Adding and Managing a Workflow
- Add the Workflow service to your tenant account. From the navigation bar, select . Alternatively, you can select , then click Add Service.
- Find the Workflow tile (widget) and click Add.
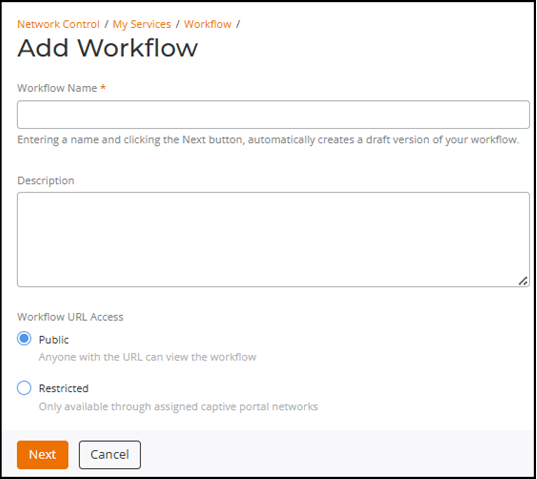
- Enter a workflow name in the Workflow Name field. The range is 2-64 characters.
- (Optional) Enter a description in the Description field to document the purpose or function of the workflow.
- (Optional) Select a Workflow URL
Access option. The options are:You can restrict workflow URL access to a specific Captive Portal Network, so that the URL only functions within that designated network. By applying this restriction, you enhance security and control, ensuring that the workflow is triggered only in the intended environment and preventing unauthorized access from other networks.
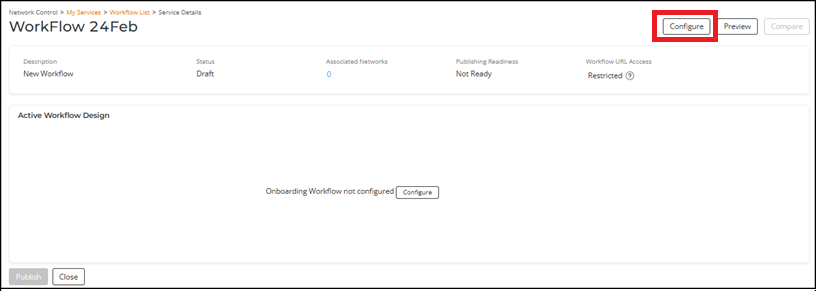
- Click Next.Active Workflow Design page is displayed with a message - Onboarding Workflow not configured.
- Click Configure to
onboard a workflow. Refer to Designing the Workflow for more details. Once the workflow is configured, you can do the following:
- Click Close to close
the workflow editor and return to the workflow list after saving required
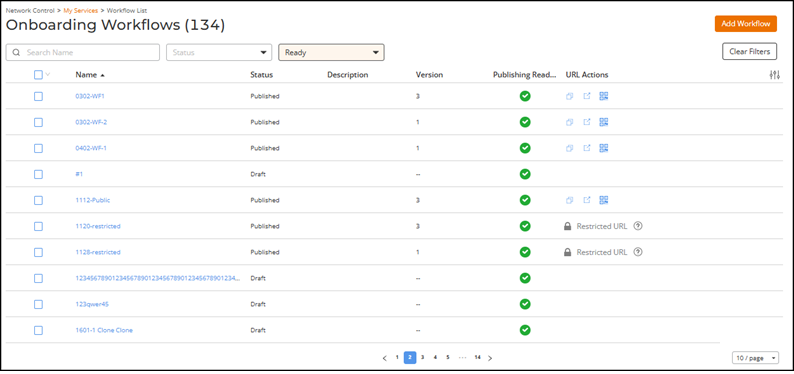
changes.The Onboarding Workflows page is displayed with the following details:
- Name: Displays the name of the workflow.
- Status: Displays the status of the workflow: Draft or Published.
- Description: Displays the workflow description.
- Version: Displays the workflow version.
- Publishing
Readiness: Displays icons indicating whether the
workflow is ready or not ready for publishing.
- The
 icon indicates that the workflow is
ready for publishing.
icon indicates that the workflow is
ready for publishing. - The
 icon indicates that the workflow is
not ready for publishing.
icon indicates that the workflow is
not ready for publishing.
- The
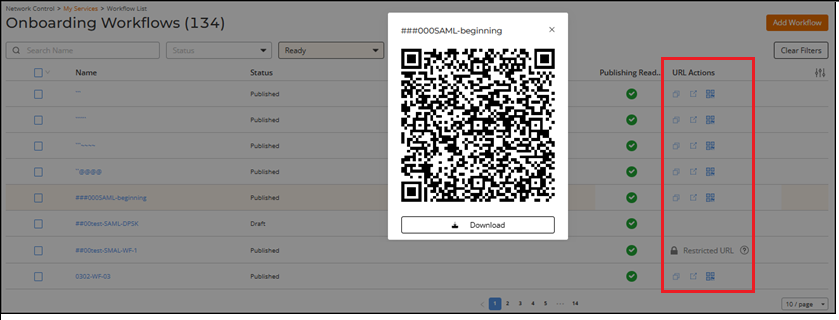
- URL
Actions: Displays three icons for workflows whose status
is Published or for workflows whose URL was
generated earlier. You can choose any one of the URL Actions depending
on your requirement:
- The
 icon copies the workflow URL.
 - The
 icon opens the workflow URL in a
new tab or window.
icon opens the workflow URL in a
new tab or window. - The
 icon opens a pop‑up that can be
scanned or downloaded.
icon opens a pop‑up that can be
scanned or downloaded. - Restricted URL: Displays Restricted URL when the Workflow URL Access is set to Restricted. The URL is only available through assigned Captive Portal Networks.
- The
You can customize which fields appear in the Onboarding Workflows table by clicking the
 icon and selecting or deselecting the desired column names. Optionally,
you can click Reset to default to restore the default subset of
columns.
icon and selecting or deselecting the desired column names. Optionally,
you can click Reset to default to restore the default subset of
columns.You can use the Search option to display only the table entries matching the specified name; enter a minimum of two characters. Additionally, you can filter the list by selecting one of the options from the drop-down menu of the Status and Publishing Readiness. The status options are Draft and Published. The publishing readiness options are Ready and Not Ready. Click Clear Filters to reset the filters. You can sort the list by clicking the associated column header.
- Select the radio button alongside the workflow name to display and access the following options:
- (Optional) Click Edit to modify the workflow.
- (Optional) Click Clone to clone a workflow.Note: You cannot clone a workflow without any steps.
- (Optional) Click Preview to preview the workflow.
- (Optional) Click Delete to delete
a workflow.Note: Workflows with associated networks cannot be deleted.