Get to Know the Physical Features of the Controller
The following sections identify the physical features of the controller that are relevant to the installation and mounting instructions that this guide provides. Before you begin the installation process, RUCKUS Networks strongly recommends that you become familiar with these physical features.
Front Panel
The following figure shows the controller’s front panel with the bezel installed. For descriptions of the numbered parts, refer to the table below.
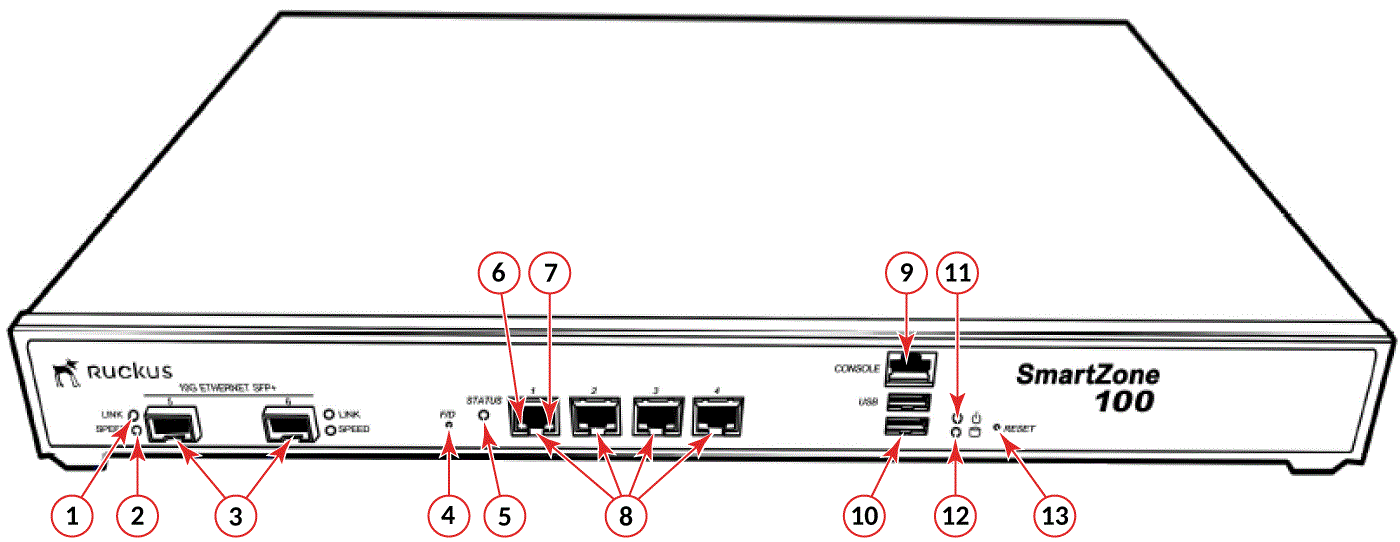
Front panel parts
|
Number |
Description |
|---|---|
|
1 |
10G Ethernet link LED (see LEDs on the Front Panel) |
|
2 |
10G Ethernet speed LED (see LEDs on the Front Panel) |
|
3 |
Two 10GBASE-X (SFP+) ports (SKU P01-S124-WW10 only) |
|
4 |
F/D (factory default) button. Press this button for at least 10 seconds to reset the controller to factory default settings. |
|
5 |
Status LED (see LEDs on the Front Panel) |
|
6 |
1000BASE-T link LED (see LEDs on the Front Panel) |
|
7 |
1000BASE-T status LED (see LEDs on the Front Panel ) |
|
8 |
Four 1000BASE-T (RJ-45) ports |
|
9 |
Console (RJ-45 serial) port |
|
10 |
Two USB ports |
|
11 |
Power LED (see LEDs on the Front Panel) |
|
12 |
HDD LED (see LEDs on the Front Panel) |
|
13 |
Reset button. Press for 5 seconds to restart the SZ 100. |