Managing DHCP Service
You can enable and manage the DHCP service in a venue.
Complete the following steps to enable and manage DHCP service.
- On the navigation bar, click
Venues. The Venues page is displayed.
- Click the Venue name.
- Click the tab.
- Click Manage Local Service.
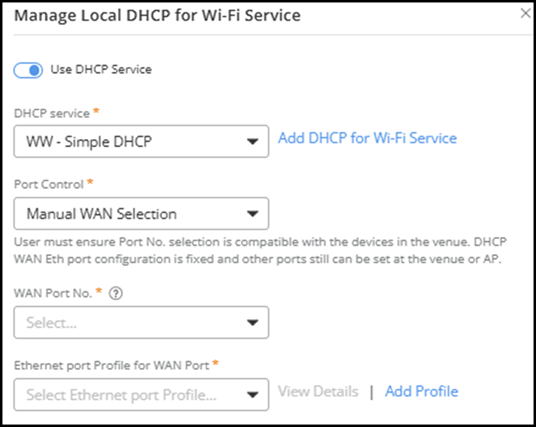
- Toggle the Use DHCP Service switch on.
- Select the DHCP service from the
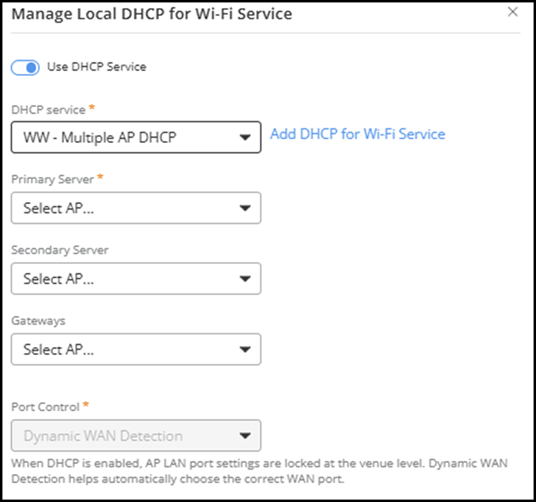
drop-down list.If a DHCP for Wi-Fi service is not yet defined, you can create a new one; click Add DHCP for Wi-Fi Service, complete the fields in the Add DHCP for Wi-Fi page, and click Add. You can then select the newly created DHCP service from the DHCP service drop-down. Refer to Adding and Managing a DHCP Service Profile for Wi-Fi for more information.Note: When you select a DHCP service that uses Multiple AP DHCP or Hierarchical AP DHCP, the dialog displays additional server configuration fields.Configure the following:
- Select the AP to use as the primary DHCP server from the Primary Server drop-down list.
- (Optional) Select the AP to use as the secondary DHCP server from the Secondary Server drop-down list.
- (Optional) Select the AP that provides gateway functionality from the Gateways drop-down list.
- (Optional) Click Add
gateway to display an additional Gateways
field.
I don't see add gateway in the UI now. Should this be removed?
- (Optional) Click the
 icon next to a gateway entry to remove
it.
icon next to a gateway entry to remove
it. - Click Apply.
- From the Port Control
drop-down menu, select Manual
WAN Connection or Dynamic WAN Connection.Note: You must verify that the selected port number is compatible with the devices in the venue. The DHCP WAN Ethernet port remains fixed, and you can configure the other ports at the venue or on the AP.
- From the WAN Port No. drop-down menu, select the LAN port that functions as the DHCP WAN uplink.
- From the Ethernet port Profile for WAN Port drop-down menu, select the Ethernet Port Profile. You can click Add Profile to add an Ethernet Port Profile. Refer to Adding an Ethernet Port Profile for more information.