Configuring RUCKUS Edge Ports

IP static routes remain in the IP route table only as long as the port or virtual interface used by the route is available and the next-hop IP address is valid.
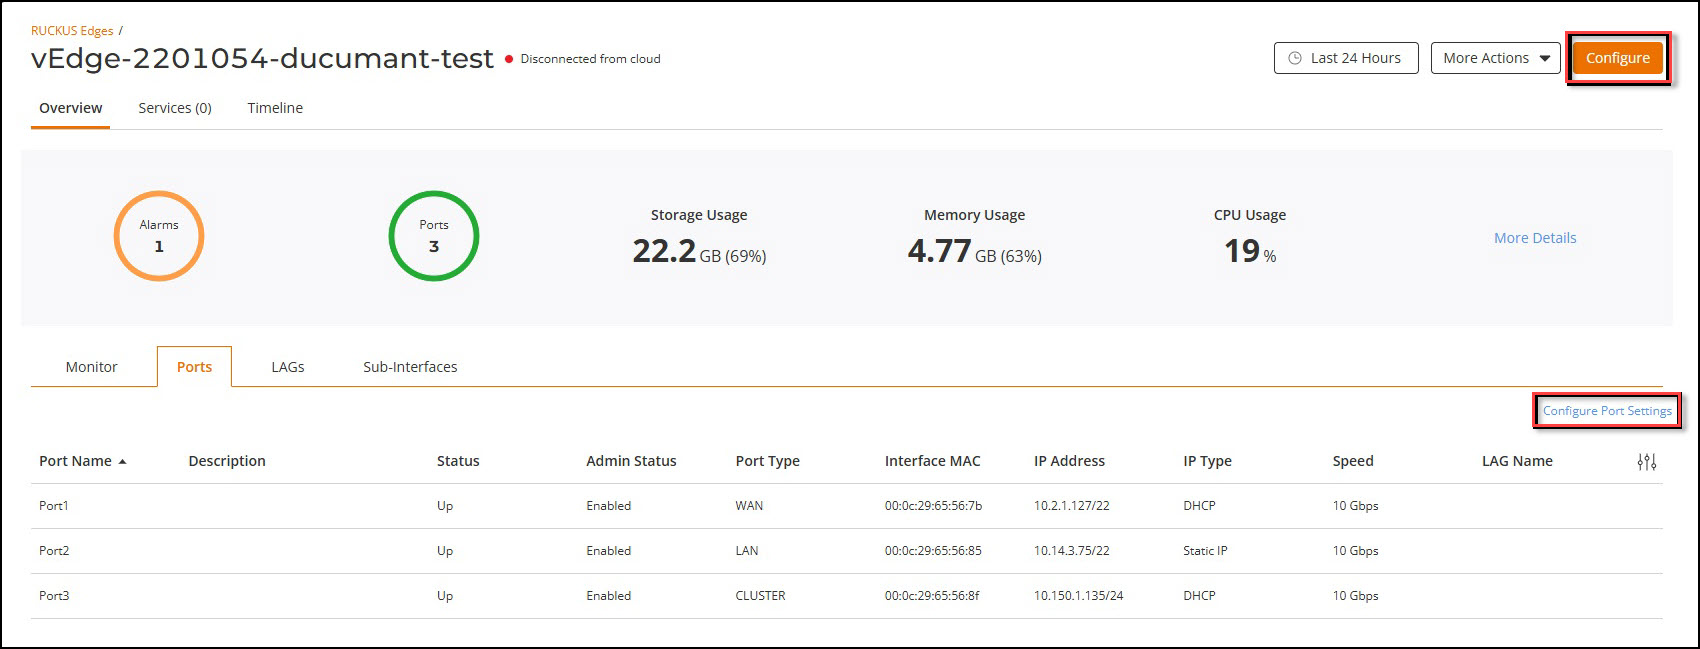
To configure ports, perform the following steps.
  1. On the RUCKUS One navigation bar, click on Gateway > RUCKUS Edge.
    This displays the list of ports on the RUCKUS Edge devices.
  2. Click on the name of the Port.
    This displays port details screen.
  3. In the Port details screen, click Configure or Configure Port Settings.
    This displays the Port Configuration details.

    Ports Configuration

  4. Click Sub-interface tab and enter the details.

    Adding Sub-interface

  5. Click Add.

Ports General

  1. Click Port General tab and enter the following details:
    • Description - Enter a short description to identify the port.
    • Port Type - Select the port type from the drop-down list. By default, WAN is selected and Port Enabled is On.
    • IP Settings - To manually configure the external DHCP, select Static/Manual and enter the IP Address, Subnet Mask and Gateway details in the respective fields. By default, the Use NAT Service is enabled.

      Port Settings

  2. After entering all the details in the respective fields, click Apply Port General settings.
  3. The application displays update successful message.
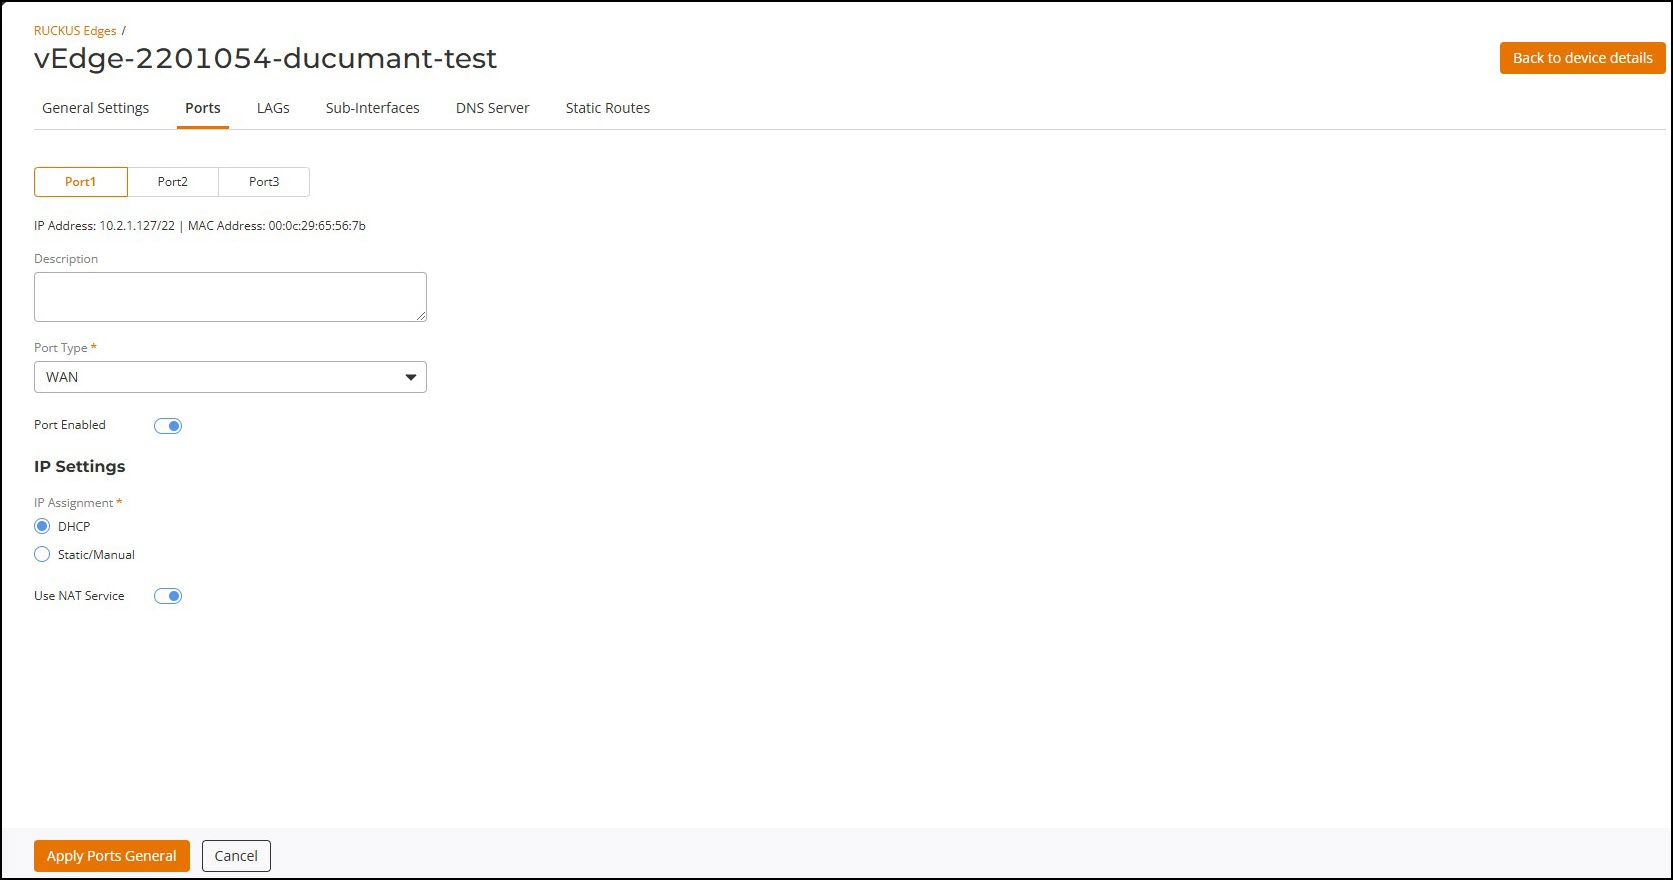
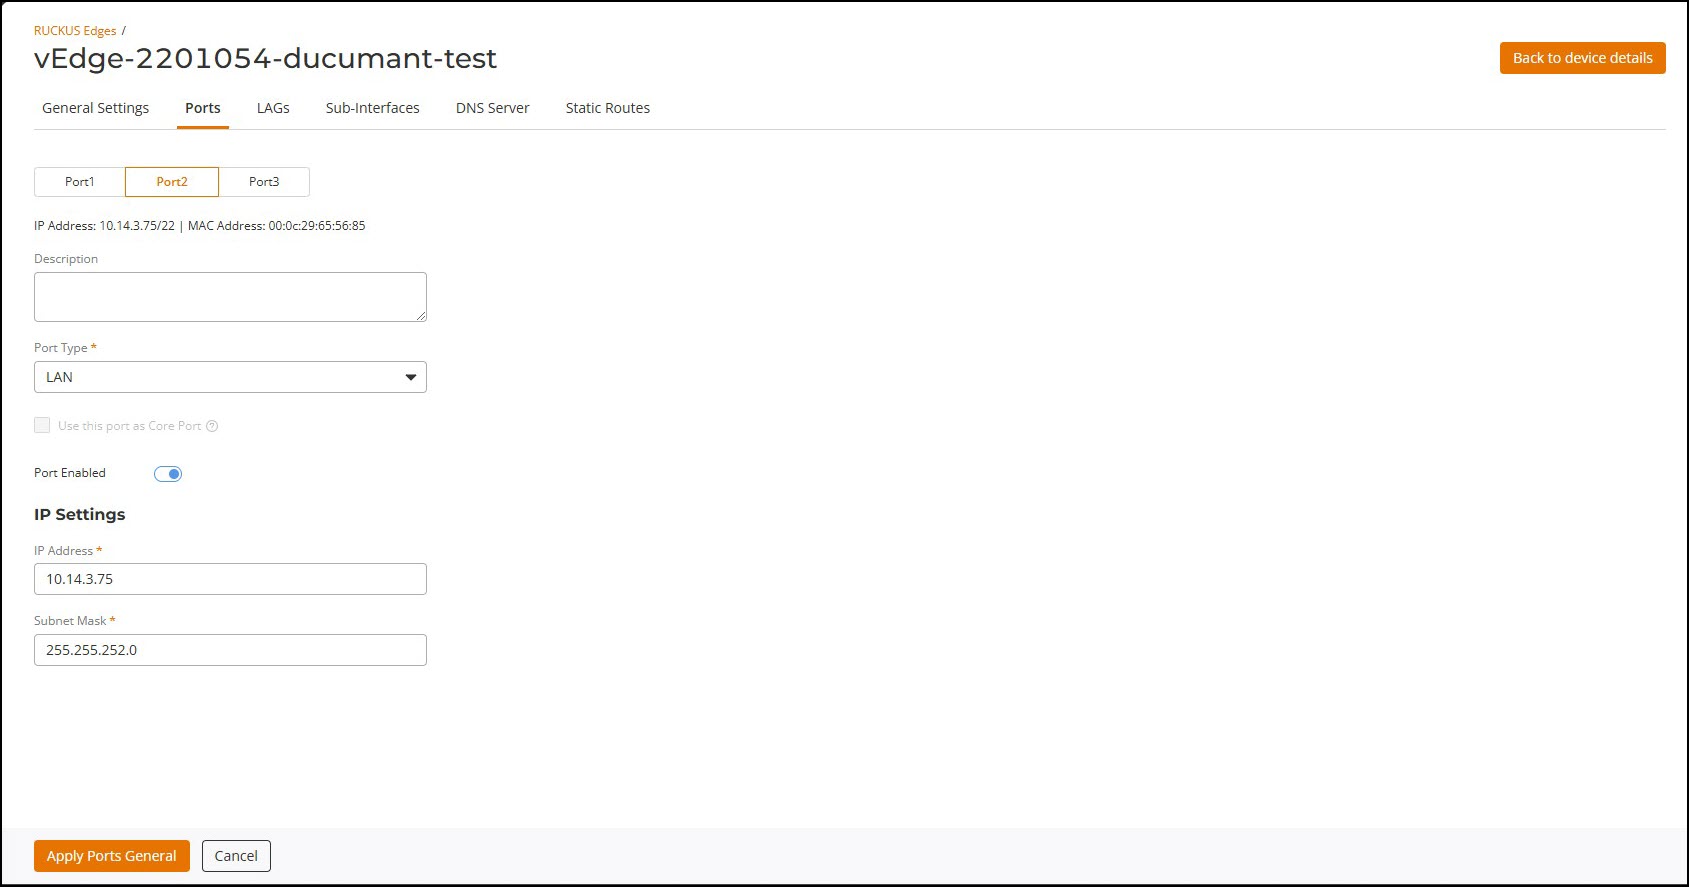
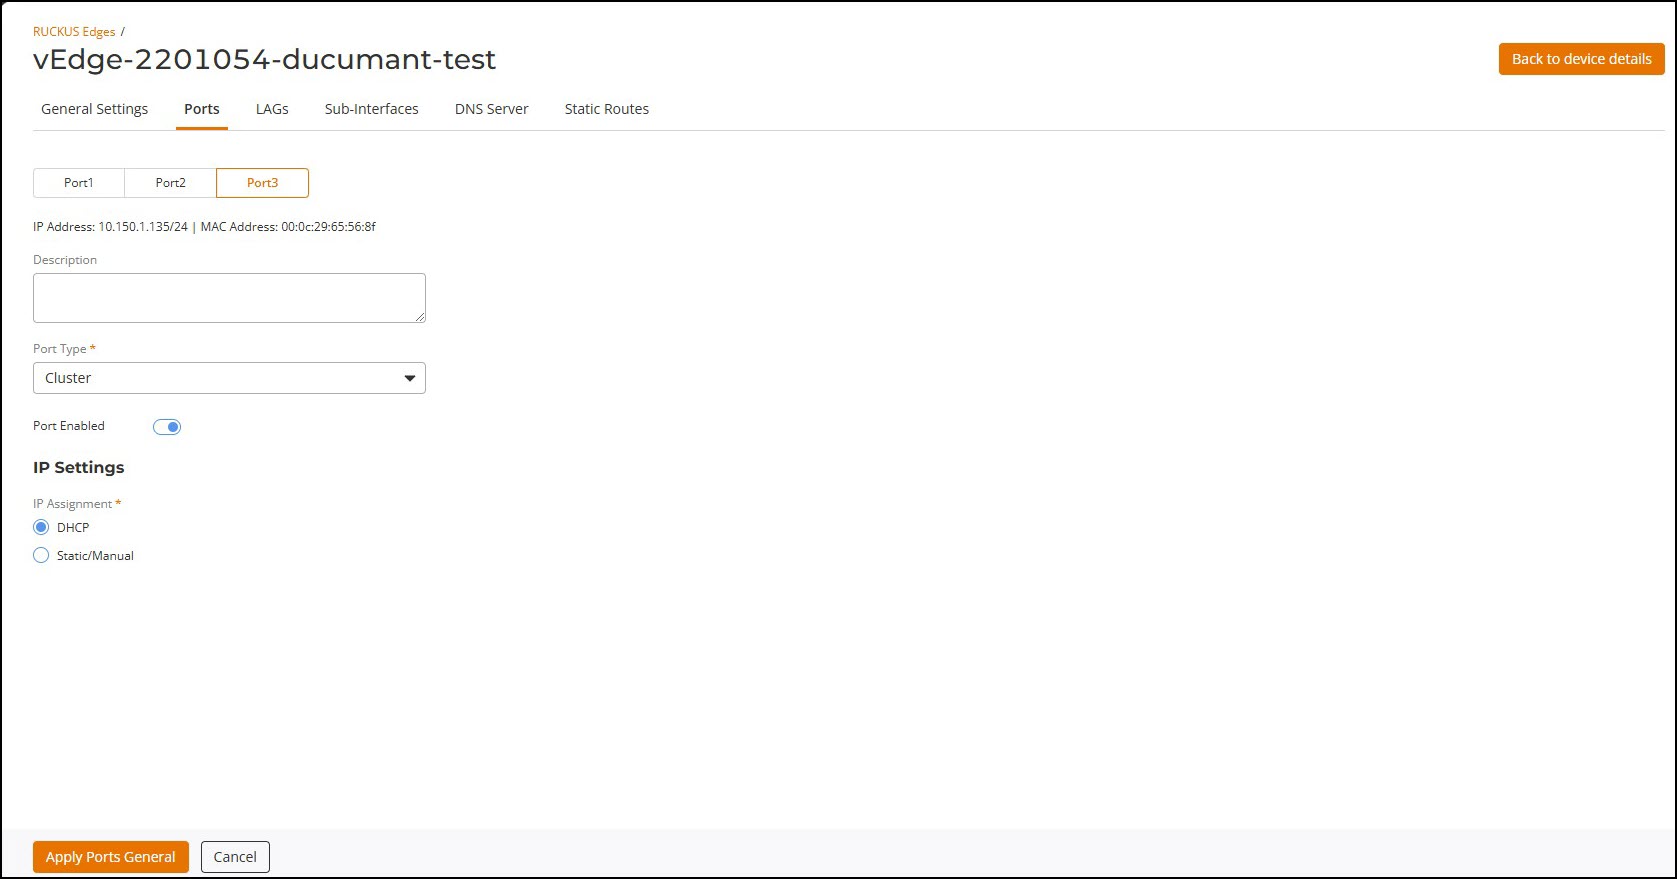
    Note: Re-iterate the same steps for Port 2 and Port 3, however, in the Port Type drop-down list, select LAN.

    Port 2 Settings

    Port 3 Settings

Sub-Interface

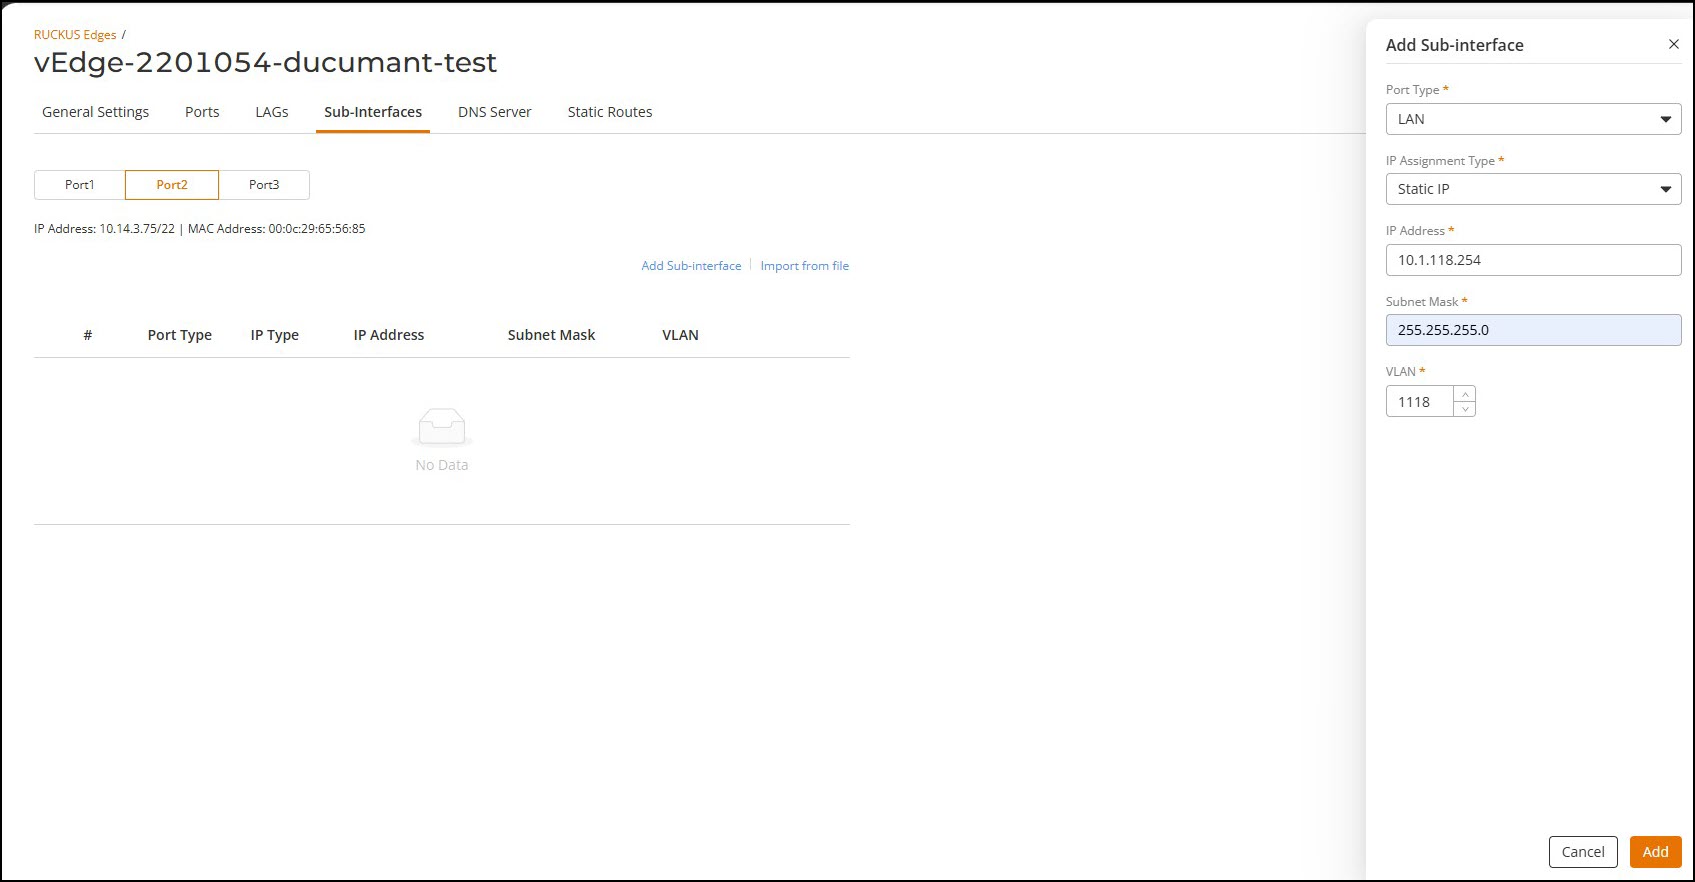
  1. Click Sub-Interface tab and click Add Sub-Interface
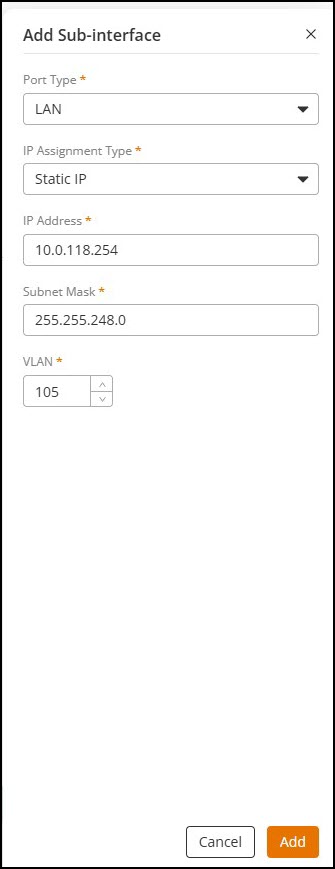
    This displays Add Sub-Interface window.
  2. In the Add Sub-Interface window, enter the following details:
    • Port Type - Select the port type from the drop-down list.
    • IP Assignment Type - By default, the IP assignment type is DHCP, however, to manually configure the ports, select Static from the drop-down list and enter the IP address.

      Sub-Interface Port Settings

  3. After entering all the details in the respective fields, click Add.
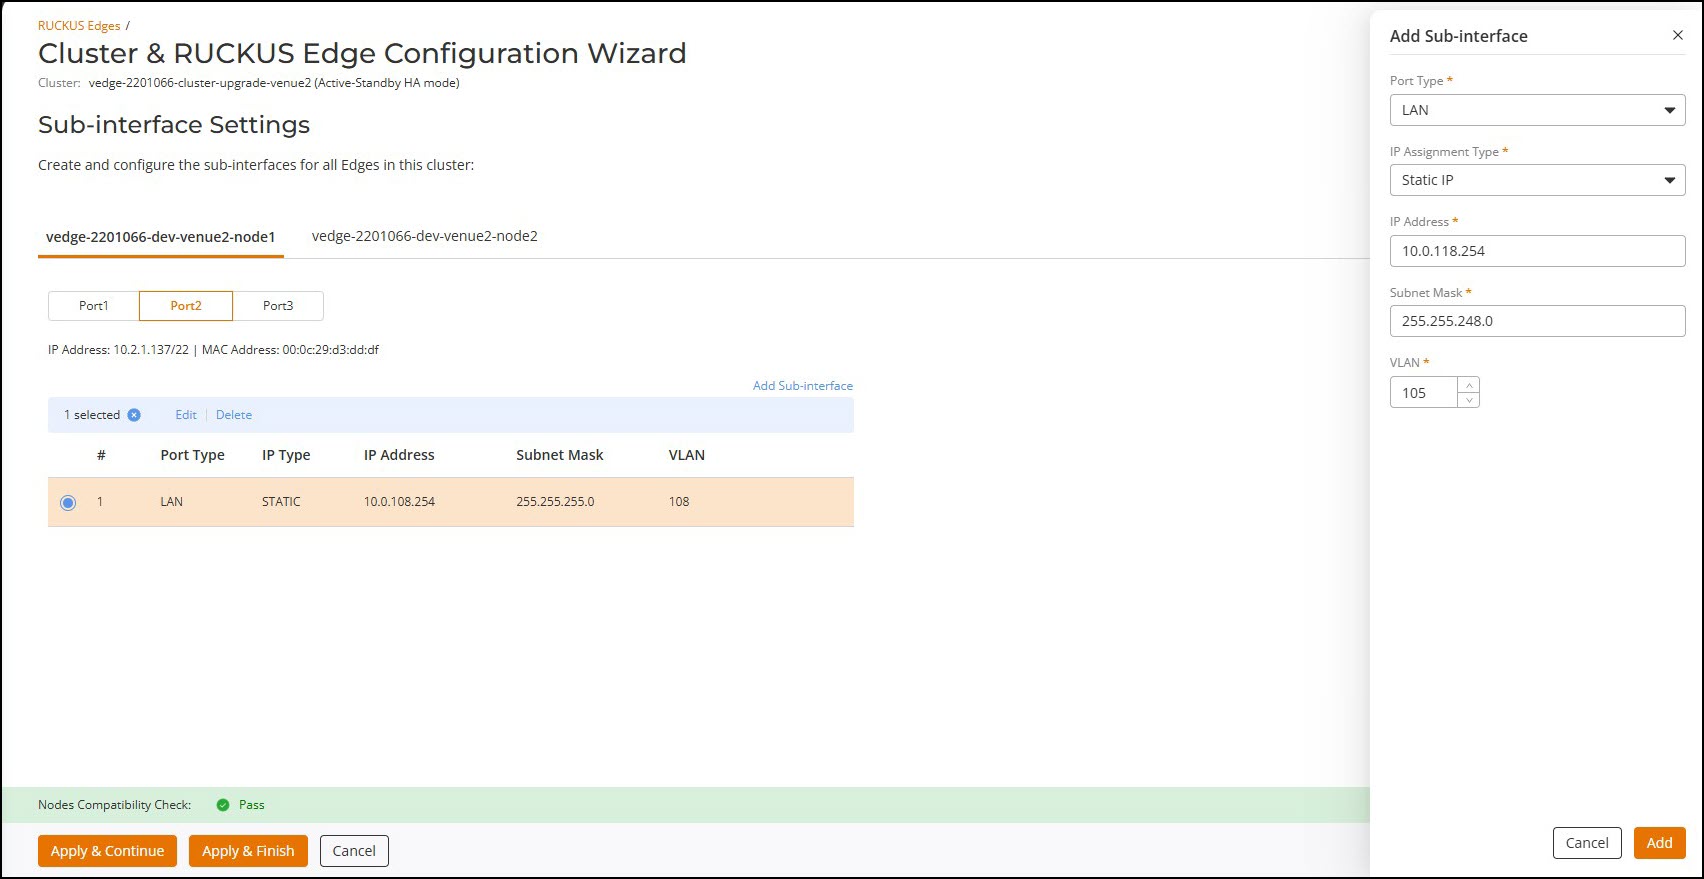
  4. The sub-interface settings are displayed on the screen.

    Sub-interface Settings

    Note: Repeat the same steps to add interfaces to Port 2 and Port 3.
  5. User can also import file from the local system by clicking Import from file. Only .csv (Comma Separated Values) file type with file size not exceeding more than 5MB is allowed to be uploaded.
    Note: User should have routes to reach the loopback of Distribution Switch from RUCKUS Edge and if the user is using external DHCP server then another route to reach the external DHCP server.