Activating and Editing the SESimagotag Plugin
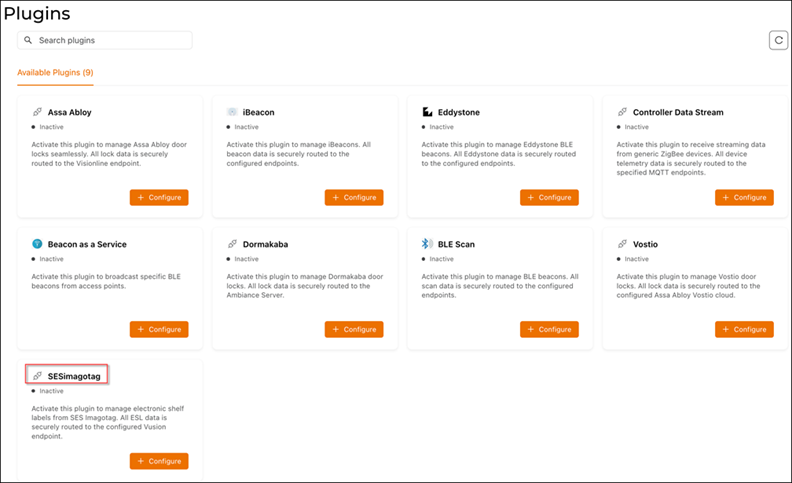
Activate the plugin to manage electronic shelf labels from SESimagotag. All ESL data is securely routed to the configured Vusion endpoint.
Prerequisites: Prior to starting this task, obtain the APC URL and APC Port number. Refer to Getting the APC URL and APC Port from the VUSION Manager Cloud Platform for more information.
To establish a connection to a partner infrastructure, the administrator must perform the following steps.
- From the RUCKUS IoT Controller main menu, click Admin.
- Click Plugins.
- Click the Available Plugins tab.
- In the SESimagotag tile,
click +
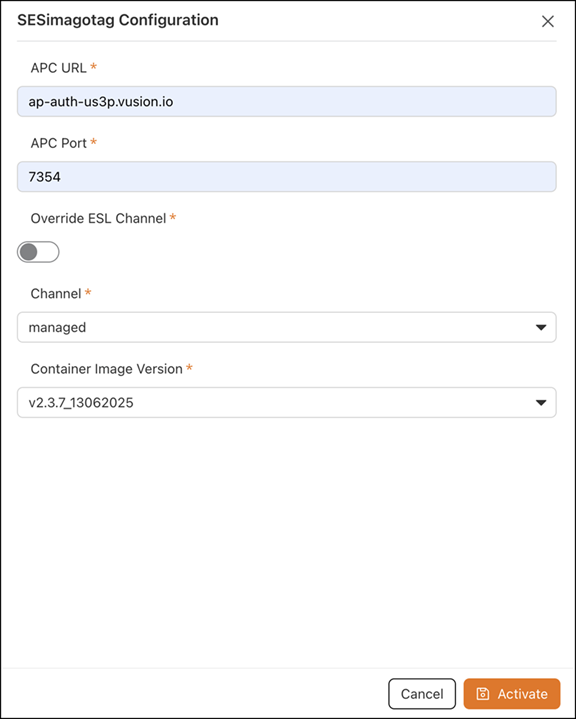
Configure to activate the plugin.The SESimagotag Configuration sidebar is displayed.
- Configure the following
parameters.
- In the APC URL
field, enter the endpoint URL.Note: Refer to Getting the APC URL and APC Port from the VUSION Manager Cloud Platform to retrieve the APC URL.
- In the APC Port
field, enter the port number.Note: Refer to Getting the APC URL and APC Port from the VUSION Manager Cloud Platform to retrieve the value for APC Port.
- For the Override ESL Channel, click the toggle to enable manual selection of the Electronic Shelf Label (ESL) communication channel.
- For the Channel field, if the Override ESL Channel option is enabled, then select a channel ranging from 0 through 10 from the drop-down list.
- In the Container Image Version field, the version number of the SESimagotag container image is auto-populated.
- In the APC URL
field, enter the endpoint URL.
- Click Activate to save the changes.
- (Optional) Click Configure to edit the existing configuration.
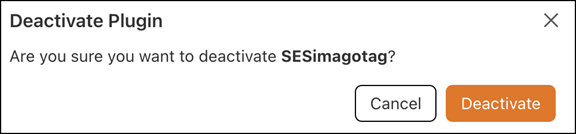
- (Optional) Click Deactivate to deactivate the plugin.