Configuring Virtual Machines
Complete the following steps to configure a virtual machine (VM).
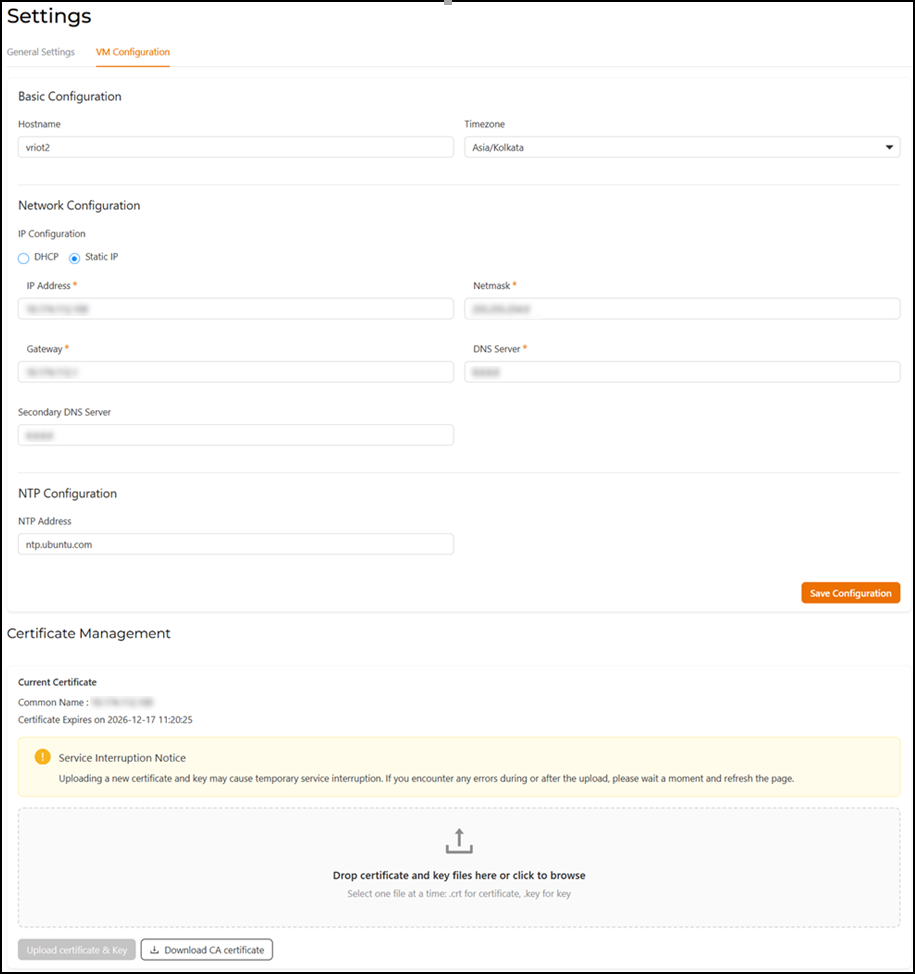
- From the main menu, select , and then click the VM Configuration tab.
- Configure the basic settings.
- Configure the network IP
settings.
- Select DHCP or Static IP as the IP assignment method. If Static IP is selected, then configure the remaining fields as described.
- In the IP Address field, enter the IP address of the virtual machine.
- In the Netmask field, enter the subnet mask.
- In the Gateway field, enter the default gateway address.
- In the DNS Server field, enter the Domain Name System (DNS) server address.
- In the Secondary DNS Server field, enter the optional backup DNS server address if the primary one is unavailable.
- Configure the Network Time Protocol (NTP) server.
- Click Save Configuration.
- (Optional) Add a certificate from a reputable Certificate Authority (CA) for enhanced security.