Adding an IoT AP
Complete the following steps to add an IoT AP to the controller.
- From the main menu, click
APs.The APs page is displayed.
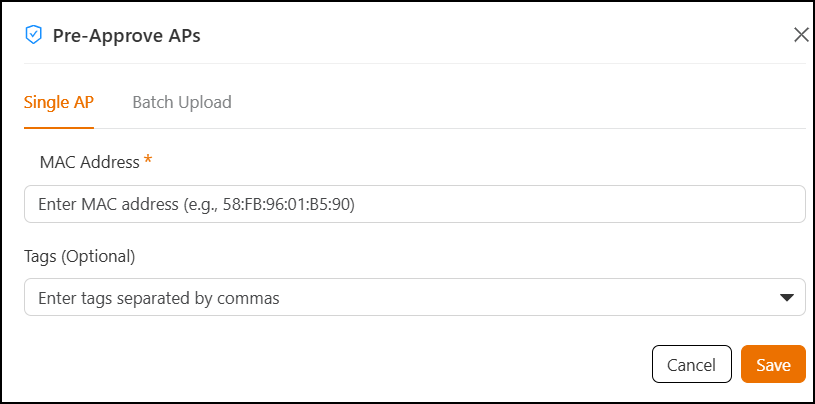
- Click Pre-Approve APs.
- To add a single IoT AP, click Single AP.
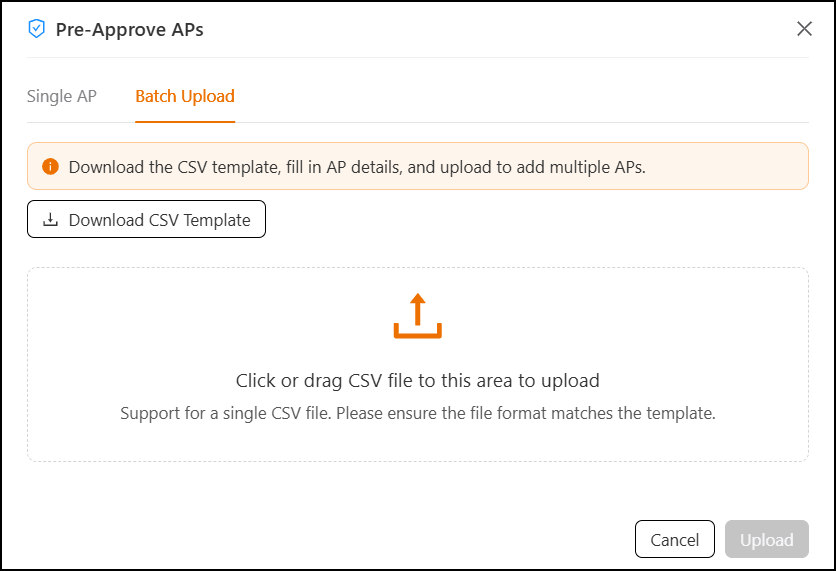
- To add multiple IoT APs, click
Batch
Upload and perform the following actions:
- Click Download Template to download the provided CSV file.
- Fill in the required details in the downloaded CSV file. Ensure all mandatory fields are completed correctly and the file is saved on your device.
- Upload the completed CSV file using one of the following methods:
- Click Process Batch Upload to process the CSV file. Otherwise, click Cancel to stop the addition and exit the page.