Configuring HA for Redundancy
The High Availability (HA) configuration
maintains system reliability and minimizes downtime by enabling automatic failover
to the
secondary node when the primary node becomes unavailable, ensuring uninterrupted
service.
You will need the static IP addresses for the controller nodes that you intend to designate as Primary and Secondary. This task is performed on the GUI for the controller to be designated as the Primary node.
Complete the following steps to configure HA.
- From the main menu, select .
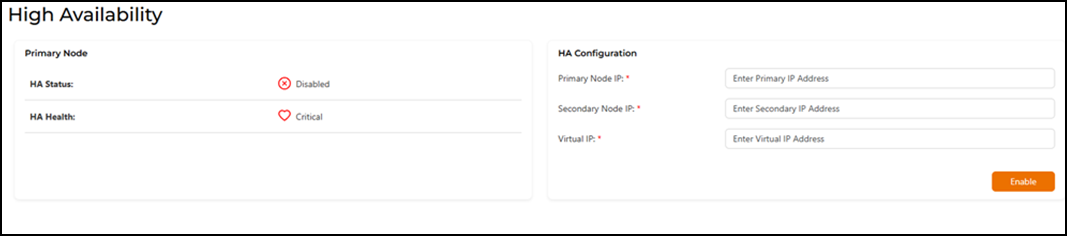
- In the HA
Configuration section, configure the following.
- Primary Node
IP: Enter the static IP address of the primary
node.Note: During normal conditions, the primary node is responsible for handling operations.
- Secondary Node
IP: Enter the static IP address of the secondary
node.Note: The secondary node takes over when the primary node fails.
- Virtual
IP: Enter the static virtual IP address.Note: A Virtual IP (VIP) is an IP address that the clients use to connect to the system, regardless of which node (primary or secondary) is active.
- Primary Node
IP: Enter the static IP address of the primary
node.
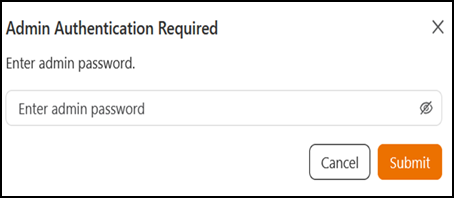
- Click Enable to activate HA.
 Enabled
 Disabled
 Healthy
 Critical