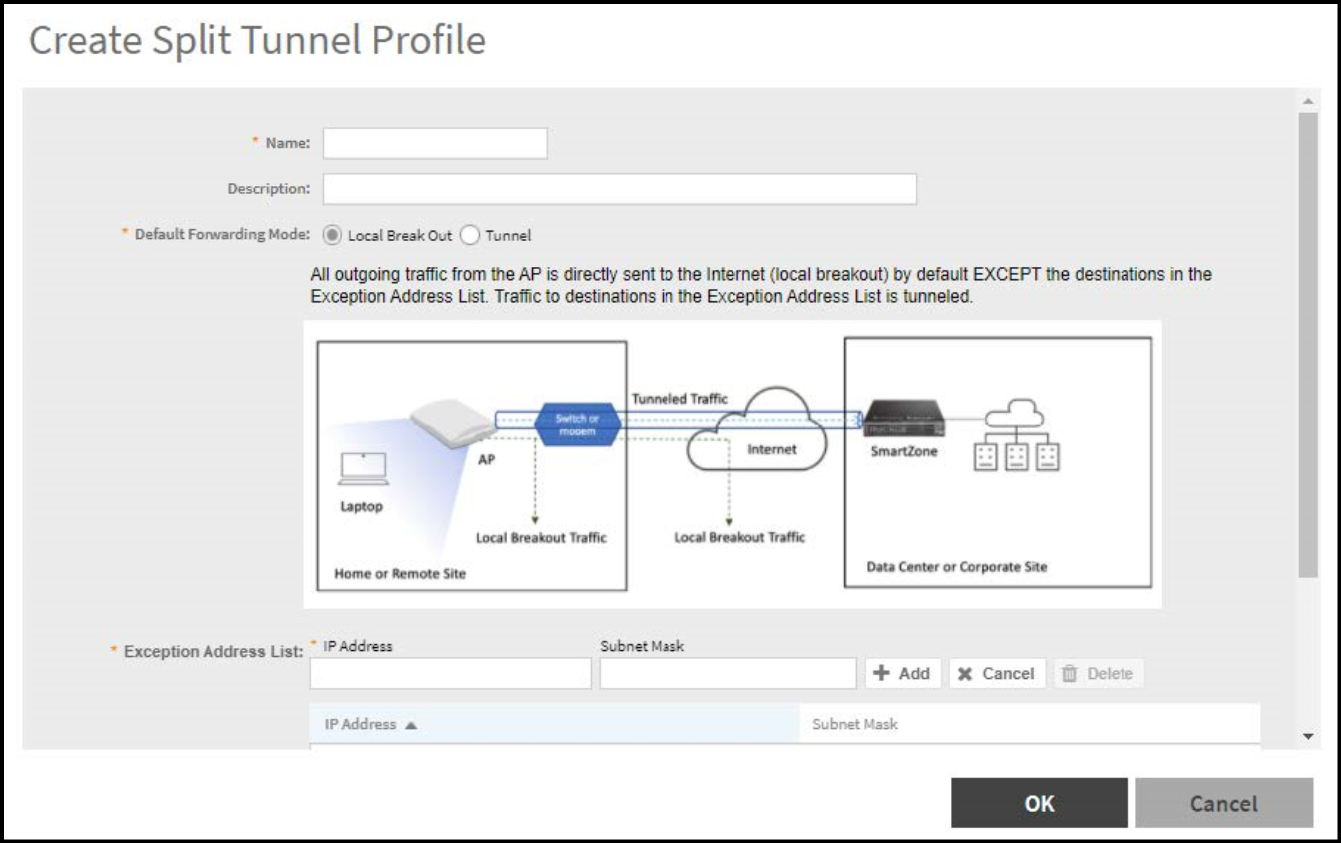
Creating a Split Tunnel Profile
A Split Tunnel profile is created to
manage corporate and local traffic by sending only corporate traffic to the controller.
- From the main menu go to .
- Select the zone for which you want to create the profile and click Create.
- Enter the split tunnel profile information:
Note: RuckusGRE or SoftGRE must be enabled on the WLAN before mapping it to a Split Tunnel Profile.
- In the Name field, type a name for the split tunnel profile.
- In the Description field, type a short description for the split tunnel profile.
- In Default Forwarding
Mode field, select one of the following option:
- Local Break Out: All outgoing traffic from the AP is by default sent to the Internet (local breakout) except for the destinations in the Exception Address List. Traffic to destinations in the Exception Address List is tunneled.
- Tunnel: All outgoing traffic from the AP is tunneled except for the destinations in the Exception Address List. Traffic to destinations in the Exception Address List is directly sent to the Internet (local breakout).
- In the IP Address field, enter the destination IP address.
- In the Subnet Mask field, enter the destination IP subnet mask.
- Click Add to add the destination IP details.
- Click OK.