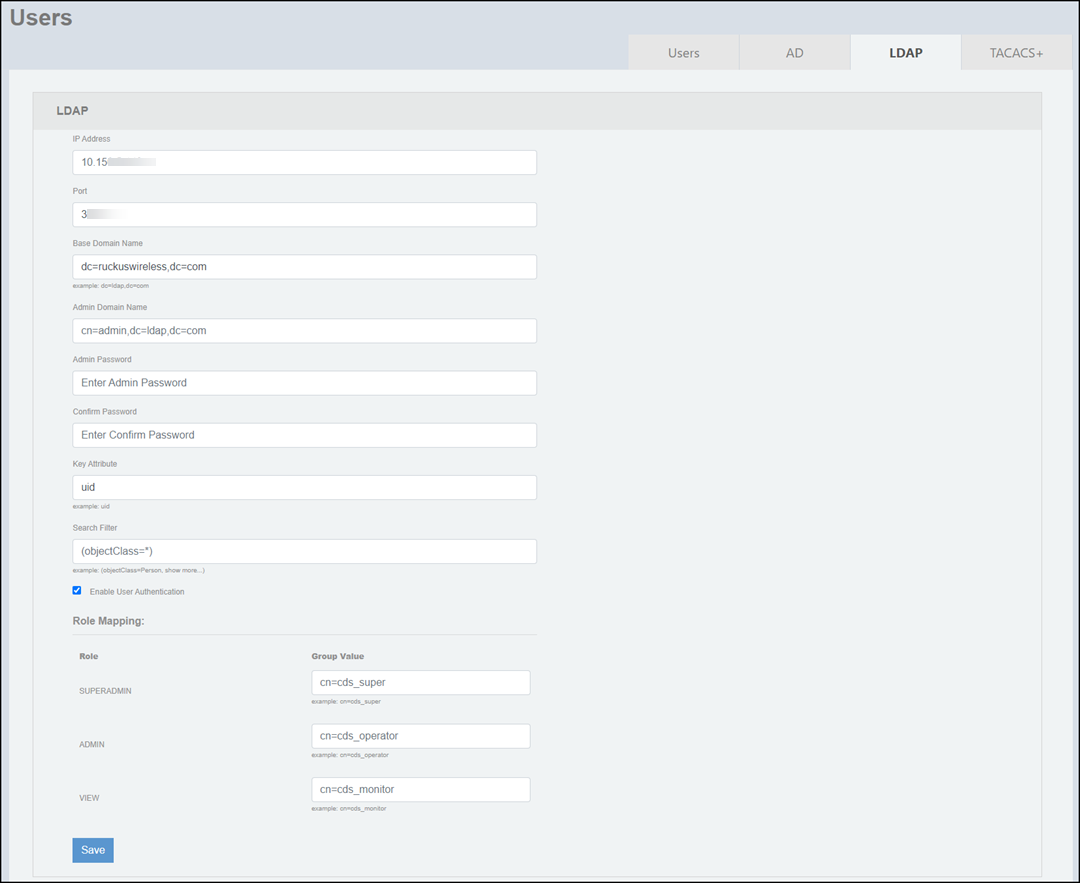
Configuring LDAP Settings
To enable user authentication through
LDAP, create LDAP settings by completing the following steps.
- On the menu, go to
Admin >
Users.
The Users window is displayed.
- In the Users window, select the LDAP tab.
- Click Create LDAP Settings.
- Complete the following fields to configure LDAP server credentials.
- IP Address: Enter the IPv4 address of the LDAP server.
- Port: Enter the port number of the LDAP server. Default is 389.
- Base Domain Name: Enter the base DN in LDAP format, which serves as the root directory for all user accounts.
- Admin Domain Name: Enter the DN in LDAP format for the administrative account used to manage LDAP entries.
- Admin Password: Enter the password for the LDAP administrator server.
- Confirm Password: Re-enter the administrator password to confirm.
- Key Attribute: Enter a key attribute to denote users, such as uid (user ID).
- Search
Filter: Define a search filter to refine which users can
be authenticated, for example:
(&(objectClass=person)(uid=*))). - Enable User Authentication: If selected, the user will be authenticated and can login through LDAP.
- Role Mapping: Map LDAP groups to user roles in RUCKUS Network Director. This configuration links LDAP group IDs to specific roles, ensuring that users inherit the correct permissions upon authentication. Example of role mappings include:
- Click Save to save the LDAP server settings in RUCKUS Network Director.