Adding a User Account
Complete the following steps to add a user account.
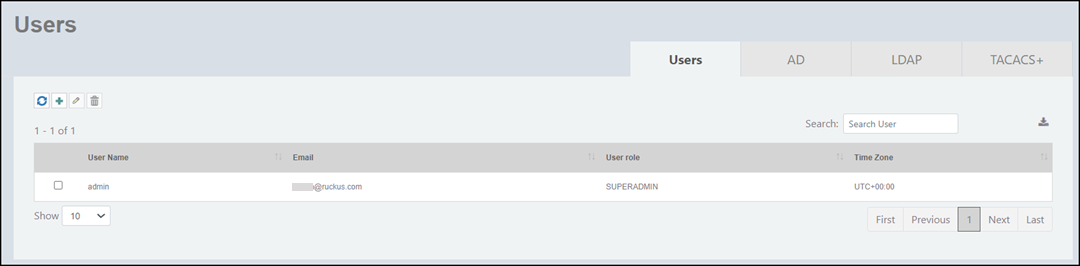
- On the menu, go to Admin > Users.
- In the Users tab, click the
 icon to add a user account.
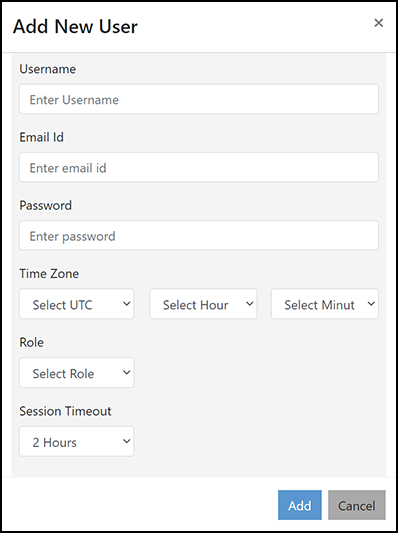
- Complete the following fields to add a user.
- Username:
Enter a username.
For TACACS+ user authentication, the username attribute entered in RND must match the
user-nameattribute defined in the TACACS+ server configuration. For more information, refer to Configuring TACACS+ Settings. - Email ID: Enter the email ID of the user.
- Password: Enter the password.
- Time Zone: Select a time zone from the list.
- Role:
Select one of the following roles from the list.
- Super Admin: A user who is assigned the role of super admin has complete privileges and can perform any actions on all the modules.
- Admin: A user who is assigned the role of admin has restricted privileges and is not allowed to perform RUCKUS Network Director system-level tasks such as DB backup, upgrade, user creations and so on. The user works at the level of an operator with the privileges to configure clusters and APs.
- View: The user assigned with the View role is limited to monitoring the system and is permitted only to view information but cannot create, modify, or delete it.
- Session Timeout: Select the duration after which idle users will be disconnected.
Once logged in to the RUCKUS Network Director application, the user can change the password and time zone in the System Settings window. For more details, refer Managing System Settings. - Username:
Enter a username.
- Click Add. An information dialog box is displayed indicating successful creation of a user account.