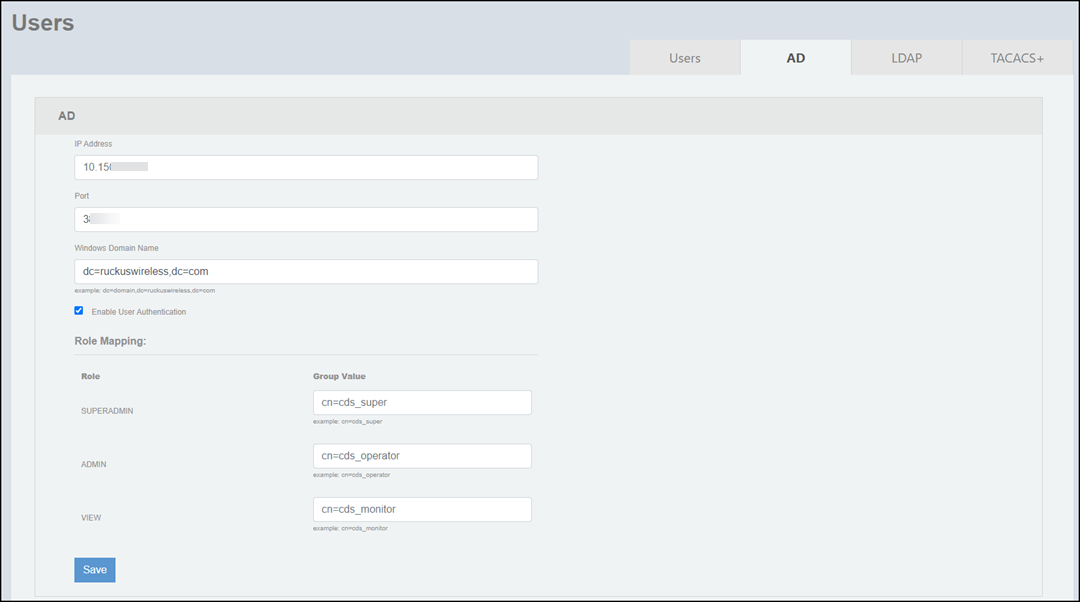
Configuring AD Settings
To enable user authentication through AD, configure AD settings by completing the
following steps.
- On the menu, go to
Admin >
Users.
The Users window is displayed.
- In the Users window, select the AD tab.
- Click Create AD Settings.
- Complete the following fields to configure AD server credentials.
- IP Address: Enter the IPv4 address of the AD server.
- Port: Enter the port number of the AD server. The default port number (389) should not be changed unless you have configured the AD server to use a different port.
- Windows Domain Name: Enter the Windows domain name assigned to the AD server.
- Enable User Authentication: If selected, the user will be authenticated and can login through AD.
- Role Mapping: Based on the AD group ID for the users, the user roles can be mapped in the RUCKUS Network Director to integrate with AD. This establishes the mapping between the user attributes and the user roles, to authenticate the user and apply the role policy. For example, the following role attributes can be mapped.
- Click Save to save the AD server settings in RUCKUS Network Director.