Enabling L3 Roaming
L3 Roaming enables seamless client
mobility across Layer 3 boundaries by preserving client IP addresses and session
continuity
as clients move between APs connected to different DPs or subnets. The feature dynamically
establishes tunnels and manages session tables to maintain uninterrupted connectivity
in
large, multi-subnet WLAN environments.
Note: L3 Roaming is supported only when 40 or fewer Data Planes are
registered in a cluster. The feature requires a valid L3 Roaming license. For
licensing details, refer to Tunnel and Data Plane Licenses.
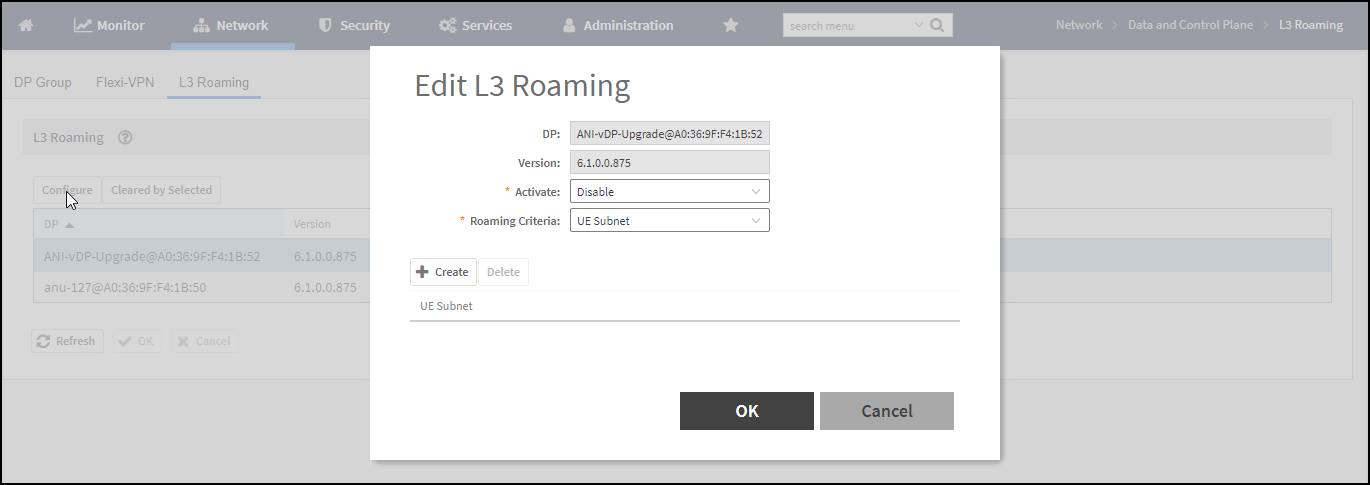
- In the controller web UI, select .The L3 Roaming page is displayed listing all the available DPs to the controller.
- Select the DP on which you want to enable L3 Roaming and click Configure.
- In Activate, select Enable from the drop-down menu to enable L3 Roaming on this DP.
- In Roaming Criteria,
select one of the following options to define the data format to establish
connection between DPs:
- UE Subnet. Select this option to define roaming boundaries based on the client’s IP subnet. With this option, the system uses the client’s IP address to determine which Data Plane (DP) is the “home” for that client. If a client roams to another AP but keeps the same IP subnet, the system recognizes that the client should remain anchored to the original DP.
- WLAN VLAN. Select this option to define roaming boundaries based on the WLAN’s VLAN ID. With this option, the system uses the VLAN ID assigned to the client’s WLAN to determine DP assignment and roaming behavior.
- Click Create to add roaming criteria based on your selection in the Roaming Criteria field:
- Click OK to save the criterion.
- Repeat steps 5 and 6 to add additional UE subnets or WLAN VLANs as needed.
- Click OK to save the L3 Roaming configuration to the selected DP.
- Click OK to apply the changes to all the DPs in the list.