Creating a New WLAN
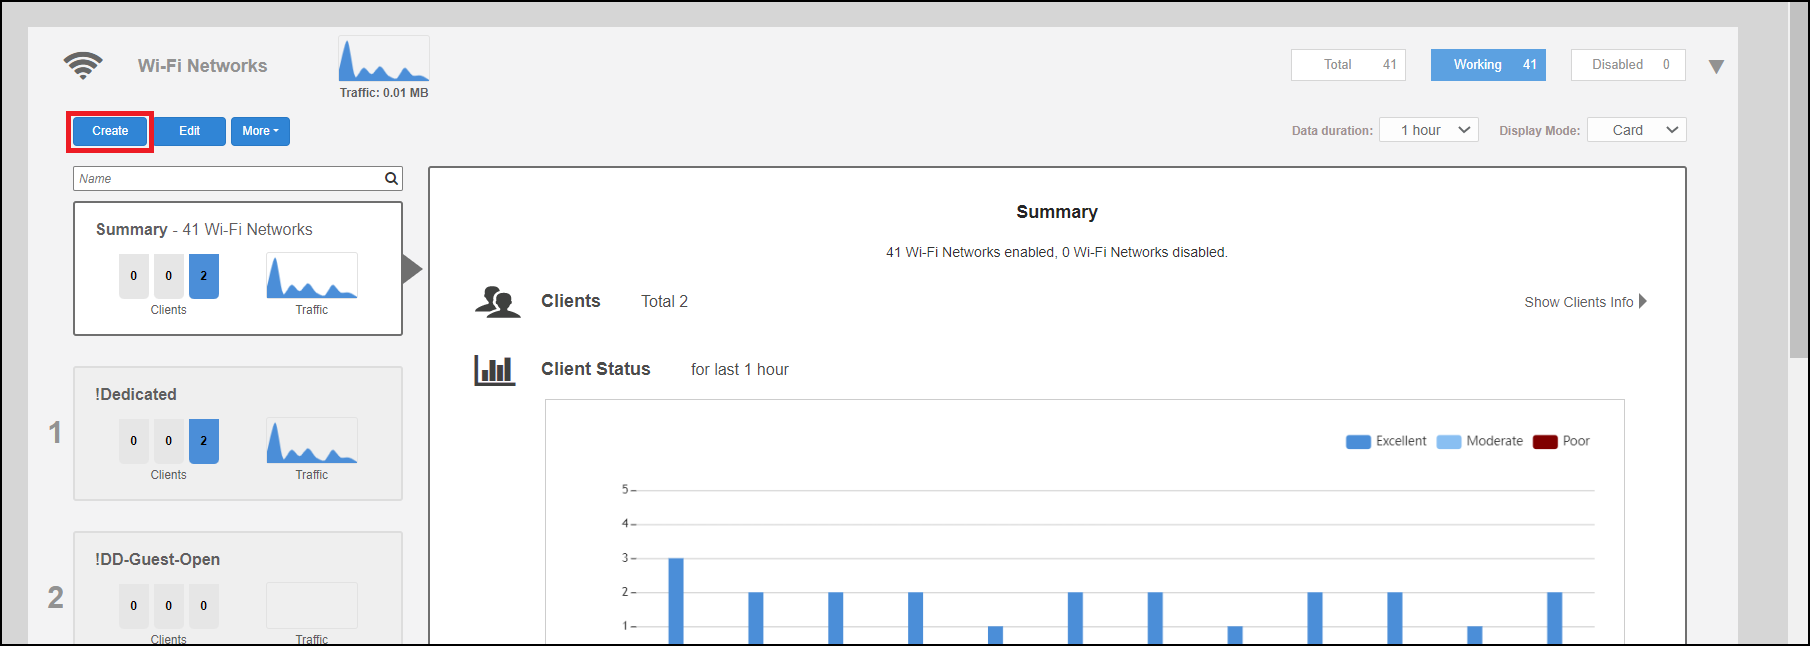
In addition to the initial WLAN you created during the setup process, you can create new WLANs using the WiFi Networks component.
- In the WiFi Networks component, click Create.
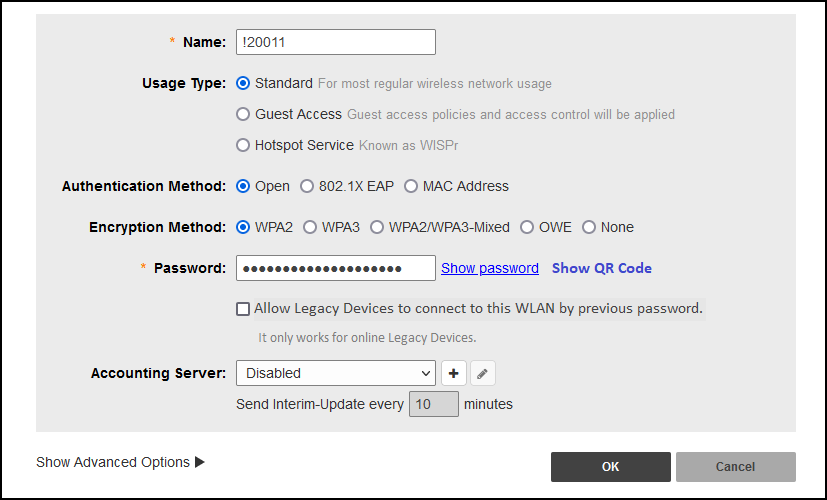
- Enter a Name for this wireless network.
- Select the WLAN Usage Type from
the following options:
- Standard: Creates a WLAN for most regular wireless network usage.
- Guest Access: Guest access policies and access controls will be applied. For more information, refer to Guest WLANs. For information on social media WLANs, refer to Social Media WLANs.
- Hotspot Service: Deploys a Hotspot (also known as WISPr) WLAN. To deploy a Hotspot WLAN, you must first configure a Hotspot Service. For more information, refer to Hotspot Services.
- For Authentication
Method, select one of the following options:
- Open: No authentication method is used.
- 802.1X EAP: Authenticates against either the internal database or an external RADIUS server.
- MAC Address:
Authenticates using the client MAC address against an external RADIUS server
or internal database.
Note: Beginning with Unleased 200.7, MAC address authentication using the local database is available.
- Under Encryption
Method, select one of the following options:
- WPA2: Encrypts traffic using the WPA2 standard. The WPA2 encryption method complies with the 802.11i security standard. Announced in 2004, WPA2 encryption remains mandatory for all new products that bear the Wi-Fi trademark.
- WPA3: You can enable 802.11r FT roaming for open authentication and WPA3 encryption. Announced in January 2018, the WPA3 standard replaces WPA2 with several security enhancements.
- WPA2/WPA3-Mixed: Allows mixed networks of WPA2- and WPA3-compliant devices. SAE FT and AKM PSK SHA256 is supported for Open authentication + WPA2/WPA3-Mixed encryption. Enable 802.11r FT Roaming is configurable for open authentication and WPA2/WPA3-Mixed encryption and 802.1X EAP authentication + WPA2/WPA3-Mixed encryption under . Refer to Radio Control Settings for more information.
- OWE: Opportunistic Wireless Encryption (OWE) provides encrypted communications for open networks.
- None: No encryption; communications are sent in clear text.
- For Password, enter a
password (WPA2), an SAE Password (WPA3), or both for a WPA2/WPA3-Mixed WLAN.
If
the Encryption method is OWE or None, no password
is required.
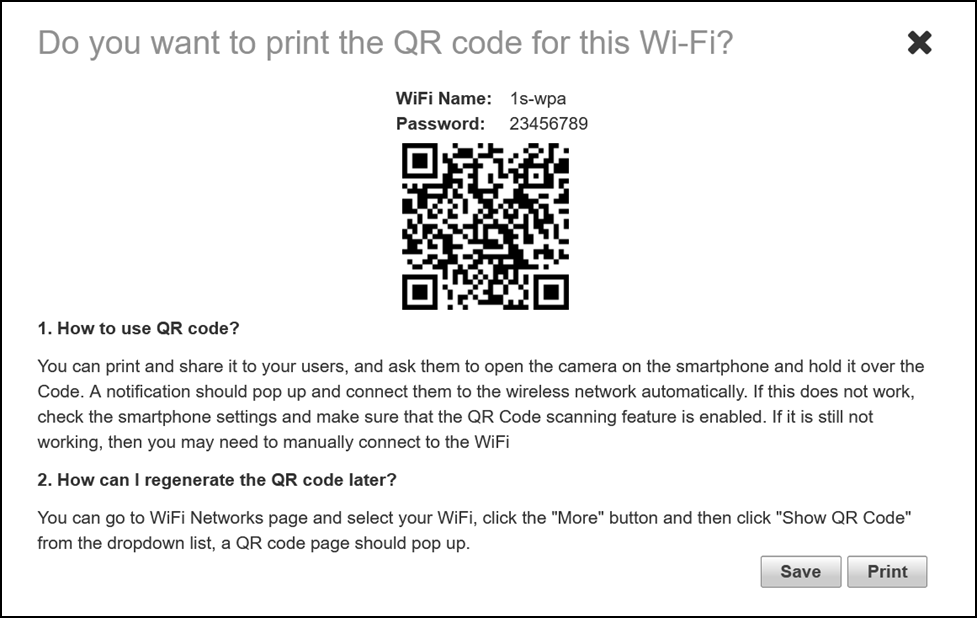
Click Show QR Code to display the QR code page. The user can save or print the QR code.
(Optional) Select the Allow Legacy devices to connect to this WLAN by previous password check box.
This option is available only for wireless clients that are marked as legacy devices in the page. For more information, refer to "Marking a Client as a Legacy Device". If the Allow Legacy devices to connect to this WLAN by previous password check box is selected, under , Dynamic PSK is selected as Internal. You can change the password and Unleashed generates DPSK keys for all connected legacy devices with the previous password of the WLAN. For more information about internal DPSK, refer to Enabling DPSK for a WLAN. You can view all the generated DPSK keys in the page.
- Choose whether a Web Authentication (Captive Portal) will be used for web-based authentication.
- Click OK to save your changes and deploy the new WLAN.