Enabling Guest Pass Self-Service
Use the following procedure to allow visitors to self-activate their devices to your
Guest WLAN(s).
To enable Guest Pass Self-Service for a Guest WLAN:
- Go to Wi-Fi Networks, and click Create to create a new guest WLAN, or Edit to edit an existing WLAN.
- Enter a Name for the WLAN, and in Usage Type, select Guest Access.
- Click Next. The second WLAN creation screen appears.
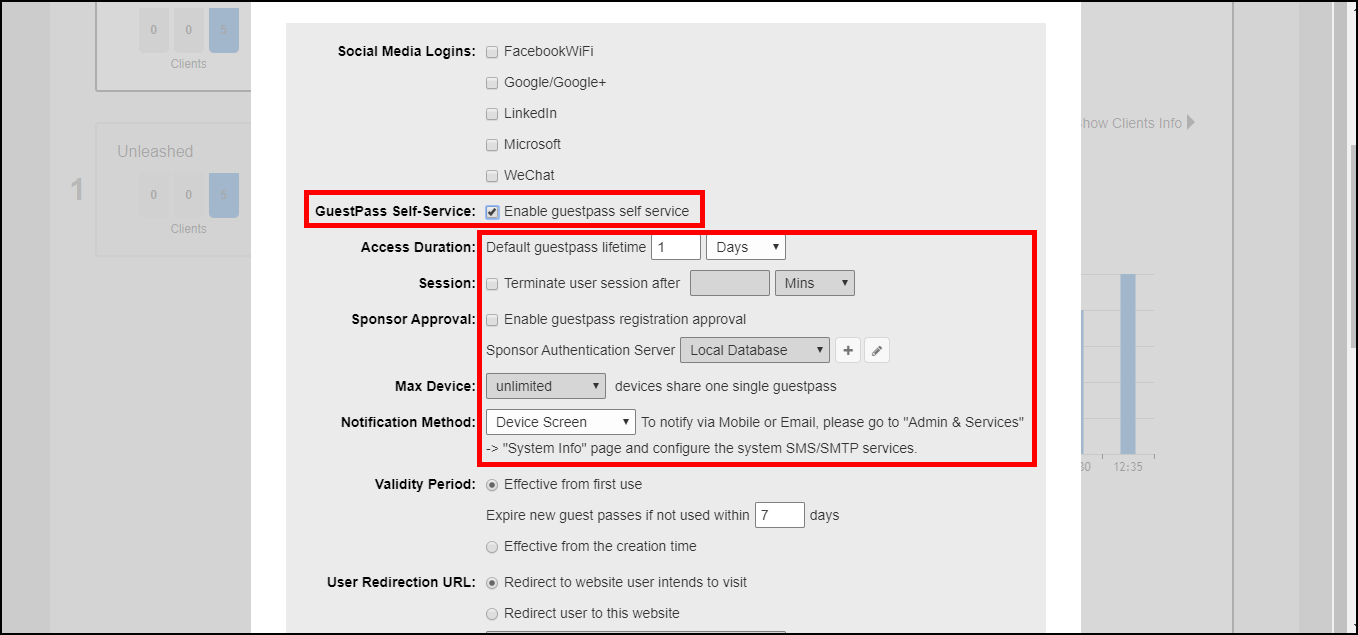
- Locate the Guest Pass Self-Service option and select the Enable guest pass self service button. Additional options appear.
- Configure the following options as required:
- Access Duration: Select the default access time provided with one guest pass in days, hours or weeks. (Default is one day.)
- Session: Optionally, enable the session limitation to require guest pass users to re-login after the specified time period.
- Max Device: Allow multiple devices to share a single guest pass. (Default is unlimited.)
- Sponsor Approval: Select this option to require email approval for issuing self-service guest passes. (See Requiring Sponsor Approval for Self-Service Guest Pass Authentication.)
- Notification Method: Select whether the guest pass will be delivered via email, SMS, or displayed directly on the device screen. When Sponsor Approval is selected, the Device Screen option is not allowed.
- Click OK to save your changes.