Adding an AP from the Inventory Window
Complete the following steps to add an
AP.
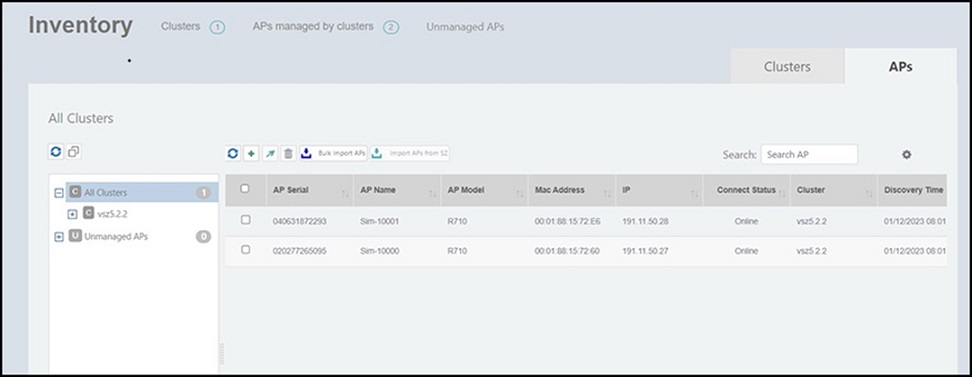
- On the menu, go to Inventory and select the APs tab.
- In the APs tab, click
the
 icon.
icon.
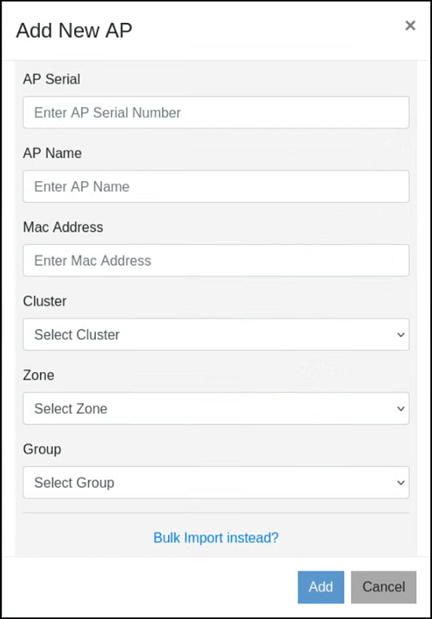
- Complete the following fields to
add an AP:
- AP Serial: Enter the serial number of the AP.
- AP Name: Enter a name for the AP.
- Mac Address: Enter the MAC address of the AP.
- Cluster: From the list, select a cluster to which you want to add the AP.
- Zone: From the list, select an AP zone.
- Group:
From the list, select a group.
Note: Adding an AP to the Group level is supported in SmartZone 3.6.2 and later versions.
- Click Add to add the AP
to the specified cluster. An information dialog box is displayed indicating that the AP is successfully added to the cluster.
- Click Ok. Alternatively, you can add APs to RUCKUS Network Director by importing APs in bulk. Click Bulk Import instead? and upload the CSV file to import APs in bulk. For complete instructions on how to import APs by uploading a CSV file, refer to Importing APs in Bulk from the Inventory Window.