Creating a Property for a Network Segmentation Group
Once you have created an eDPSK pool, you
can create a property that uses that pool, and you can assign the property to a Network
Segmentation group.
Follow the steps below to configure a property and assign it to a Network Segmentation group:
Note: For more information about
configuring properties, refer to the Cloudpath Enrollment System
Property Management Administration Guide.
- In the Cloudpath UI, go to Managed Access > Properties.
- Click Add Property.
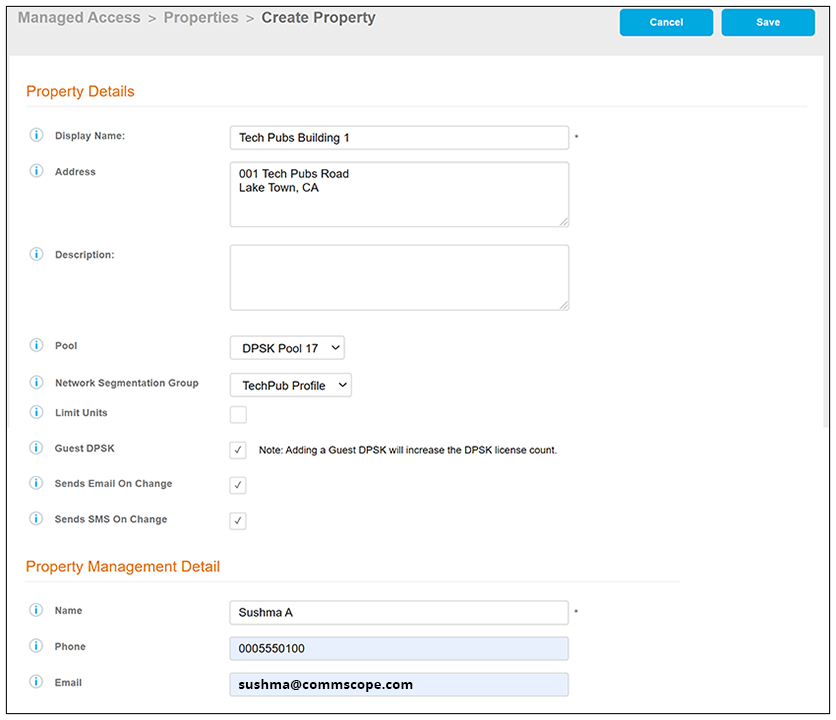
- Configure the property, as shown and
described in the following example.
- Display Name: A meaningful name for the property (visible to you, as an administrator, and visible on the tenant portal).
- Address: Address of the property.
- Description (optional): Description of the property (visible only to you, as an administrator).
- Pool: The eDPSK pool assigned to this property (selected from the drop-down list).
- Network Segmentation Group: The name of the Network Segmentation group to assign to this property (selected from the drop-down list). All access points and VNI assignments on units (how to add units is described later) are derived from this Network Segmentation group. Once a unit has been assigned to the property, the group cannot be changed.
- Limit Units: You can check this box if you want to limit the number of units that can be assigned to this property. If you check the box, a "Max Units" pop-up field appears where you can enter the desired number.
- Guest DPSK: Checking this box assigns a guest DPSK to every unit that you add to the property. This field cannot be set on individual units, nor can this selection be changed once units have been assigned to the property.
- Sends Email On Change:
Checking this box means that the contact person for a unit gets notified by
email whenever the DPSK of the unit or the unit's guest DPSK (if guest DPSKs
are being used) changes, or if the access token to the tenant portal is
changed.
Note: If this box is checked, the contact person of the unit also gets notified by email as soon as you have added that unit to the property and saved the configuration.
- Sends SMS On Change: Checking
this box means that the contact person for a unit gets notified by text
whenever the DPSK of the unit or the unit's guest DPSK (if guest DPSKs are
being used) changes, or if the access token to the tenant portal is changed.
Note: If this box is checked, the contact person of the unit also gets notified by text as soon as you have added that unit to the property and saved the configuration.
- Management Info section: As the property manager, this should be your contact information that you want displayed in all communications with your tenants.
- Click Save. You are returned to the main Properties screen where your newly configured property is now displayed, as shown in the example below:
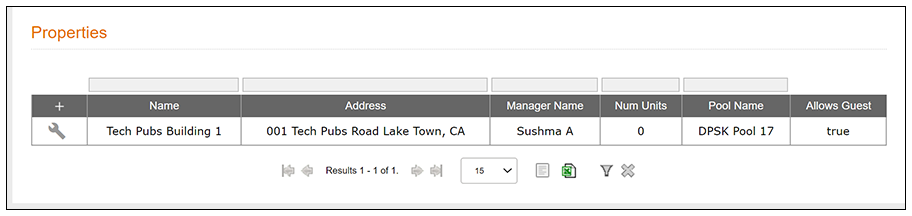
From the grid view of the property (see screen above), you can click the wrench icon to invoke four tabs that allow you to perform various action on the property.
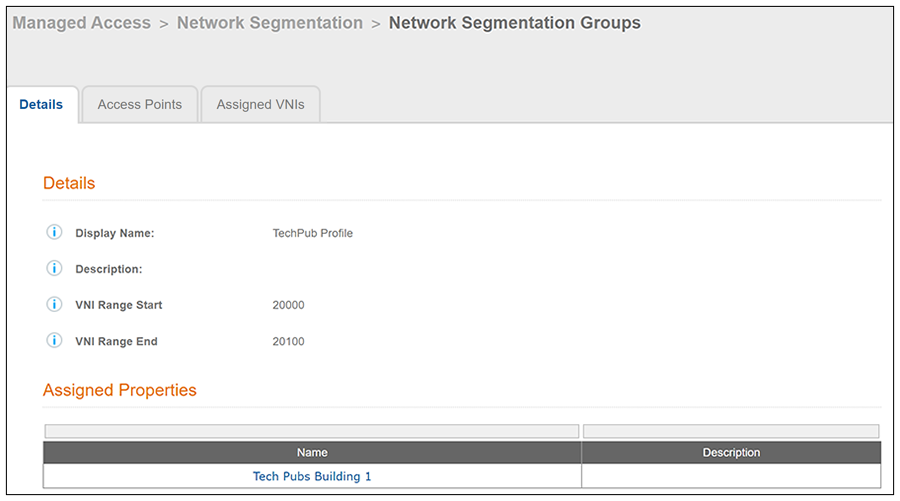
Note: If you return to the Managed Access > Network
Segmentation portion of the UI, then click the wrench icon of the Network
Segmentation group, the ensuing screen displays live links to any properties you have
assigned to the group, as shown in the following example:
For information about adding units to a property that is part of a Network Segmentation group, proceed to Adding Units to a Property of a Network Segmentation Group.