Adding Units to a Property of a Network Segmentation Group
Once you have added a property to a
Network Segmentation group, you can then add units to the property.
Follow the steps below to add units to the property:
Note: For information about how
DPSKs get assigned, refer to the Cloudpath Enrollment System Property Management Administration Guide.
- From the main Properties screen, click the wrench icon for the specific property.
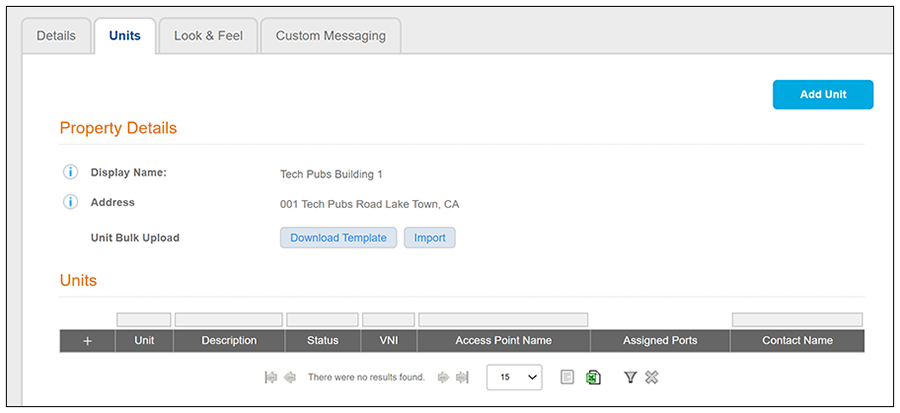
- On the ensuing screen, click the Units tab to invoke the
following screen:
Note: If you have a lot of units to add, you can use the Download Template and Import buttons to add units by bulk (field descriptions are provided in the following steps). For more information about bulk uploads, refer to the "Bulk Upload Considerations" section of the Cloudpath Enrollment System Property Management Administration Guide. To add units individually, proceed to the next step.
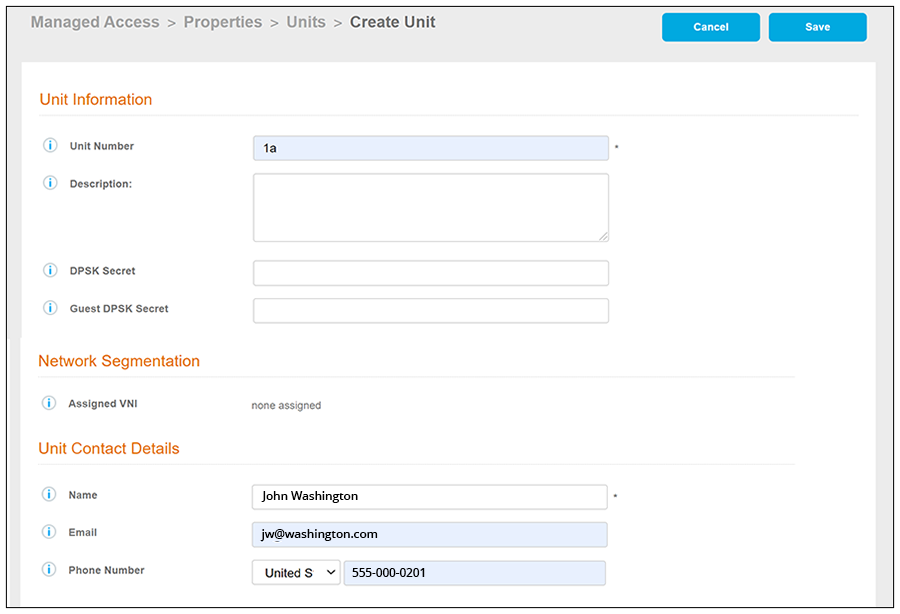
- Click Add Unit to add the first
unit to your property, as shown and described in the following example:
- Unit Number: Number or name of the unit you are adding.
- Description (optional): Description of the unit.
- DPSK Secret (optional): This
is the secret that all devices connecting to this unit will need for wi-fi
access. On the tenant portal, this secret is called the "Wi-Fi Passphrase."
In the Cloudpath UI, you do not need to enter a value here because the
secret is automatically generated. However, you can enter a value if you
wish, and you can also change the unit secret at a later time.
Note: If, when you created the property, you checked the "Guest DPSK" box, a separate "Guest DPSK Secret" gets generated that all guest devices connecting to this unit will need for wi-fi access.
- Guest DPSK Secret (optional): This field is present in unit configuration only if you checked the "Guest DPSK" box when you configured the property. This is the secret that all guest devices connecting to this unit need for wi-fi access. On the tenant portal, this secret is called the "Guest Passphrase." In the Cloudpath UI, you do not need to enter a value here because the secret is automatically generated. However, you can enter a value if you wish, and you can also change the guest secret at a later time.
- Assigned VNI: The VNI number
assigned to this unit on the Network Segmentation group associated with this
property. By default, all units that belong to a property with a Network
Segmentation group will have an assigned VNI, but this VNI can be removed by
the administrator if desired.
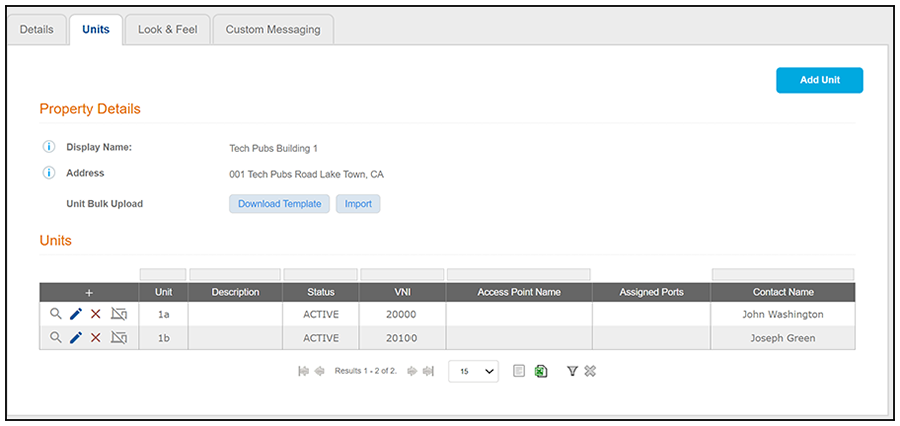
Note: The VNI is assigned once you save the configuation. For example, you can see the VNIs assigned to two configured units in Property Details Example After Adding Two Units. If no VNIs are available when the unit is created, no VNI is assigned. However, as soon as a VNI becomes free (for example, if the range of VNIs is increased or if a unit is deleted), a newly available VNI is auto-assigned to the new unit.added since previous draft
- Unit Contact Details: Enter
the contact information for the tenant of this unit. The email and mobile
phone information that you enter will be used to notify the tenant about how
to access the tenant portal and what the pass phrases are for unit and guest
wi-fi access.
Note: The name you enter here will appear near the top of the home page on this person's tenant portal.
- Click Save.
Note:newly added for this draftOnce you save the configuration of a new unit, you have the option of resending the assignment SMS/Email to the phone number and/or email defined for this unit, provided that sending SMS/Email has been enabled in the configuration of the applicable property. To resend this information (for example, if you have changed a wi-fi passphrase), you can enter edit mode for the unit, and enable the "Resend SMS/Email" check box in the "Unit Contact Details" section of the screen, then click Save. Another method of resending this information is to click the magnifying glass for the unit (in the grid view of all configured units), then click the Resend Unit Assignment SMS/Email button in the "Unit Contact Details" section of the screen (refer to Unit-Specific Information).
- Using the Add Unit button (or the + button above the Units grid), continue to add as many units to the property as you want. The following screen shows two units have been added to the property:
- To add access points and assign ports, click the magnifying glass for a unit such as unit 1a in the example above.
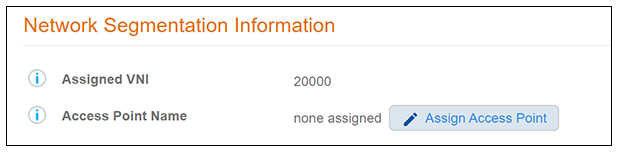
- In the "Network Segmentation Information" section of the ensuing screen, click Assign Access Point.
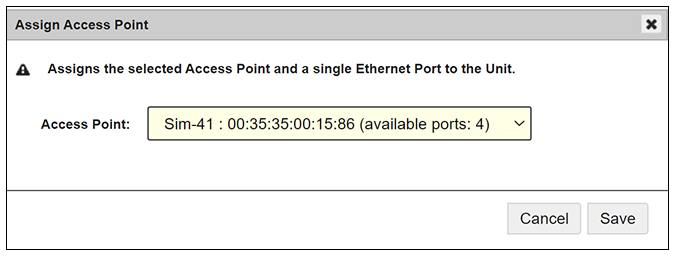
- From the Access Point drop-down (see screen below), select the AP and a single ethernet port to assign to the Unit, then click Save.
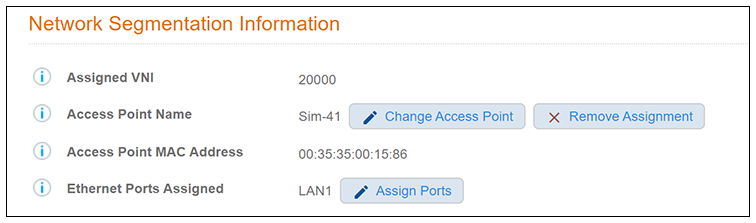
- After your selection is saved, the
Network Segmentation Information on the screen reflects the selection, as shown in
the following screen:
You can use the buttons shown as follows:
- Change Access Point: This button allows you to change your selection from the Access Point drop-down list.
- Remove Assignment: This button removes the access point and ethernet port assignments from the unit.
- Assign Ports: This button invokes a popup screen that shows available ethernet ports you can select.
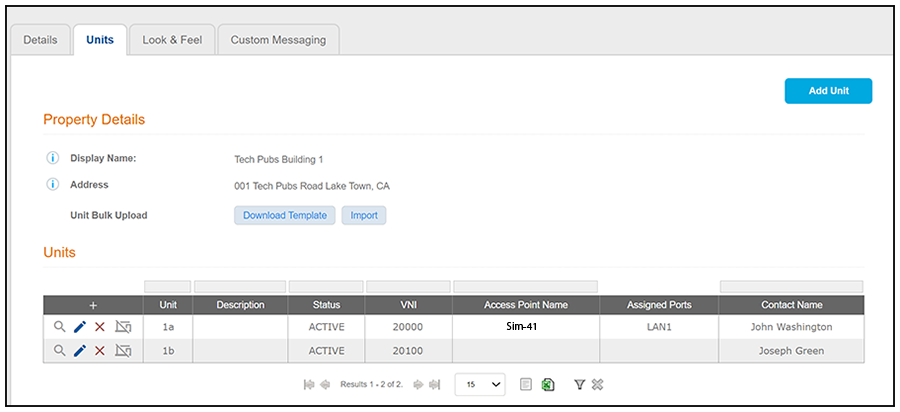
If you return to the Units tab view of the property, the access point and port selection you just made now appear:
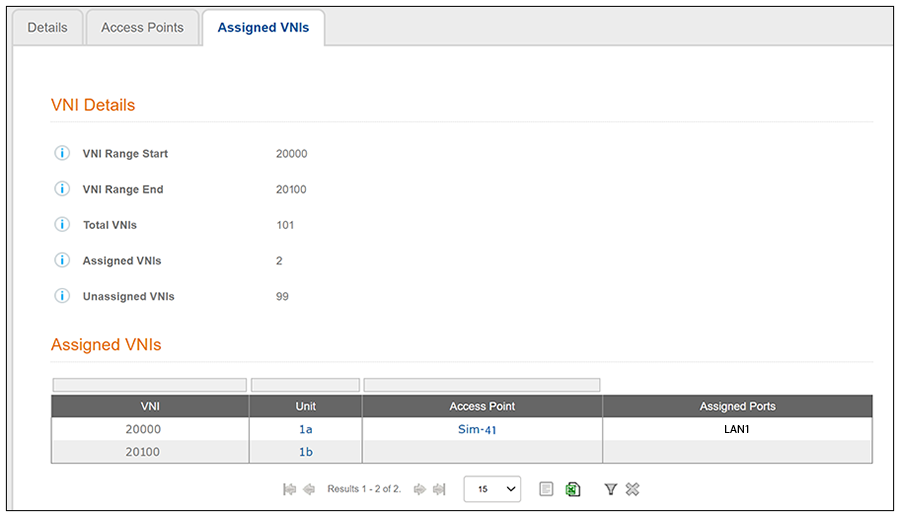
You can also return to the Assigned VNIs tab of the Network Segmentation Group to view the updated list of assigned VNIs, as shown in the following example screen: