Creating a Policy to Assign to eDPSK Pools (Optional)
Each policy has an associated RADIUS attribute group which defines the RADIUS response attributes (such as filter ID, and class). Each authentication is matched against an assigned list of candidate policies in sequential order. Criteria of a policy can include dynamic conditions such as a user's physical location, username, or the time of day.
The following procedure guides you first through creating RADIUS attribute groups for your policies, then creating the policies themselves. You must create at least one RADIUS attribute group before you can configure a policy because a policy needs to have at least one RADIUS attribute group available for selection.
- In the Cloudpath UI, go to Configuration > Policies.
- Select the RADIUS Attribute Groups tab, then click the Add RADIUS Attribute Group button.
- In the ensuing Create Radius Attribute
Group screen, enter the information to create the group, then click Save.
Note: You can configure as many RADIUS Attribute groups as you want. One RADIUS Attribute group will later be assigned to each policy you create.An example screen is shown below. For detailed steps, refer to the "Configuring Policies" section of the Cloudpath Enrollment System External Dynamic Pre-Shared Key (eDPSK) Configuration Guide.
- Configure your policies:
- In the Configuration > Policies area of the UI, select the Policies tab, then click Add Policies.
- In the ensuing Create Policy
screen, enter the information to create the policy, then click Save.
Note: You can configure as many policies as you want.An example screen follows. For detailed steps, refer to the "Configuring Policies" section of the Cloudpath Enrollment System External Dynamic Pre-Shared Key (eDPSK) Configuration Guide.
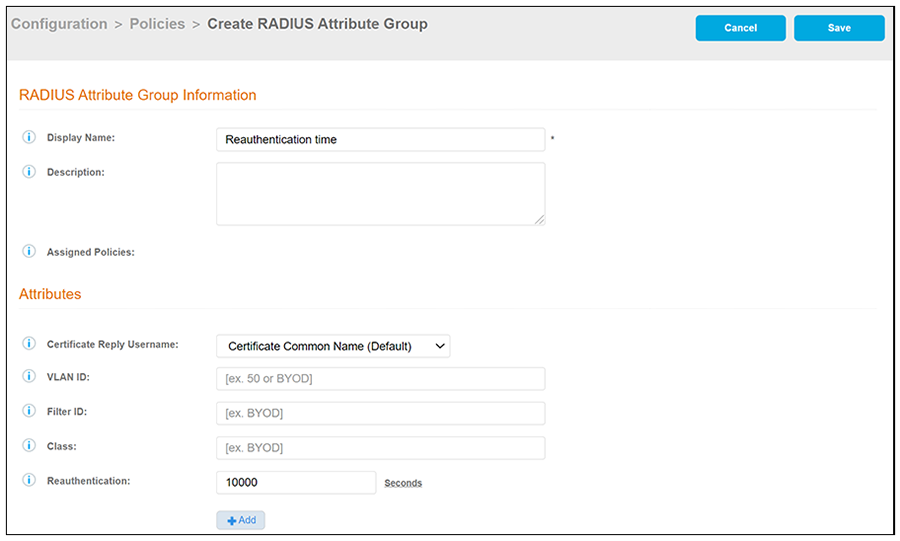
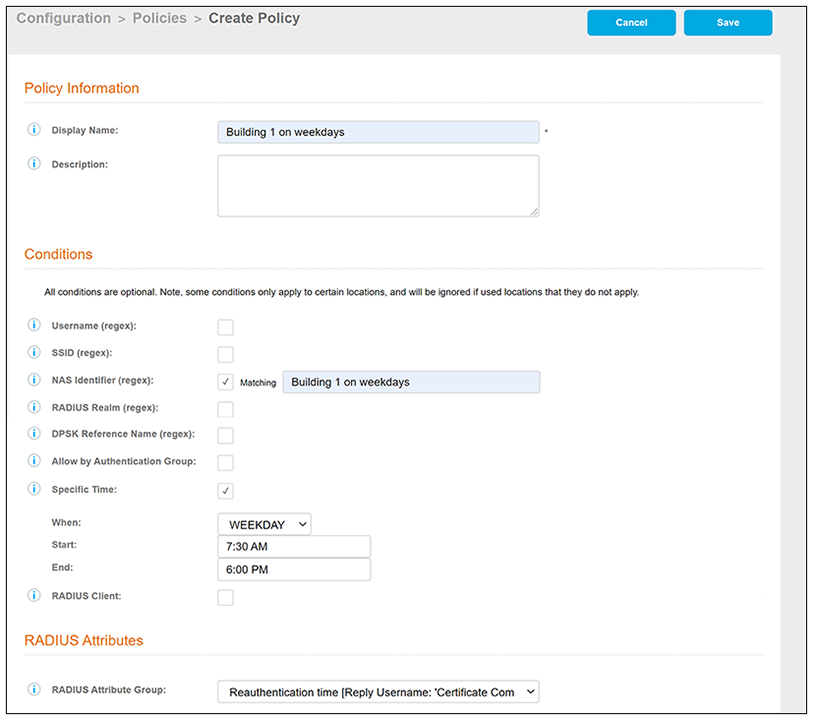
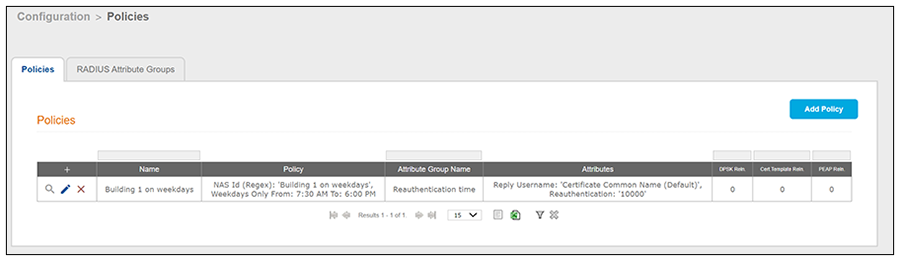
The following illustration shows the Policies tab after one policy has been added. The information shown in the table represents the policy configuration shown in the example in the Create Policy Screen. The attribute group name and its attributes come from the attribute group name selected in the Create Policy Screen drop-down list. (The "Certificate Reply Username" applies only to certificate-based authentications, and is therefore described in the Cloudpath documentation of certificate templates.) The RADIUS attribute information shown below comes from the example in the Create RADIUS Attribute Screen.