Installing and Starting RUCKUS Virtual Edge on Proxmox VE 8.3
- You have a Proxmox VE account and Proxmox VE installed. Refer to Proxmox VE
Documentation (https://pve.proxmox.com/pve-docs/) for further information.
Note: Proxmox VE installation provides you with one host node within the Proxmox GUI Datacenter.
- You have downloaded the RUCKUS Virtual Edge software (.OVA file) from the RUCKUS Support site to your local machine.
Use the .OVA file downloaded from the RUCKUS Support site (https://www.proxmox.com/en/downloads).
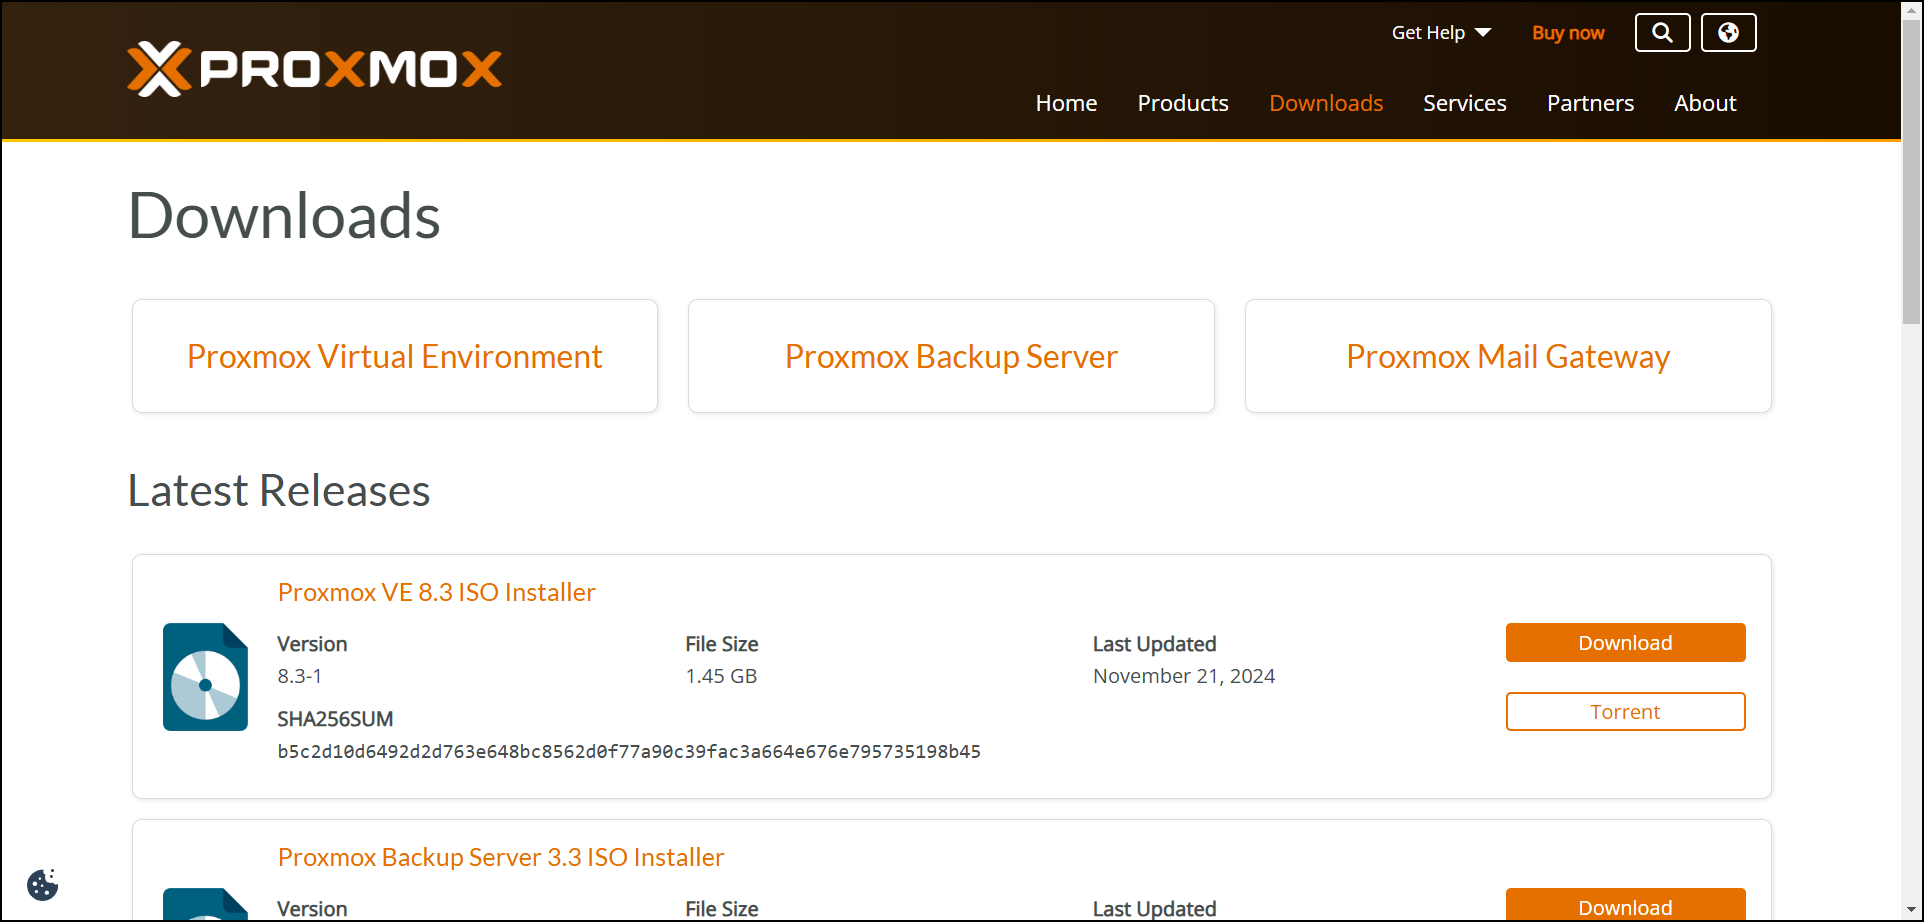
- Download the Proxmox VE 8.3 ISO Installer from the official Proxmox website (https://www.proxmox.com/en/downloads).
- Log in to your Proxmox VE.
- Configure the Linux Bridge so that the host
can communicate with the NIC.
- From the left pane,
select the host node (within the Datacenter hierarchy) in which you plan
to install the RUCKUS Virtual Edge device, then select . The list of network devices are displayed.
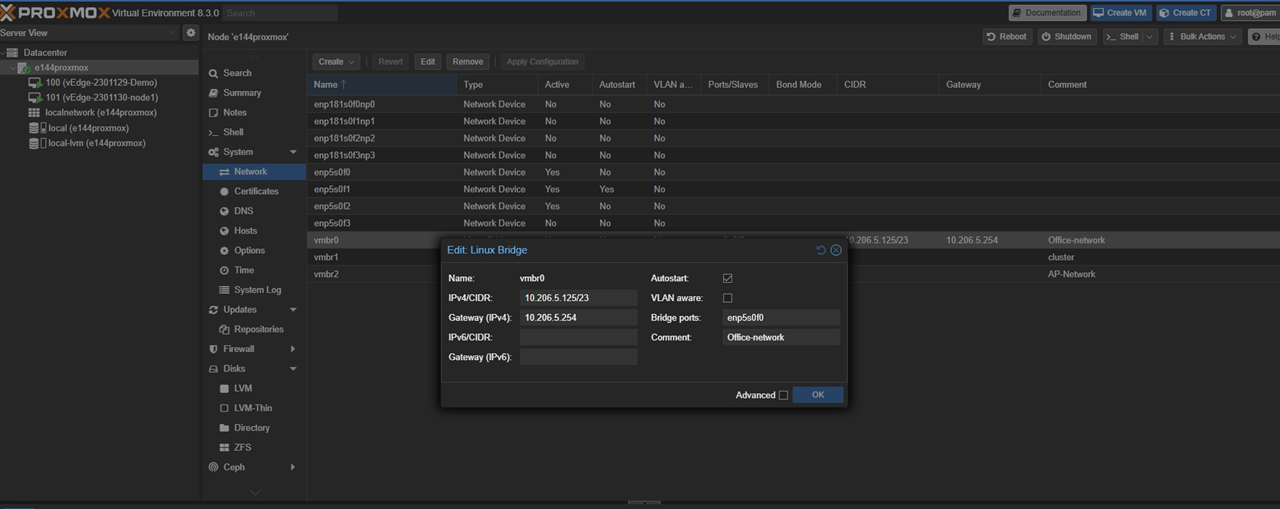
- Select a Linux Bridge
network device (default is vmbr0) and click Edit.The Edit Linux Bridge page is displayed.
- Enter the following information and click OK.
- From the left pane,
select the host node (within the Datacenter hierarchy) in which you plan
to install the RUCKUS Virtual Edge device, then select .
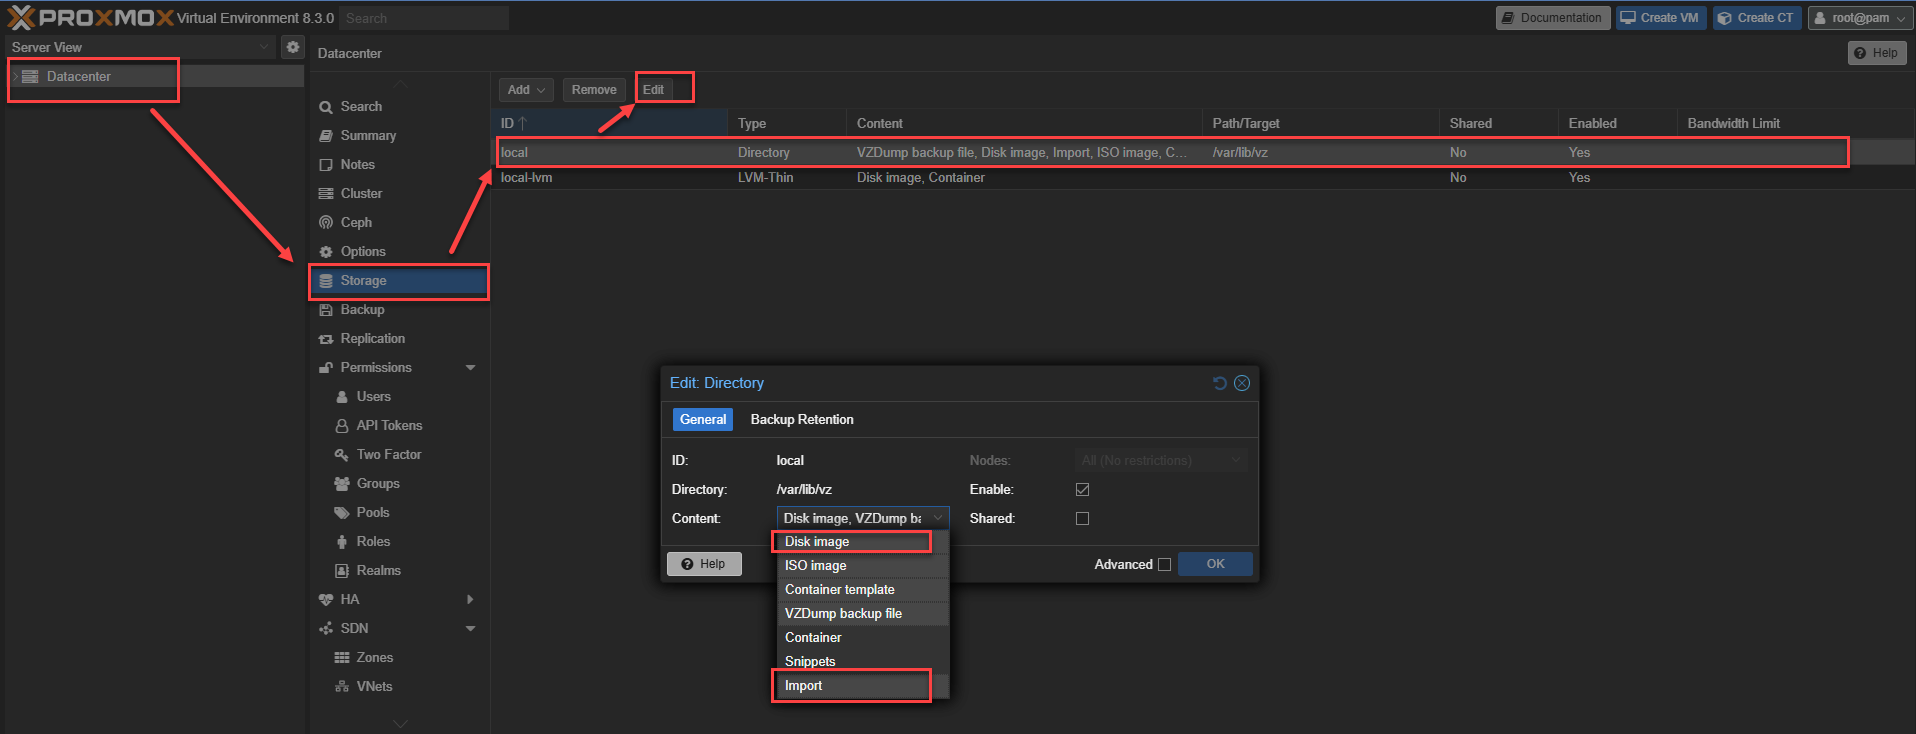
- Enable the Content option to import the .OVA file.
- From Datacenter, click Storage.
- Select the Directory and click
Edit.Note: Use only the local disk to store the RUCKUS Virtual Edge .OVA file.
The Proxmox default uses the ISO format for creating a VM, but RUCKUS Virtual Edge uses the .OVA file for deploying on the Proxmox VE.
The Edit Directory dialog box is displayed. - For the Content option, select Disk Image and Import.
- Click OK.
- Deploy RUCKUS Virtual Edge on Proxmox VE.
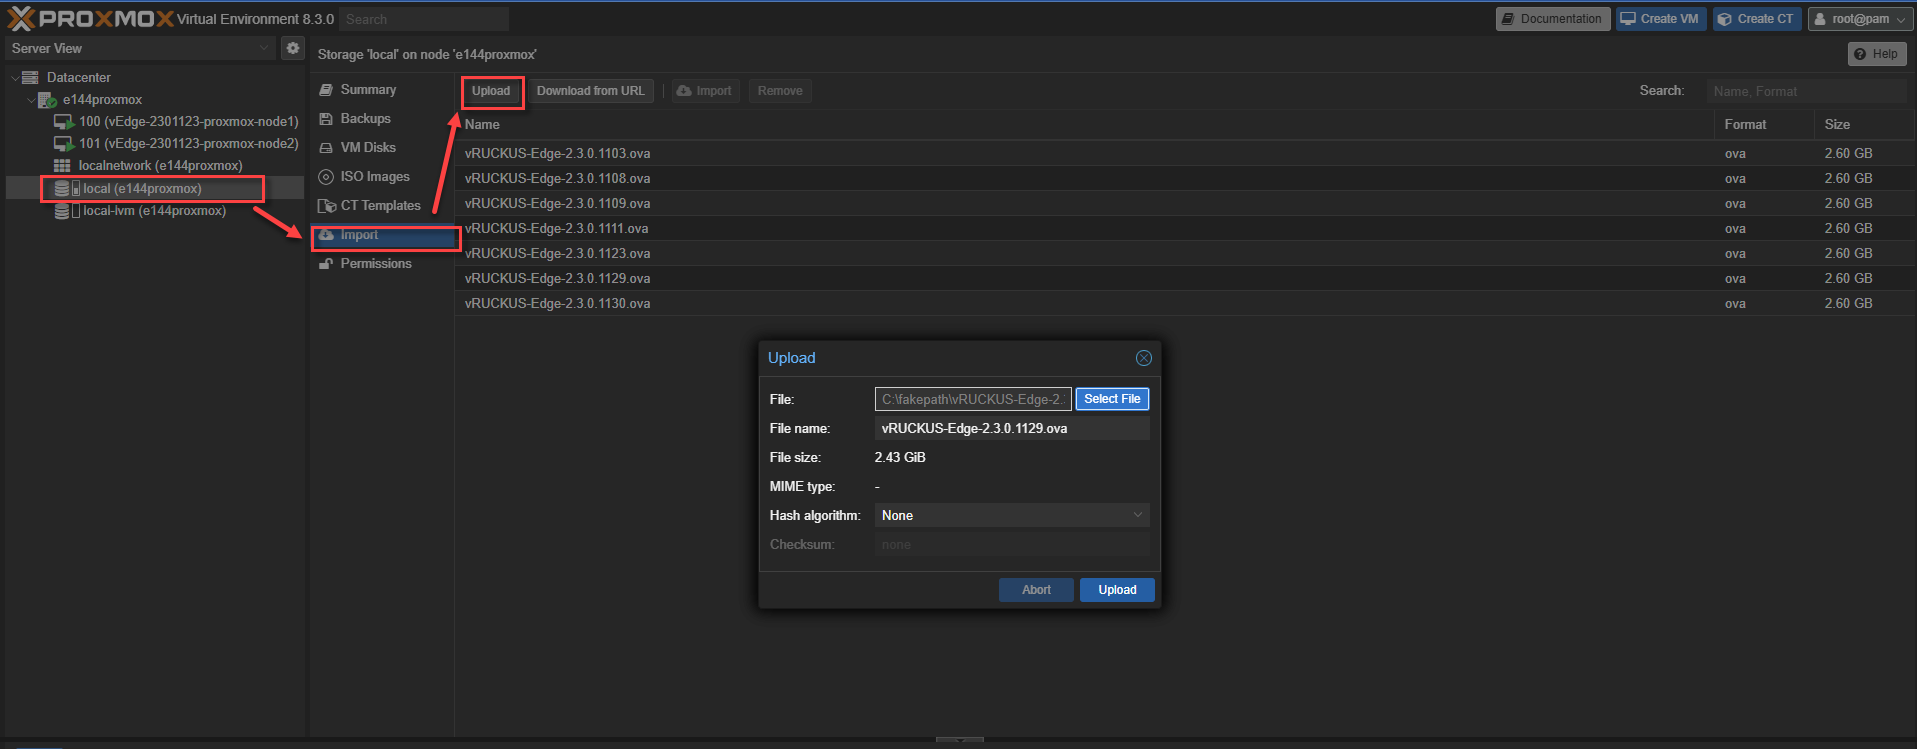
- From the left pane, select the local disk storage for which the bridge interface was configured in .
- Select Import and click Upload.
- In File, click Select File and select the .OVA file.
- Click Upload.
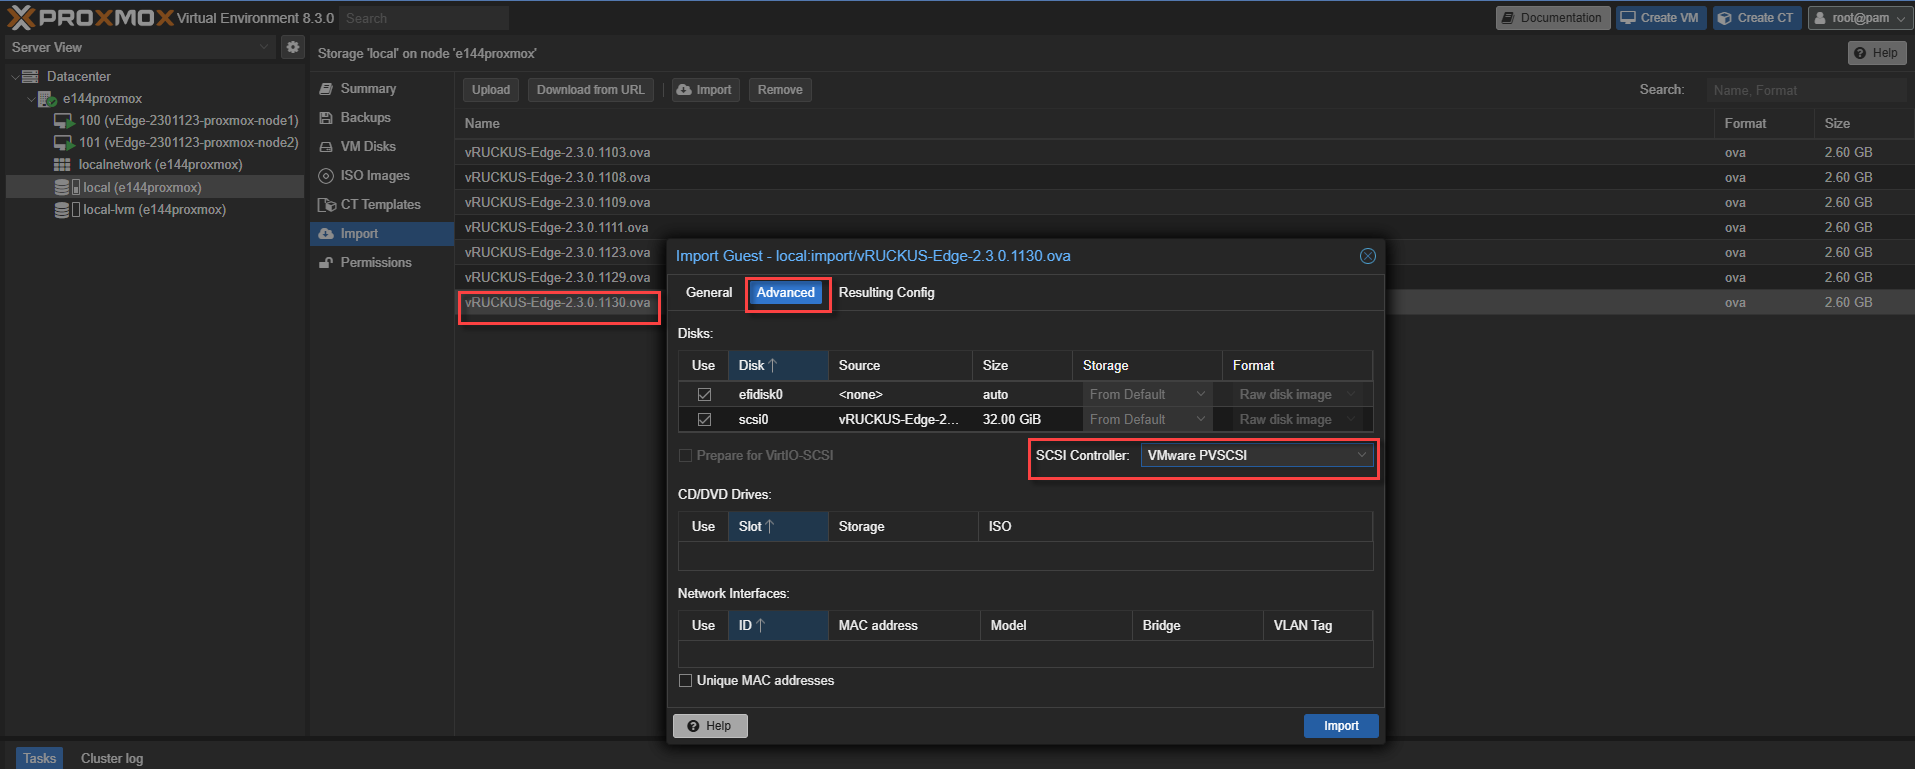
- Double-click the .OVA file to import a new RUCKUS Virtual Edge
VM.The Import Guest dialog box is displayed.
- From the Advanced tab, change the SCSI Controller option to VMware PVSCSI.
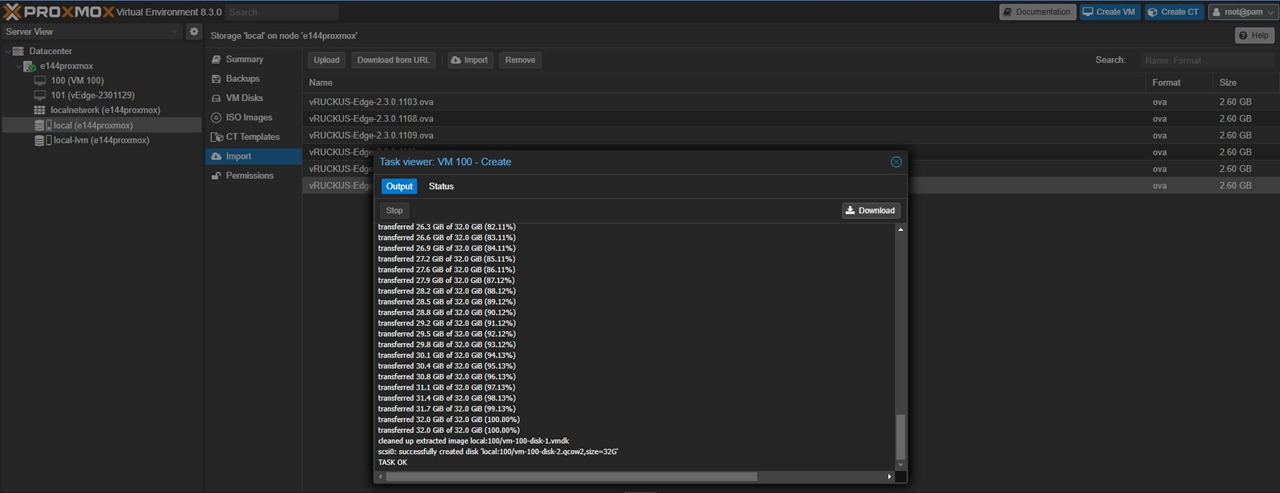
- Click Import to create the VM.
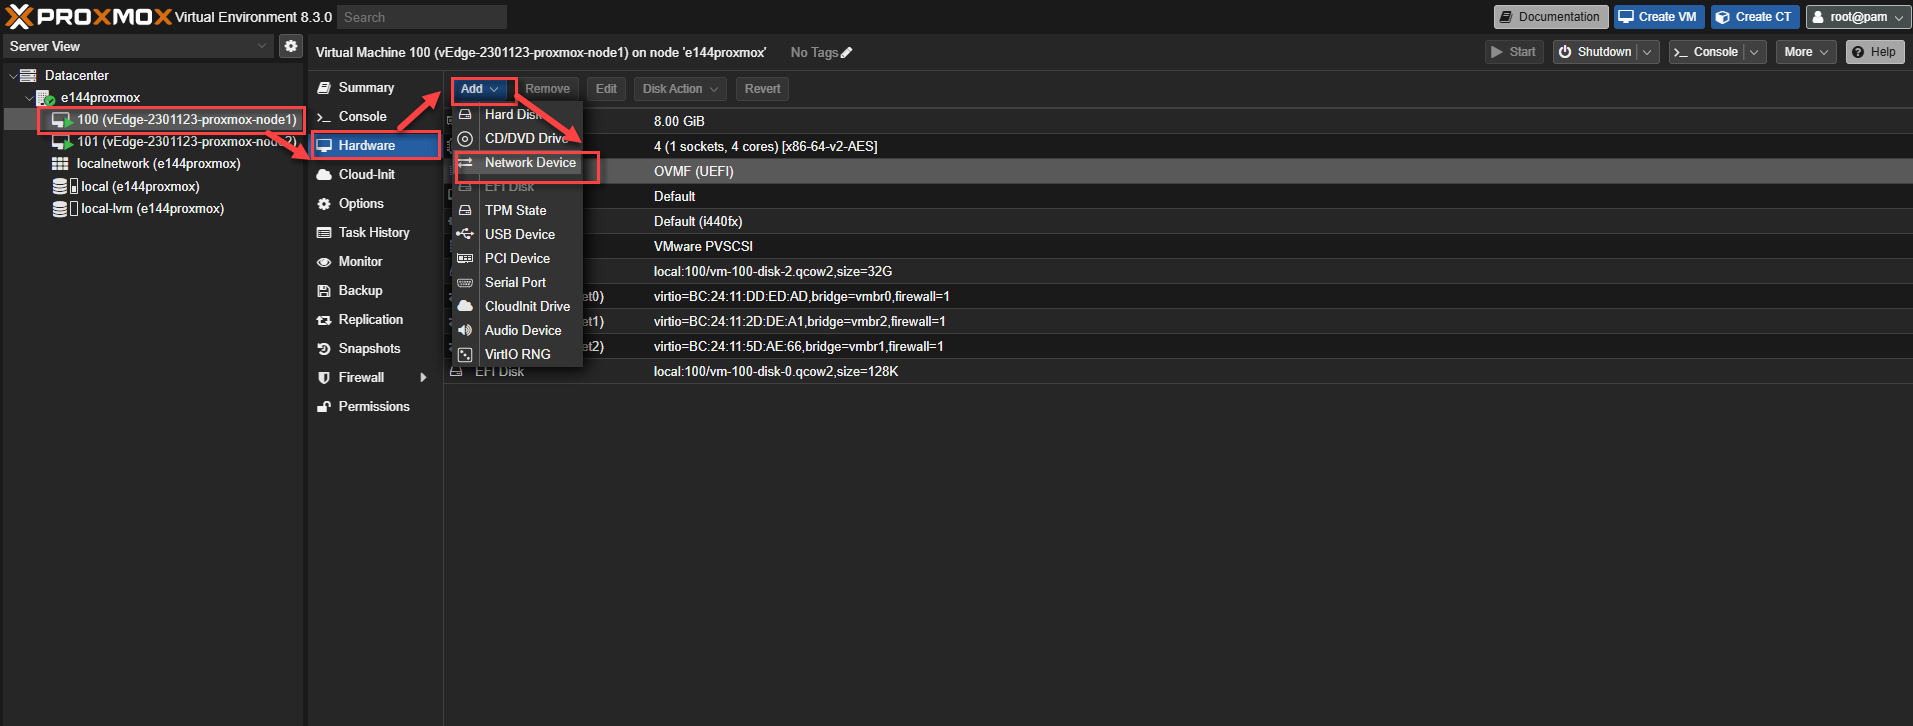
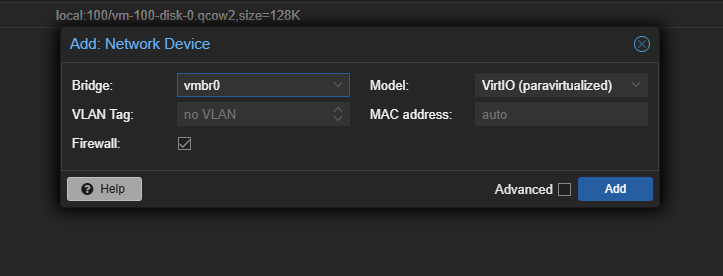
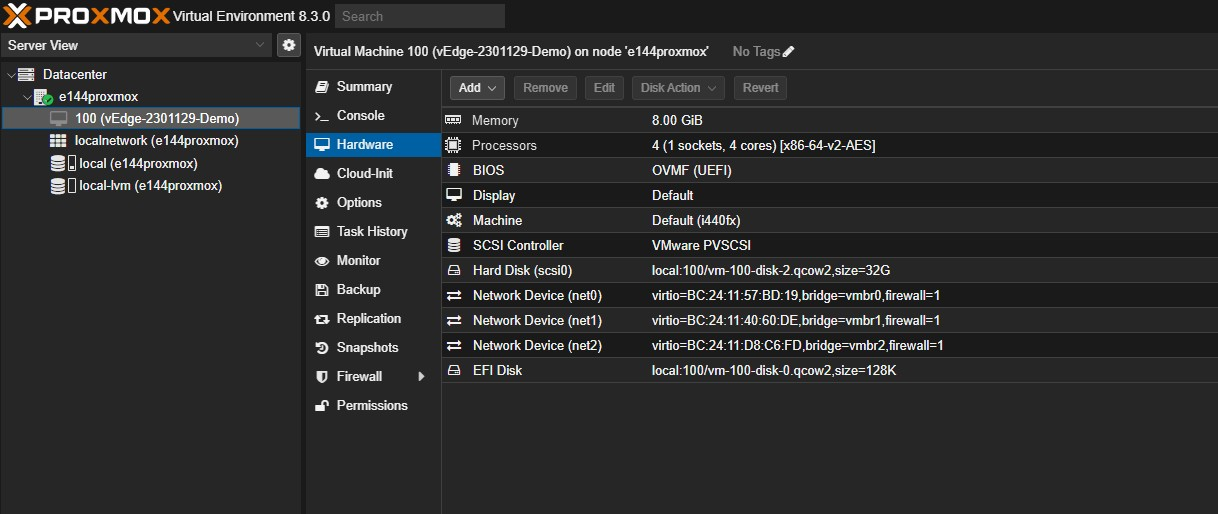
- Add the Linux Bridge interface to the RUCKUS Virtual Edge VM that you just created via the Import function.
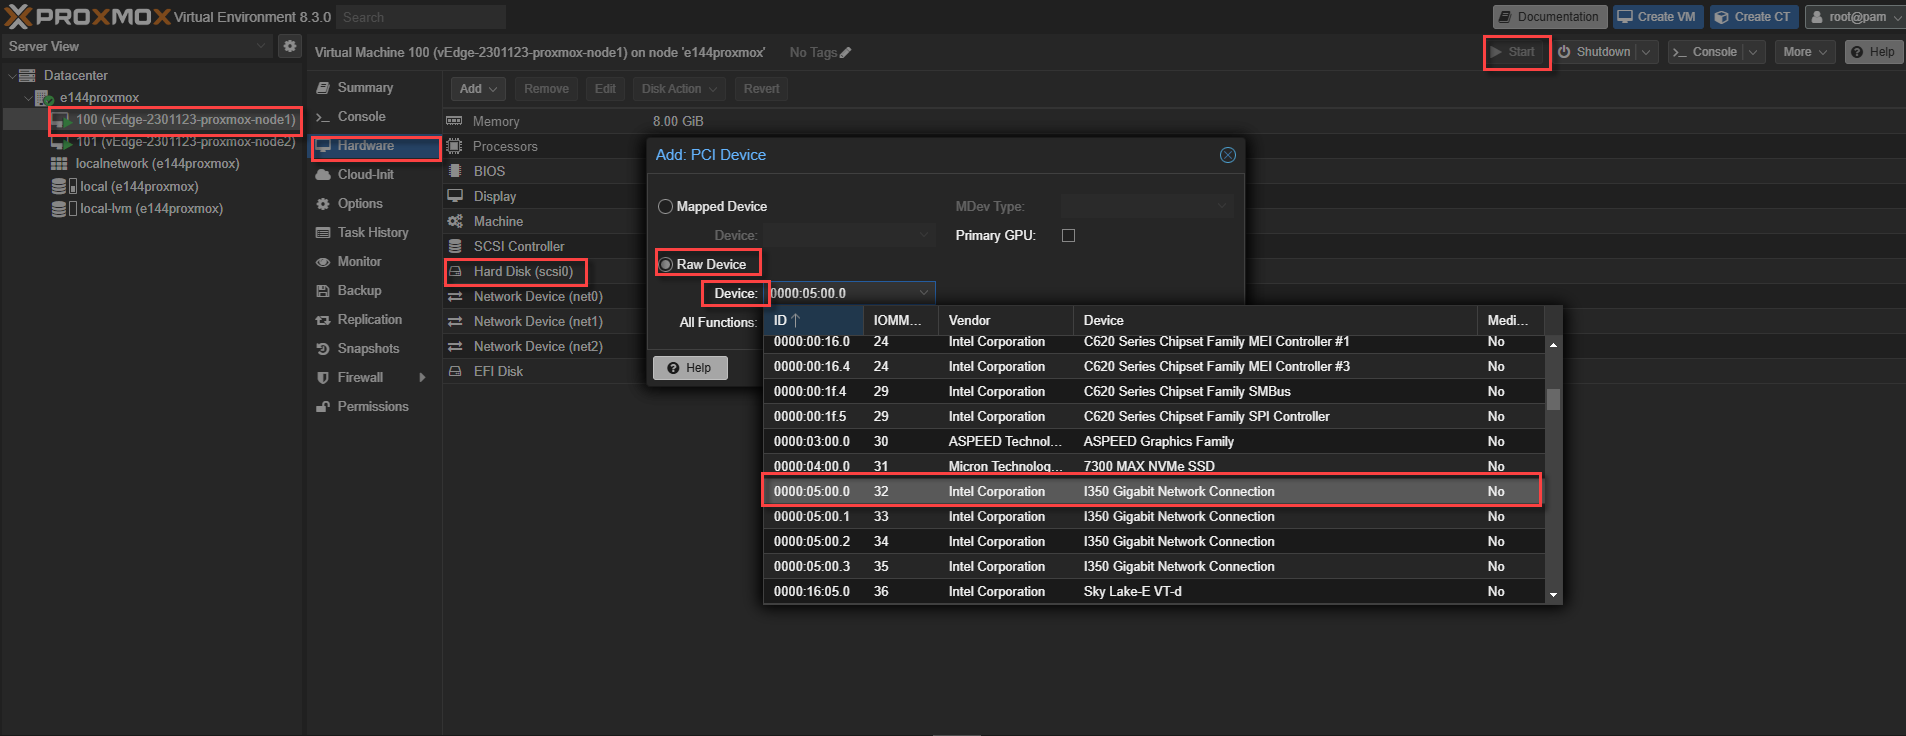
- Add a PCI-passthrough interface
to the RUCKUS Virtual Edge VM.Note: PCI devices are added one at a time. Repeat this step to add more than one PCI device.
When you use PCI passthrough for a device, it becomes unavailable to the host system. Additionally, virtual machines with pass-through devices cannot be migrated.
- Select the RUCKUS
Virtual Edge VM device from the left panel, click , and then click Start.The Add: PCI Device dialog box is displayed.
- Choose the Raw Device option and select the PCI device from the Device drop-down.
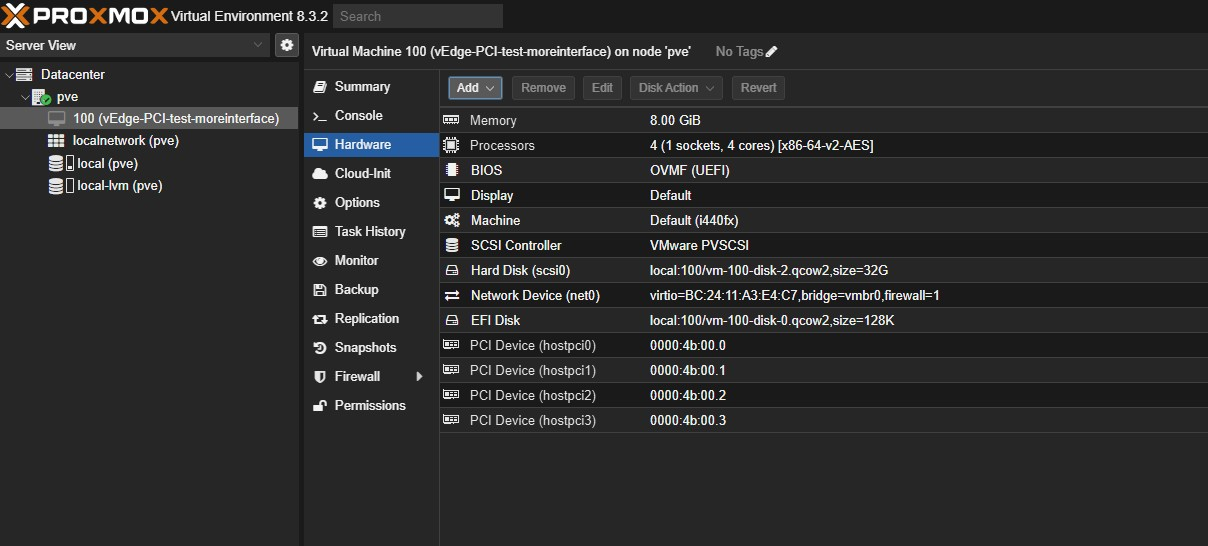
- Click Add. The RUCKUS Virtual Edge VM hardware summary screen is updated, displaying the PCI device.
- Select the RUCKUS
Virtual Edge VM device from the left panel, click , and then click Start.
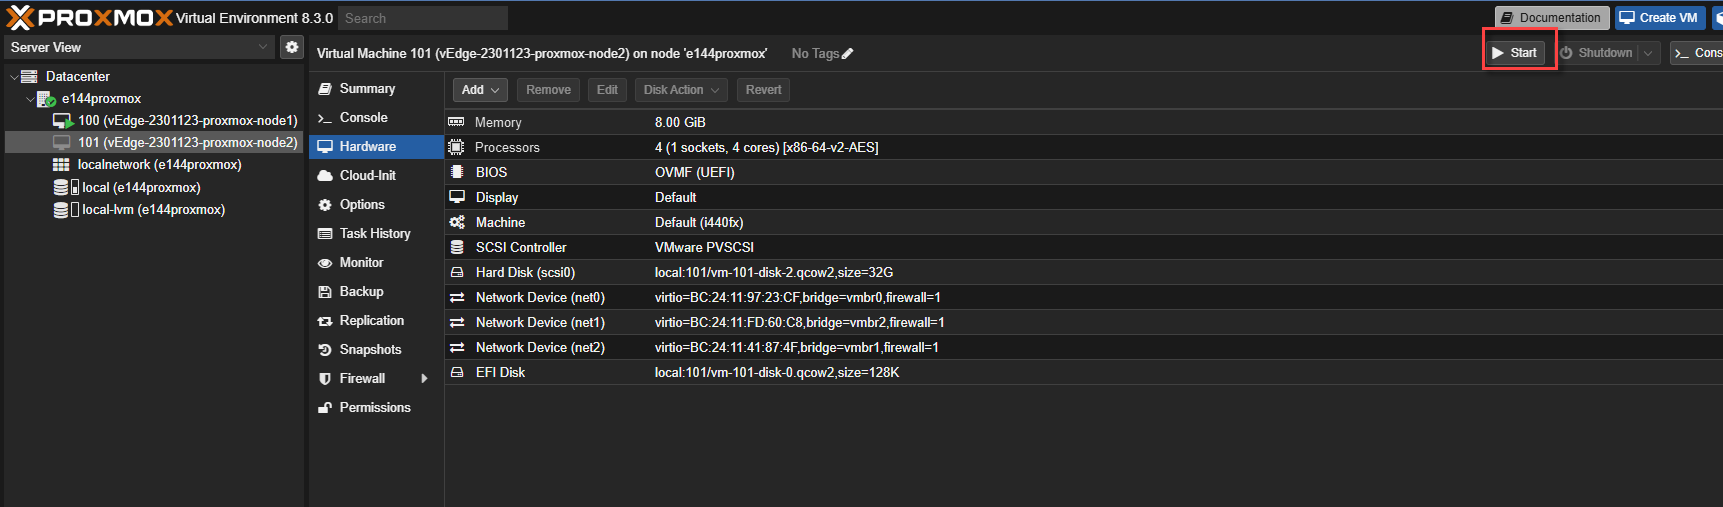
- To start the RUCKUS Virtual Edge VM, choose the device from the left panel, select Hardware, and then click Start.
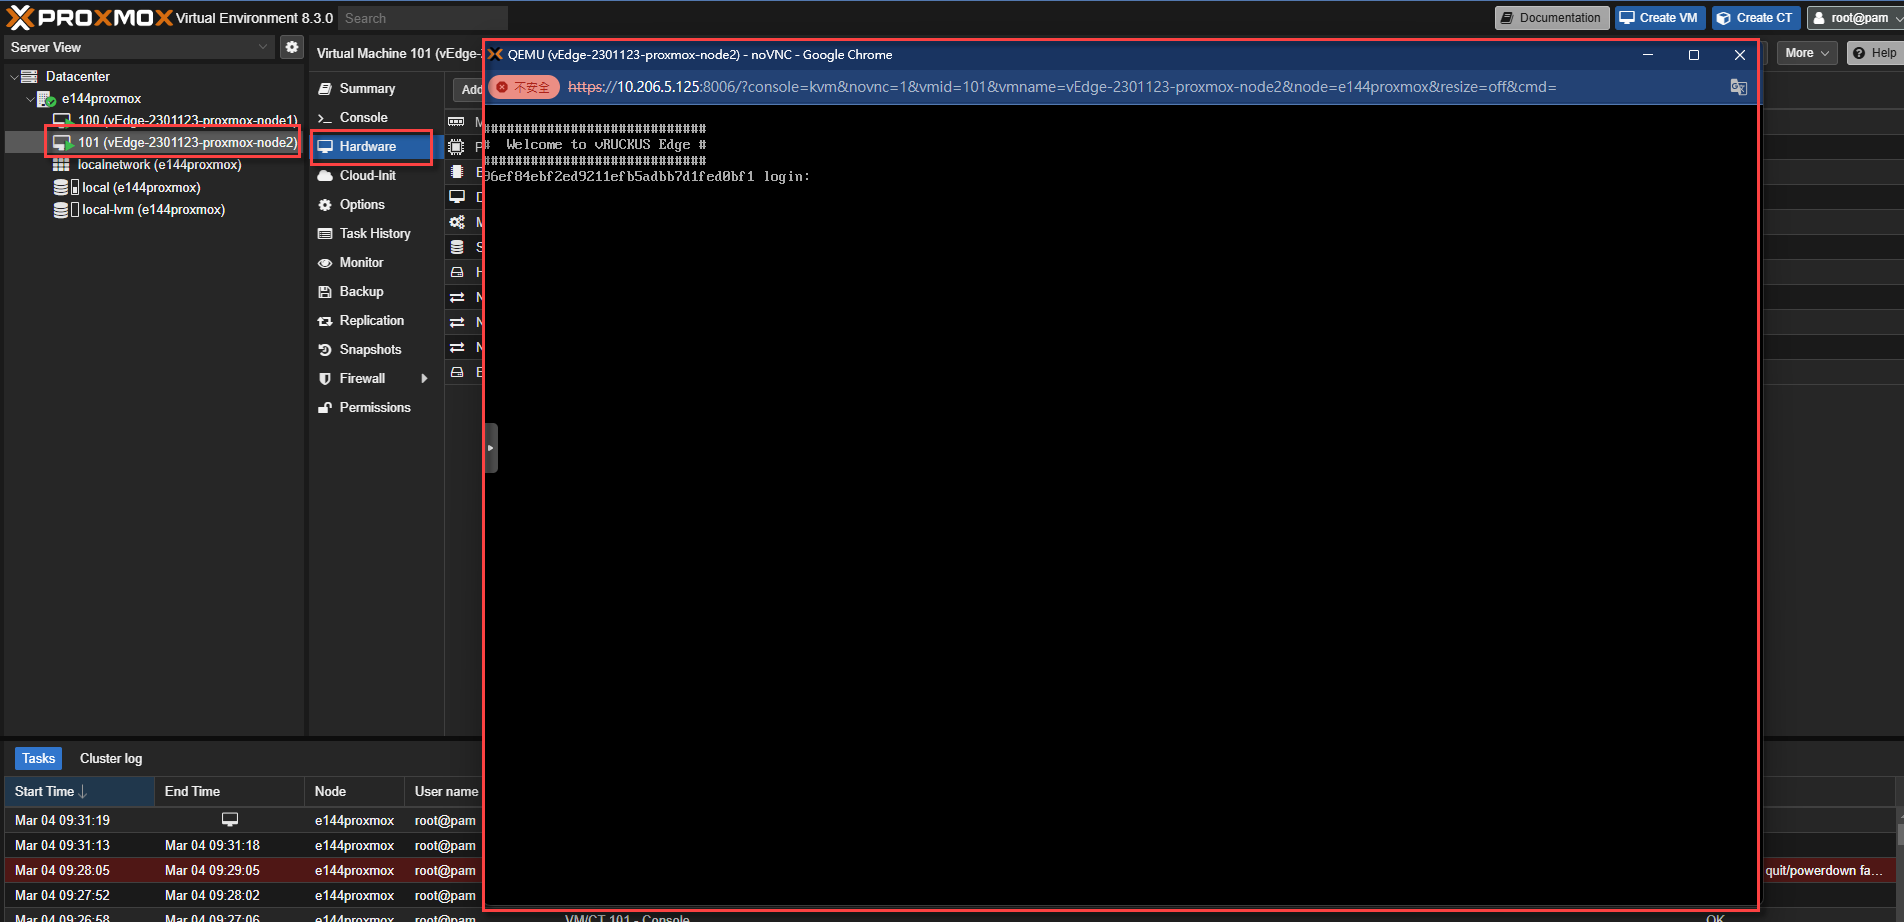
- (Optional) Double-click the VM to open the console window, allowing access to the command line interface. This enables the user to access the VM (RUCKUS Edge) CLI through the web interface console. Additionally, the user can access the RUCKUS Edge VM console via the Proxmox device CLI.