Configuring vSwitch on the ESXi Server for RUCKUS Virtual Edge
This task comprises configurations on the
ESXi server to add a standard virtual switch (vSwitch) on the ESXi server (facilitating
RUCKUS Virtual Edge connectivity with the network), add the
vSwitch to a port group, and deploy the RUCKUS Virtual Edge
and port group.
- Log in to the ESXi server.
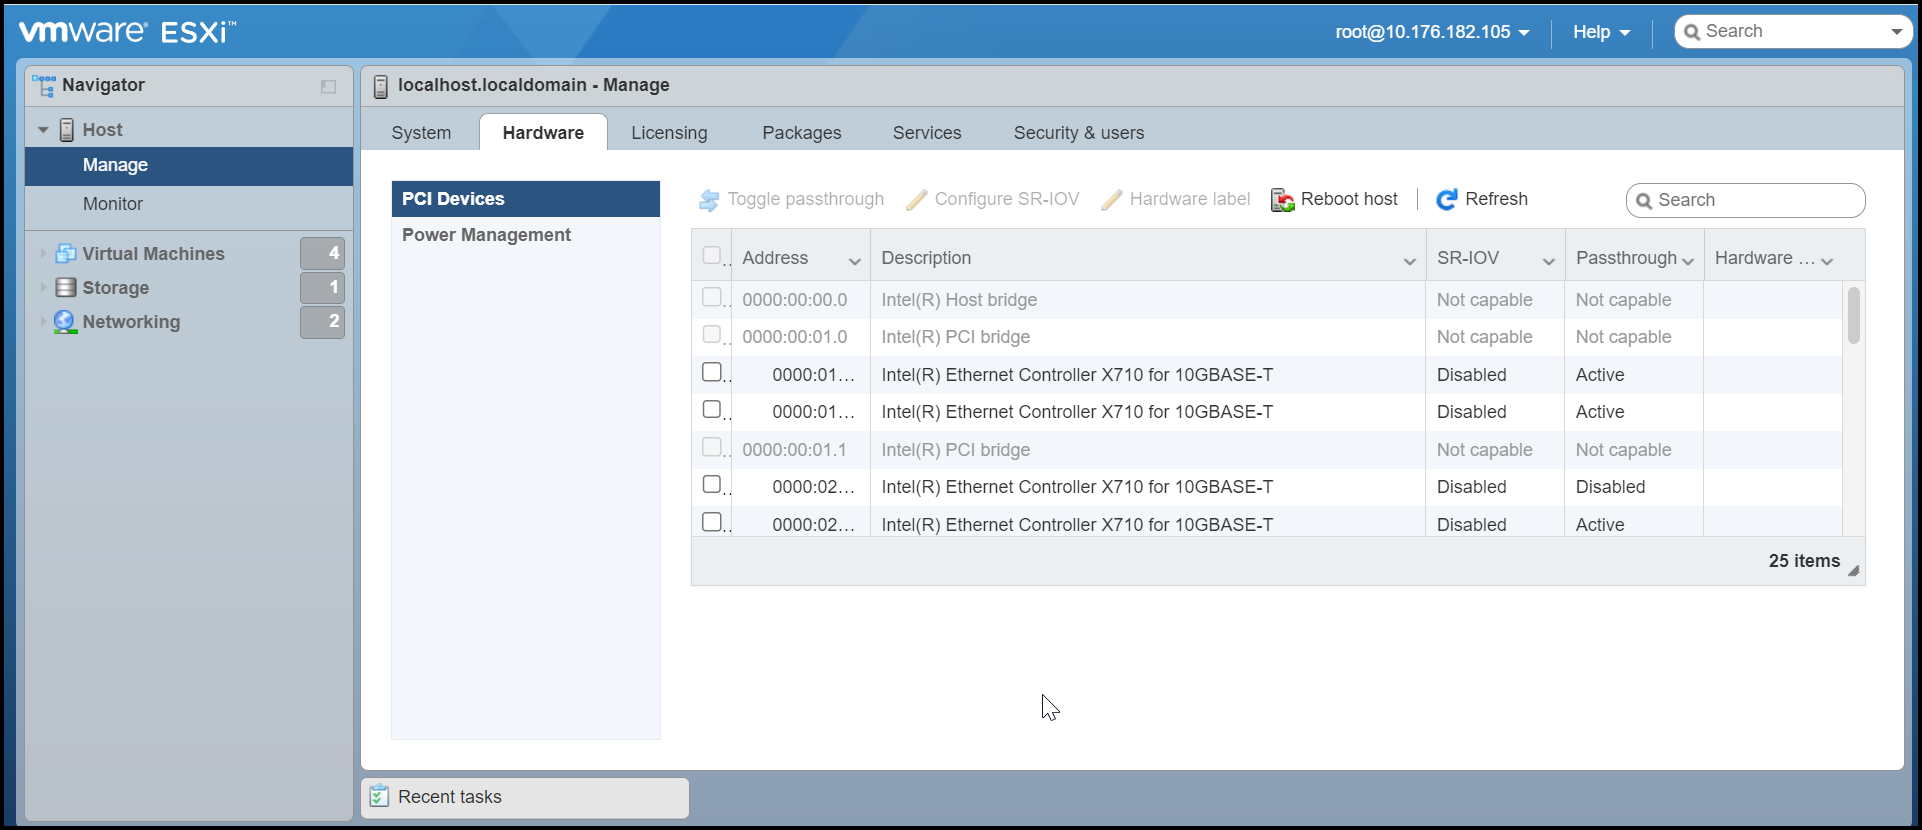
- Disable Peripheral Component Interconnect (PCI) passthrough mode on the RUCKUS Virtual Edge NIC ports. In the ESXi Navigator menu, select . Click the Hardware tab, then click PCI Devices. Select the RUCKUS Virtual Edge NIC ports to disable, then click Toggle Passthrough.
- In the ESXi
Navigator menu, select Networking and
click the Virtual
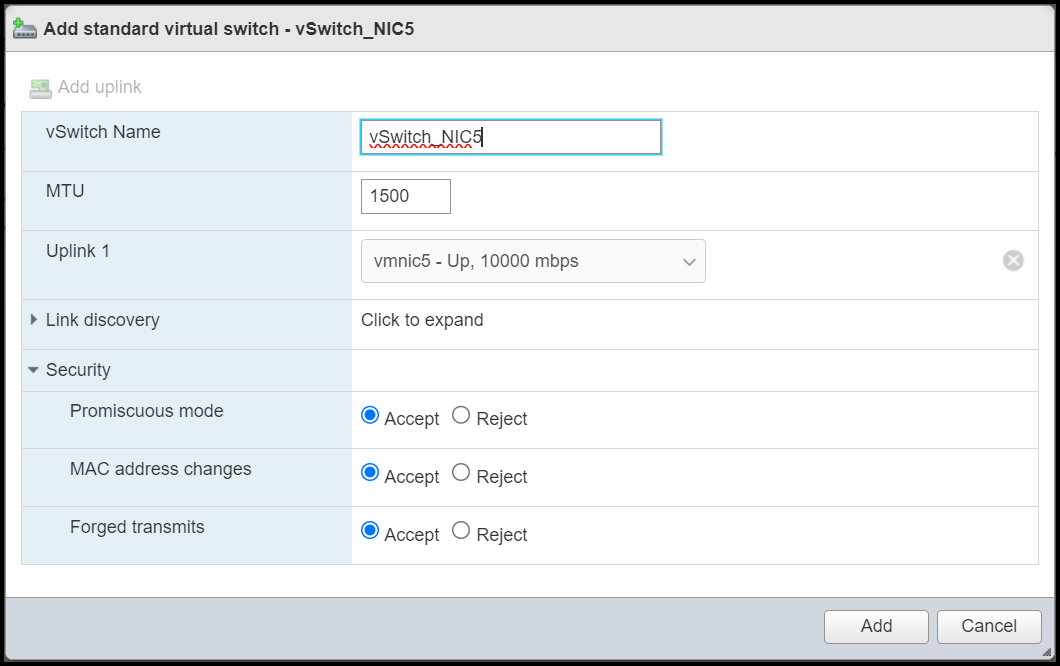
switches tab.In the Virtual switches window, click Add standard virtual switch. This displays Add standard virtual switch - New switch window. In this screen, enter the following details:
- vSwitch Name: Enter a name to identify the switch.
- MTU: Maximum Transmission Unit, limits data packet size for any network device. Enter the data packet size limit. The default value is 1500.
- Uplink 1: Uplink port is used to connect the virtual switch to a physical switch. Select the uplink port from the drop-down list.
- Link Discovery: This layer advertises information to directly connected peer/neighbors.
- Security: In this
section, the options are to Accept or Reject various security
options.
- Promiscuous mode: Allows a network device to intercept and read each network packet that arrives in its entirety.
- MAC address changes: Allows ESXi to accept or reject requests to change the effective MAC address of a virtual machine to a different address than the initial MAC address.
- Forged Transmits: When accepted, the ESXi server does not check the virtual machine traffic for fake MAC addresses.
- Click Add. The new vSwitch is added.
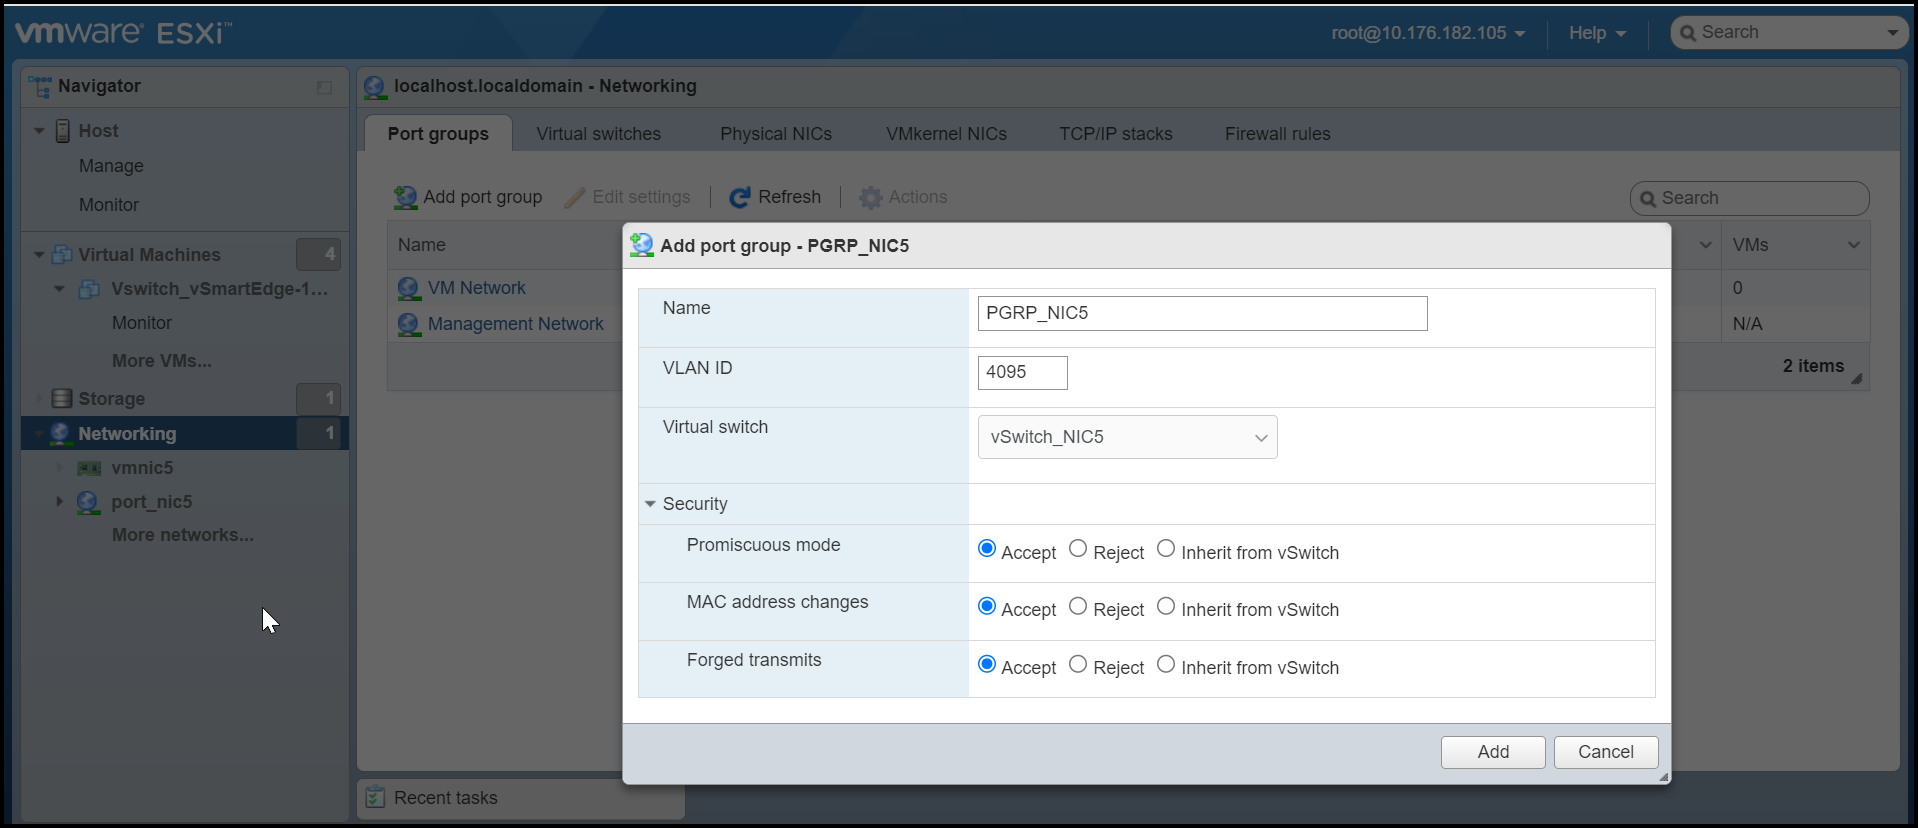
- After creating a new switch, add
the switch to the port group. To add the switch, click the Port groups tab.
This displays the Add
Port Group window. In this window, enter the following
details:
- Name: Enter a name to identify the port group.
- VLAN ID: Enter the VLAN ID of the broadcasting domain. For the RUCKUS Virtual Edge device enter 4095 as VLAN ID.
- Virtual Switch: Select the configured virtual switch from the drop-down list.
- Security: Select Accept for all options. Refer to the Add standard virtual switch - New switch information in for descriptions of the Security options and recommended selections.
- Click Add. The new port group is added and associated with the new vSwitch.
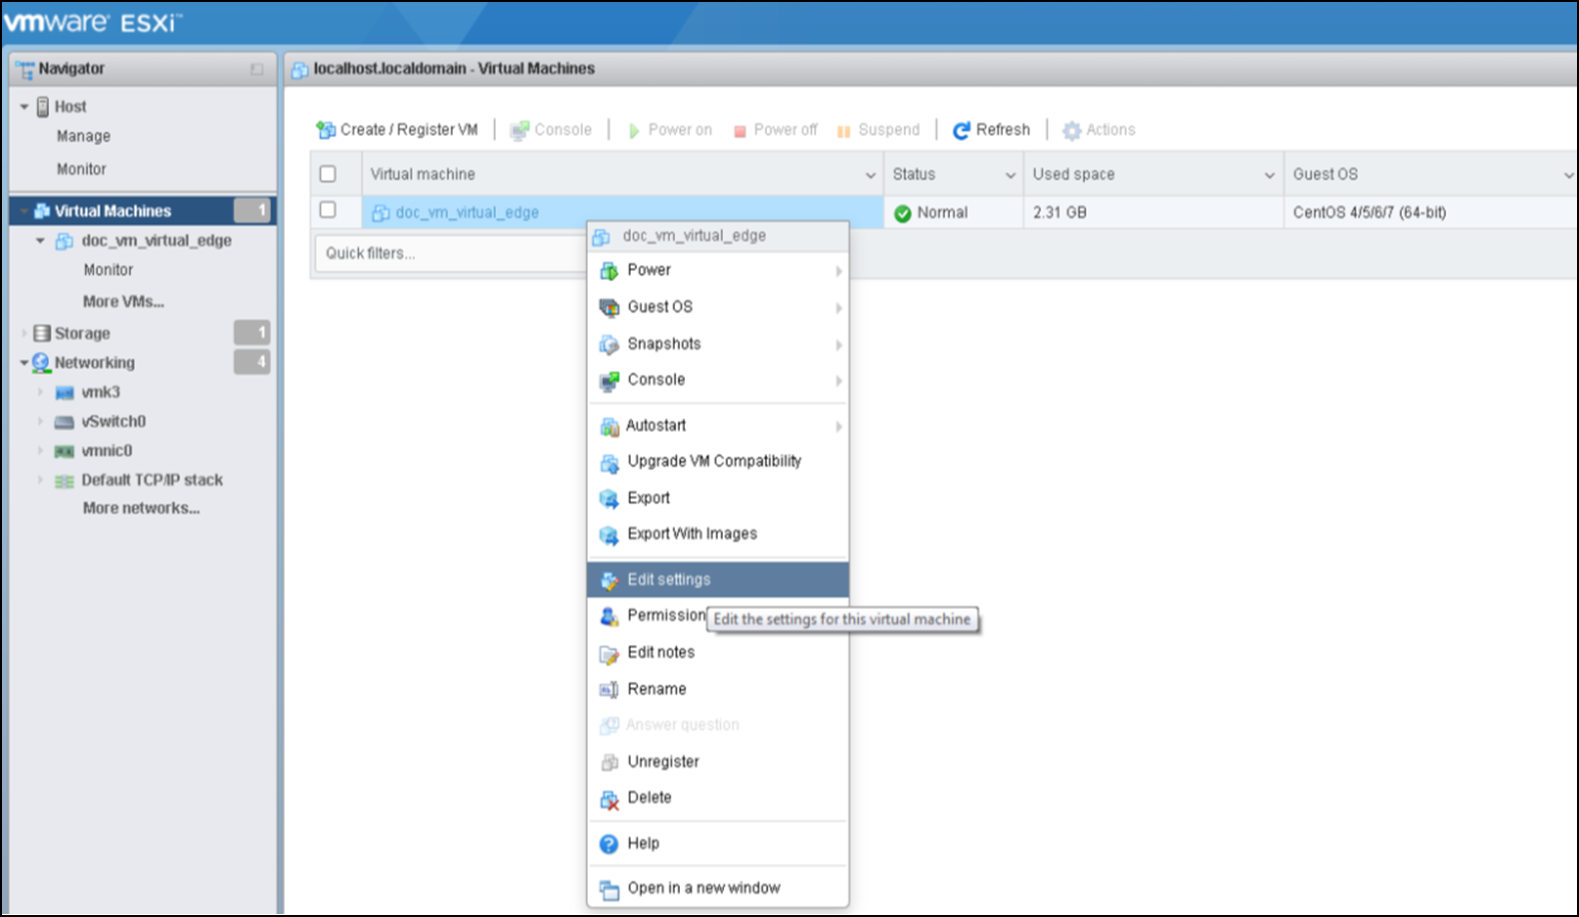
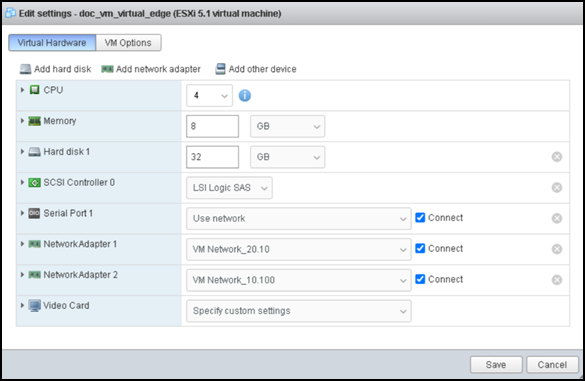
- After the port group is configured, deploy the vSwitch and the port group by editing the virtual machine settings.
- In the Edit settings window, click Add network adapter.
- Configure the following network adapter settings:
- CPU: Select the number of CPUs required for this device.
- Memory: Select the memory requirement in GB.
- Hard disk 1: Select the hard disk size in GB.
- SCSI Controller 0: Select the primary controller for managing SCSI devices.
- Network Adapter 1: Select the network adapter and select Connect.
- Video Card: Select the video card.
- Click Save.
- Start the RUCKUS Edge device by right-clicking on the name of your RUCKUS Virtual Edge machine and selecting the Power option. The interfaces are recognized, and the name is displayed as VMXNET.