Set Up Client Certificate Template Settings for NPS
In Cloudpath, certificate templates are used to generate certificates.
To set up a client certificate template using an onboard CA, perform the following steps:
- From the Cloudpath left menu, select .
- Click Add Template to create a new certificate template.
- Choose Use an onboard certificate authority and select the onboard CA you created in the previous section.
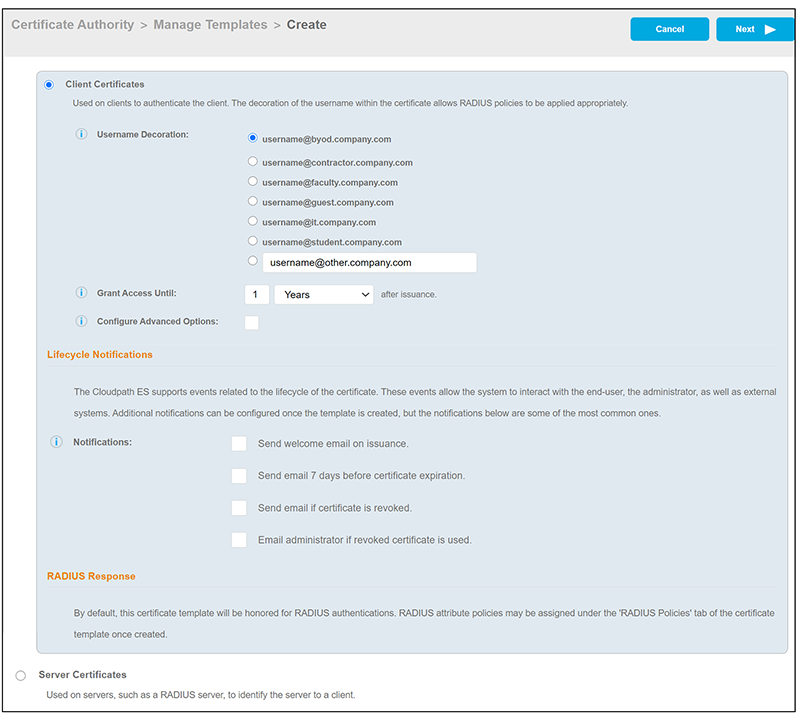
- Select Client Certificates.
- Select or enter a Username Decoration. The decoration of the username within the certificate allows RADIUS policies to be applied appropriately.
- Grant access for the appropriate amount of time.
For example, you might have client certificate template for a guest user that is valid for one, or a few days, another for a contractor that is valid for 6 months, and one for employees that is good for a year.Tip: To configure pattern attributes, certificate strength, and EKUs, check the Configure Advanced Options box before you click Next. For more information about the advanced options, refer to Client Certificate Template Advanced Options.
- Select any email notifications to be sent to the user related to the lifecycle of
the certificate.
Additional certificate notifications can be configured after the template is created.
-
slight change to wording for CP 5.8After the template has been created, you can assign RADIUS attribute policies from within the "RADIUS Policies" tab. For more information, refer to Adding RADIUS Policies to the NPS Certificate Template.Note: By default, this certificate template will be honored for RADIUS authentications.