Creating a Management Portal
Before you create a management portal, you need to create one or more properties that you wish to add to the portal. For example, Property Details Example After Adding Four Units shows a property called Building 1. The following illustration shows a property called Building 2:
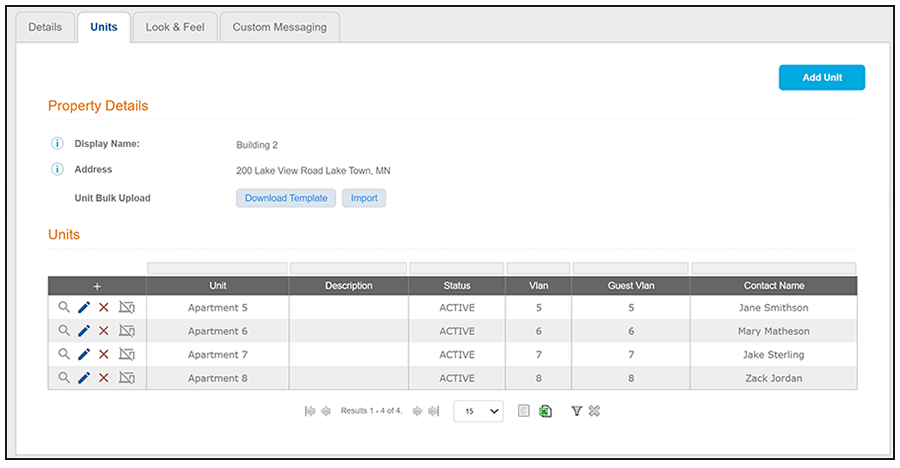
To create a management portal that contains both of these properties (for example, they could be two buildings in the same apartment complex), follow these steps:
- In the Cloudpath UI, go to Managed Access > Management Portal.
- Click Add Portal Access.
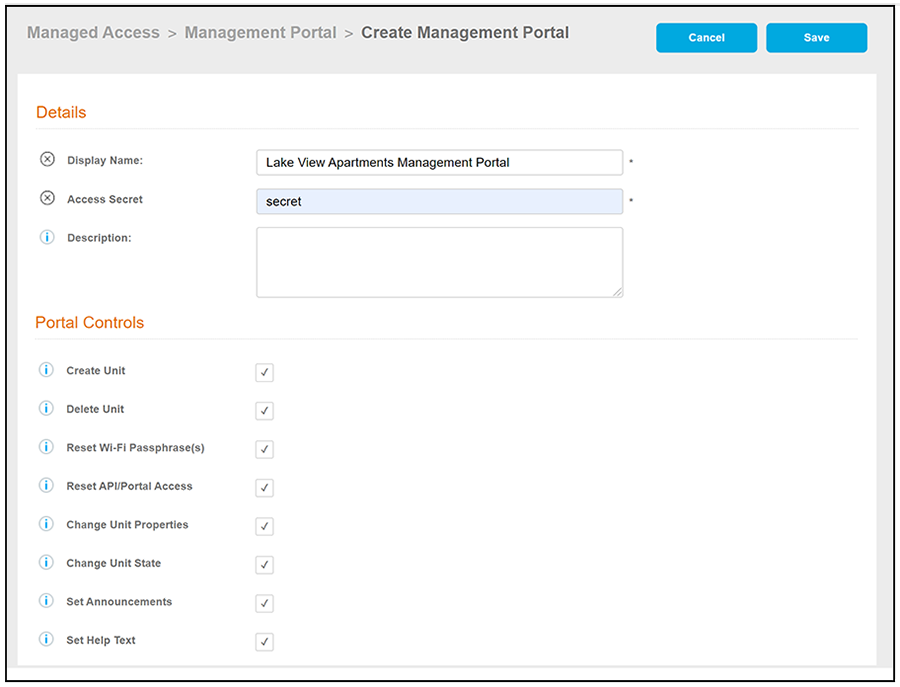
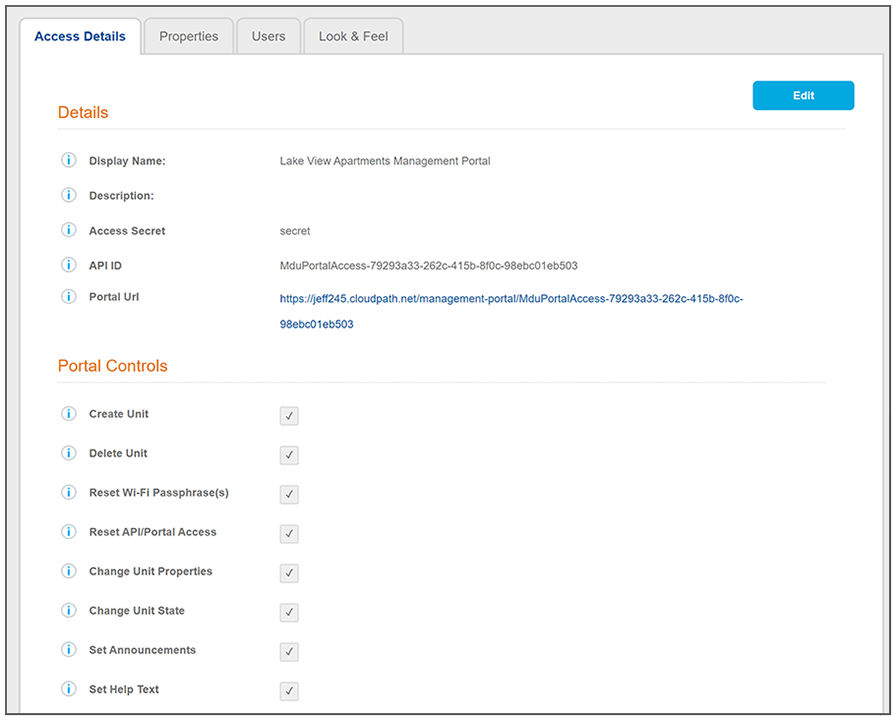
- Create the management portal, as shown and described in the following example.
- Display Name: A meaningful name for the management portal (visible only to you, as an administrator).
- Access Secret: In this field, you create a secret that will be required on login to access the management API and management portal.
- Description (optional): Description of the management portal (visible only to you, as an administrator).
- Portal Controls: Use the
check boxes to indicate which management APIs you want users of this portal
to be allowed to access. The settings you choose here also determine what
actions users of the management portal UI can perform.
Note: Once you have configured the portal, you can then add users.
- Click Save. The Access Details tab of the newly created management portal is displayed, as shown in the following example.
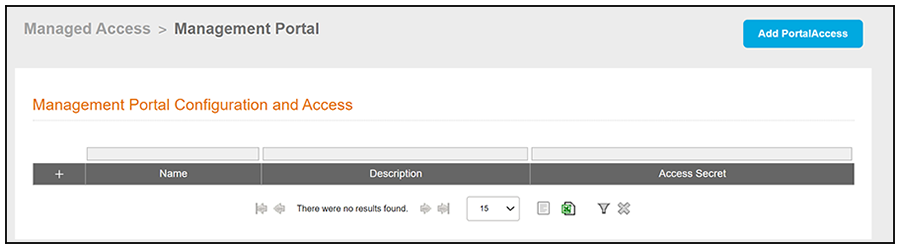
To view all configured management portals, go to Managed Access > Management Portal. The example management portal shown above is shown in the grid-view list of portals:
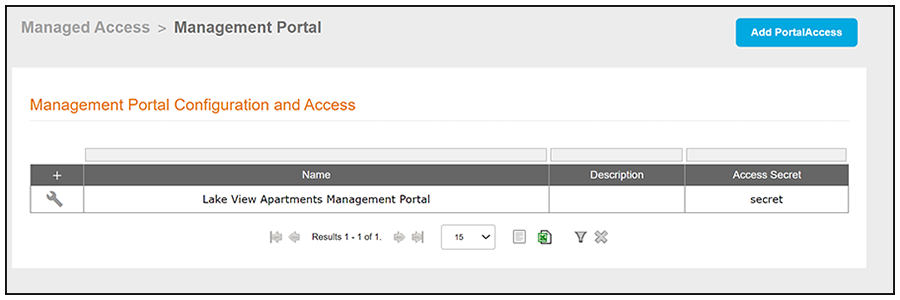
If you click on the wrench icon next to a portal, the four-tab view (shown in Newly Created Management Portal - Access Details Tab) is displayed. From there, you can go to any of the tabs.
Using the Access Details Tab of the Management Portal Configuration Screen
From the Access Details tab of a configured management portal (refer fo the example screen in Newly Created Management Portal - Access Details Tab), you can do the following:
- Click the Portal URL to be directed to the UI for this management portal. (For information about using the management portal UI, refer to Connecting to the Management Portal User Interface.)
- You will use the API ID as the GUID of this management portal in API calls.
- Use the Edit button to:
- select or de-select any of the portal controls.
- change the access secret, description, or display name.
- delete the management portal by scrolling down to the Cleanup portion of the screen and following the instructions. If you delete the management portal, the portal and all of the assigned users as well as the UI configuration data will be deleted. The properties that have been associated with this portal will not be affected.
Using the Properties Tab of the Management Portal Configuration Screen
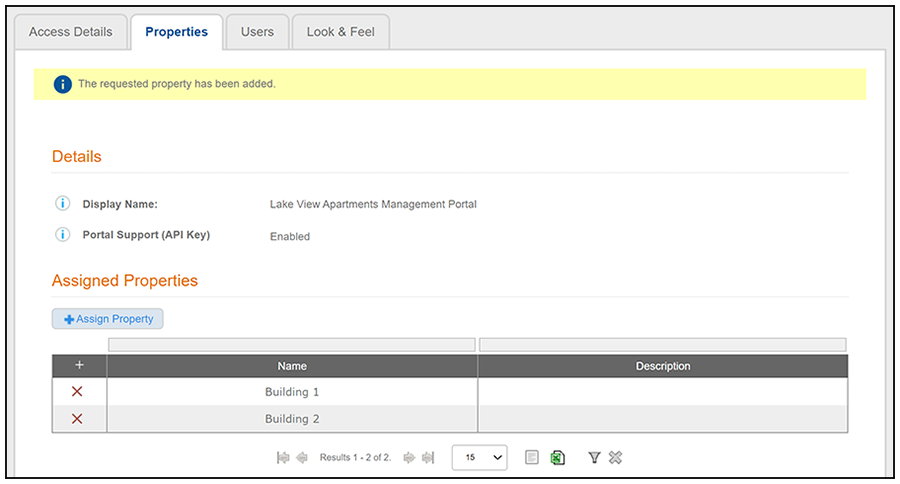
Use the Properties tab to assign properties to the management portal. For example, the following screen shows two properties (configured in the Cloudpath UI via the Managed Access > Properties path) that will be added to the example management portal shown earlier.
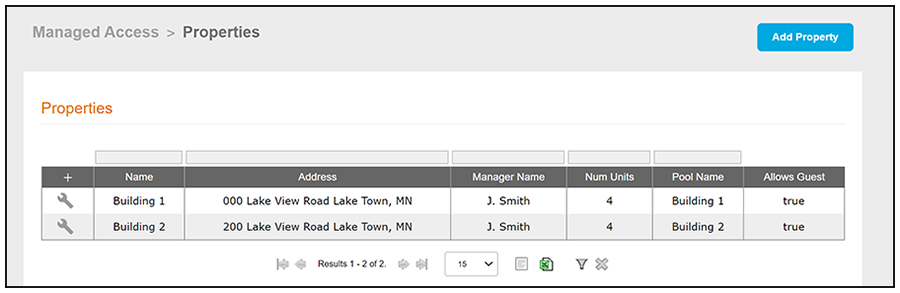
To add these two properties to the Lake View Apartments Management Portal (Newly Created Management Portal - Access Details Tab), perform the following steps:
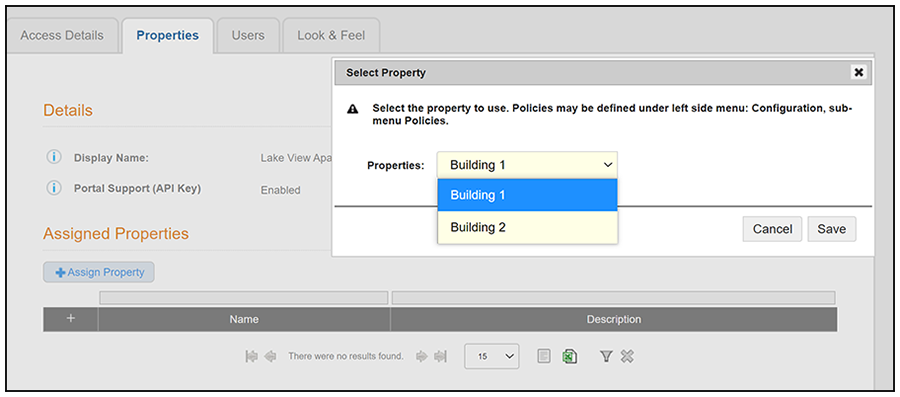
- From the Properties tab, click +Assign Property.
- On the ensuing screen, use the Properties drop-down selection to select a property you wish to add, then click Save.
- Repeat the preceding steps until you have added all the properties you want to the management portal configuration. The screen below shows that both "Building 1" and "Building 2" have been added to the Lake View Apartments Management Portal.
Using the Users Tab of the Management Portal Configuration Screen
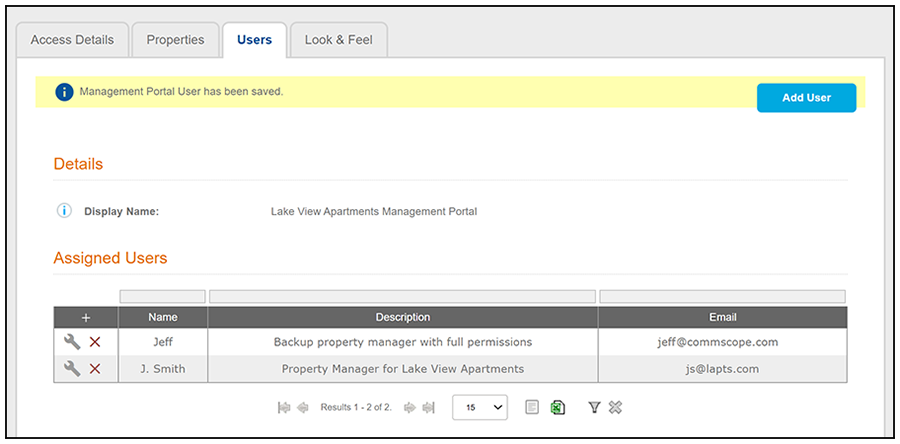
The Users tab allows you to add all the users that you want to this management portal. All users will have the same API capabiltity, which is defined in the Portal Controls portion of the Access Details tab.
To add users, follow the steps below:
- From the Users tab, click the Add User button or click + under the "Assigned Users" area.
- In the ensuing screen, enter the
email address to use when validating the user against the management portal and
the access secret.
Note: You can also enter a name and description.
- Click Save.
- Follow the preceding steps to add additional users. The following example screen shows that two users have been added: The main property manager and the backup property manager.
Other actions you can perform from the Users tab include:
Using the Look and Feel Tab of the Management Portal Configuration Screen
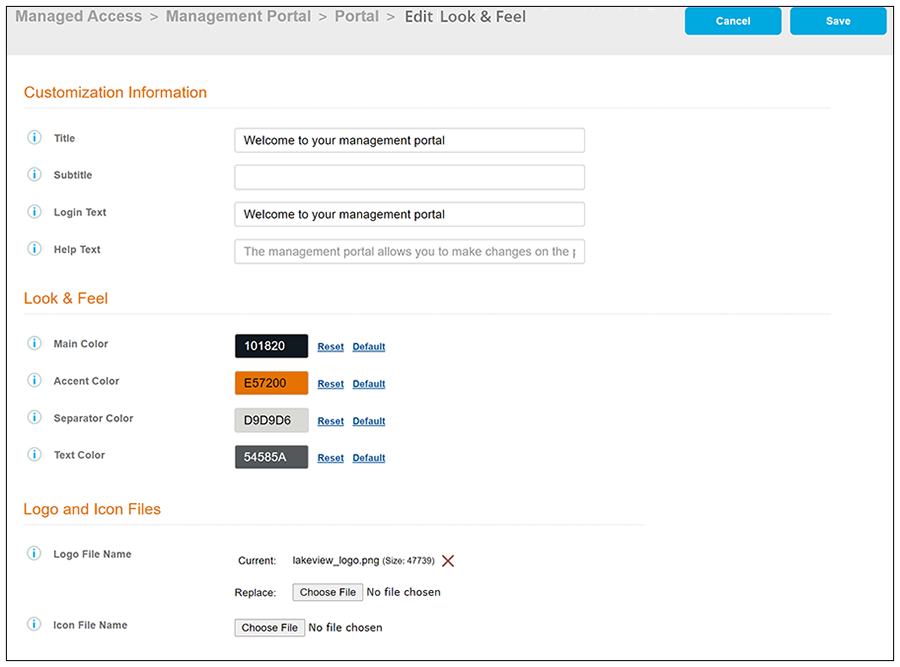
You can use the Look & Feel tab from within a management portal configuration to add a logo, color scheme, title, and subtitle for portal users. The following steps describe setting up the look and feel for the example management portal that was configured in Newly Created Management Portal - Access Details Tab.
- From the Look & Feel tab, click Edit.
- Configure the look and feel as
desired, as shown and described in the following example:
- Title: Title to display on the home page of the management portal UI.
- Subtitle: A subtitle, if desired, that provides a welcome-type message to the user and appears underneath the title.
- Login Text: Text to display when the user login screen is presented.
- Help Text: The text to display in the help page on the management portal UI. Default help text is provided, as shown in the screen example above.
- Color buttons: Use the various color buttons to create the desired look for the management portal UI.
- Logo File Name: You can
upload an image file to display the logo of your property on the
management portal UI. In this example, the name of the property is "Lake
View Apartments," which is why the imported file is named
accordingly.
Note: It is recommended that the image for the logo be no larger than 440 x 119 pixels.
- Icon File Name: Sets the favicon that is displayed in the management portal UI browser tab.
- Click Save.
Note: As soon as you save any changes that you made in the Look & Feel tab of the Cloudpath UI, these changes will be reflected on the management portal once you refresh the management portal page in your browser.