Adding a Guest Pass
If you have a user that requires temporary access to the network (for example, a
company visitor or a temporary worker), you can create a guest pass for that person.
Note: If you need to create guest
passes for multiple users, you can create them in bulk. For more information,
refer to Importing Guest Accounts in Bulk.
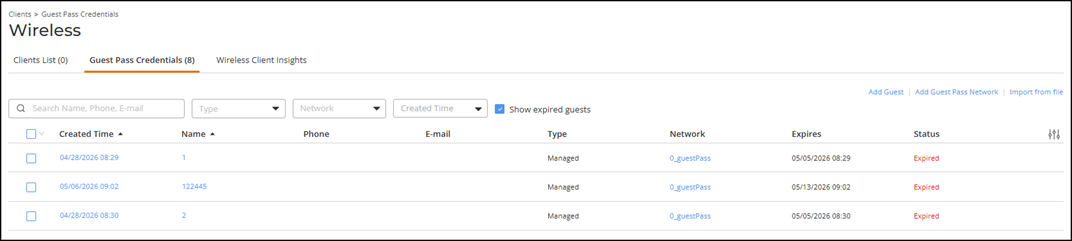
To create a single guest pass, complete the following steps. - From the menu, select .
- If you see the message “Guest cannot be added since
there are no guest networks,” click the Add Guest Pass
Network option. A modified version of the network wizard window appears with the network type preset as Captive Portal - Guest Pass. Complete the rest of the steps in Creating a Network That Uses a Captive Portal with a Guest Pass to add the guest network.
- Click Add Guest.
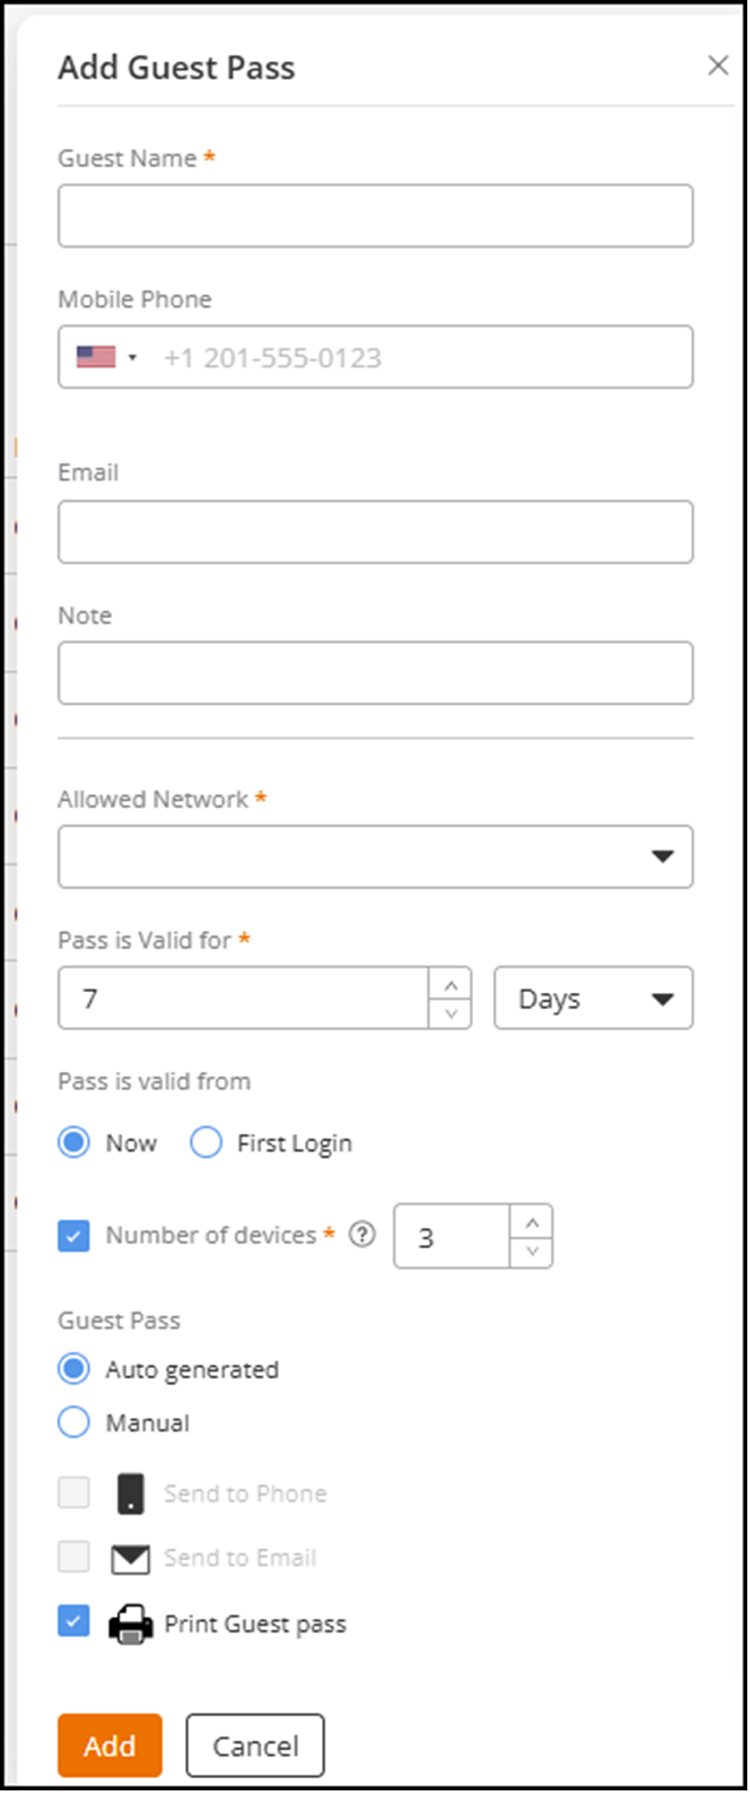
- Complete the following fields to identify the user of this guest pass:
- Guest Name: Enter the name of the guest.
- (Optional) Mobile Phone: Enter the mobile phone number of the
guest. The mobile phone number must follow the format: + {country
code}-{area code}-{phone number}. For example, you can type
+1-408-888-8888.
Note: The default country displayed in the Mobile Phone field is based on your web browser locale.
- (Optional) Email: Enter the email address of the guest.
- (Optional) Note: Enter any notes or additional information about the guest.
- Allowed Network: Select a network to which you want this guest to have access. Only managed guest networks appear on this list. If you have not created a managed guest network, this list will be empty.
- Pass is valid for: Select the number of hours or days for which the guest pass will be valid.
- Pass is valid from: Select either Now or First Login.
- Number of devices: Select this checkbox to limit the number of devices on which the guest pass can be used simultaneously, and enter the required value.
- Guest Pass: Select one of these options to create the password:
- Specify how you want the guest user to receive the instructions for activating the
guest pass. Options include:
- Send to Phone: Select this checkbox to send the guest pass information to the guest's phone via SMS. This option requires a Mobile Phone number be defined.
- Send by Email: Select this checkbox to send the guest pass information to the guest's email address. This option requires an Email address be defined.
- Print Guest
Pass: Select this checkbox to print a hard copy of the guest
pass information, which you can give to the guest user.
Note: If you are printing the guest pass information, remember to temporarily disable the pop-up blocker of your web browser (if enabled).You can select multiple guest pass delivery methods.
- Click Add.