Activating and Editing the BLE Scan Plugin
The RUCKUS IoT Controller provides
support for the Bluetooth Low Energy (BLE) BLE Scan Plugin . The RUCKUS IoT Controller reads the packet from the IoT AP and routes the packets to
the BLE beacon vendor cloud services.
To establish a connection to a vendor infrastructure, the administrator must perform the following steps.
- From the main menu, click Admin.
- In the left navigation pane, click Plugins.
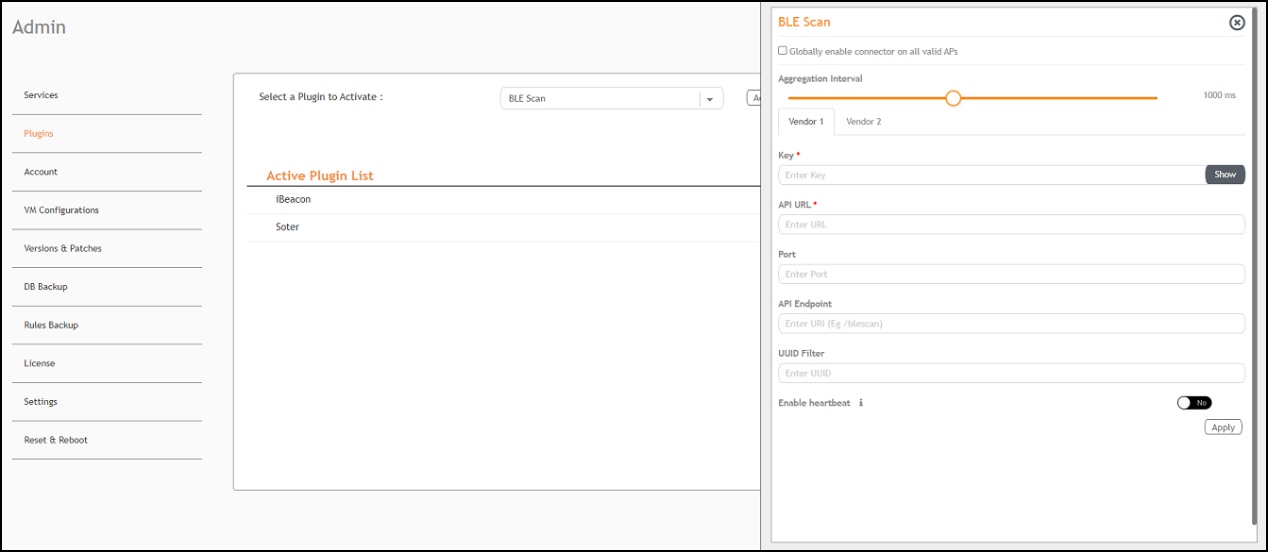
- In the Select a Plugin to Activate list, select the BLE Scan plugin and click Activate.
- After the BLE Scan plugin is
activated, enter the following configuration parameters.
- Select Globally enable
connector on all valid APs to add all respective IoT APs
automatically. Connectors are mapped to IoT AP by adding the connector
name tag to the IoT AP. Note: If Globally enable connector on all valid APs is not selected, you can activate the plugin for each AP by adding a tag. Refer to Adding Tags to an AP for more information.
- For Aggregation Interval, set the time interval between the two packets.
- Enter the Key.
- Enter the API URL.
- Enter the Port number.
- Enter the API Endpoint.
- Enter the UUID Filter. The filter allows only the BLE ADV packets with the specified UUID to be passed on to the vendor application.
- Enable heartbeat. Enabling heartbeat allows the vendor application to receive the IoT AP status, such as online or offline.
- Select Globally enable
connector on all valid APs to add all respective IoT APs
automatically. Connectors are mapped to IoT AP by adding the connector
name tag to the IoT AP.
- Click Apply.
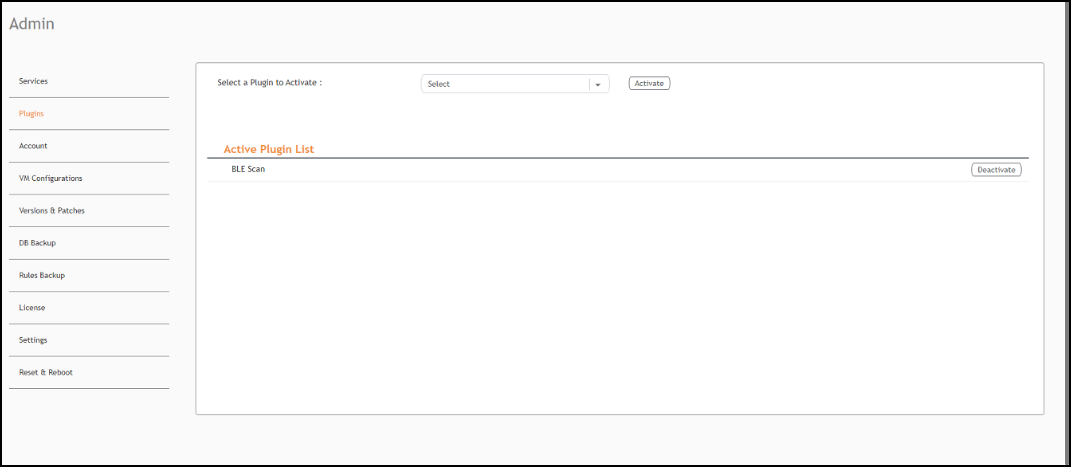
- To deactivate the BLE Scan plugin, select it and click Deactivate.
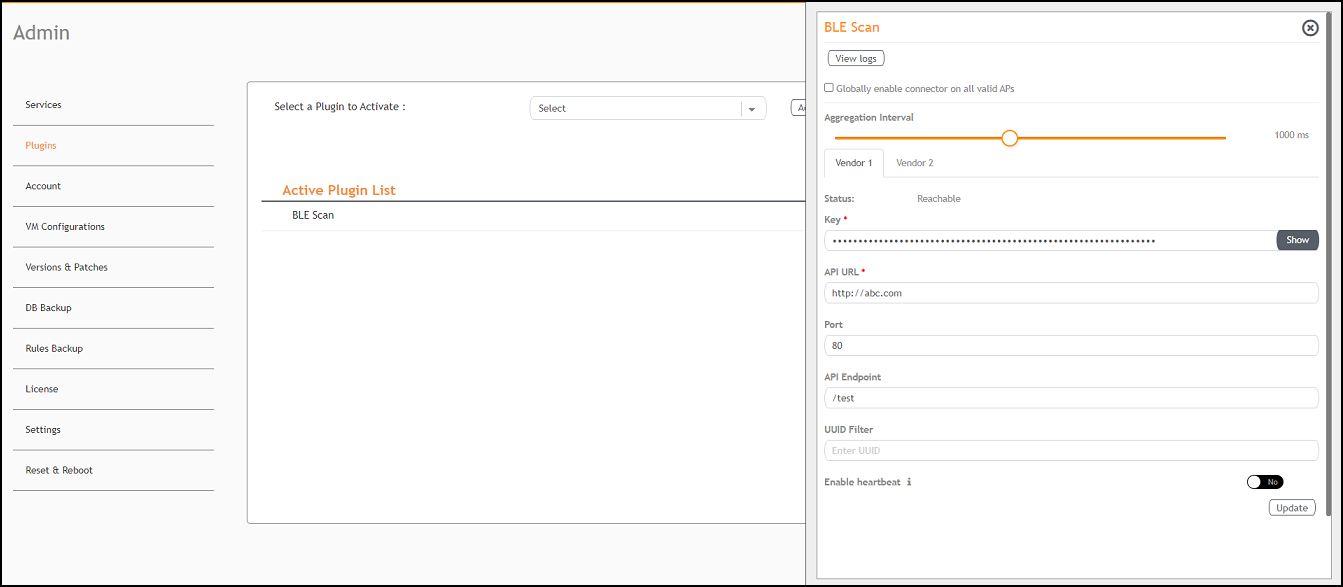
- To edit the configuration of the BLE Scan plugin, select it and click Update.