How an Access Point or Access Switch Gets Assigned to a Unit
Assigning an AP to a Unit
- To assign an AP and an ethernet port, click the magnifying glass for a unit such as unit 1a in Property Details Example After Adding Two Units.
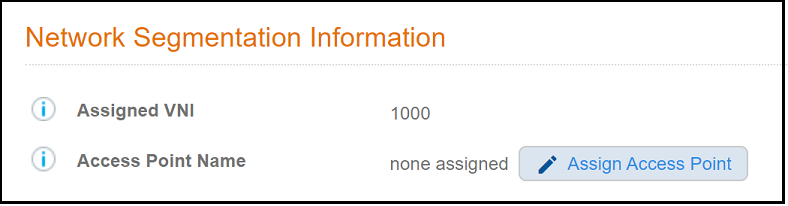
- In the "Network Segmentation Information" section of the ensuing screen, click Assign Access Point.
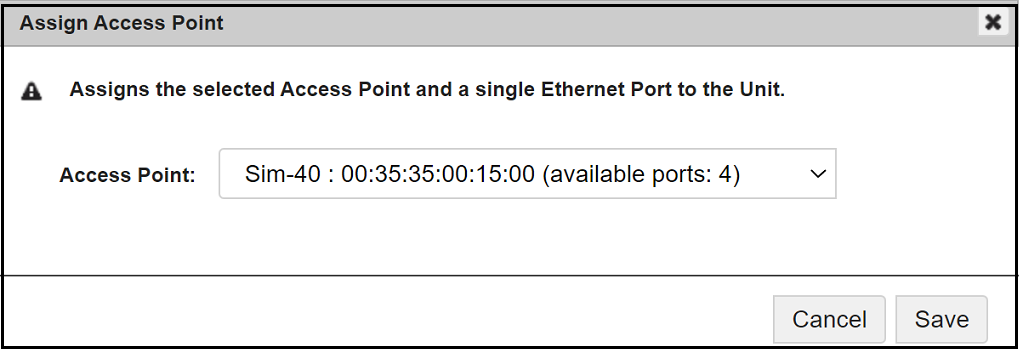
- From the Access Point drop-down (see screen below), select the AP and a single ethernet port to assign to the Unit, then click Save.
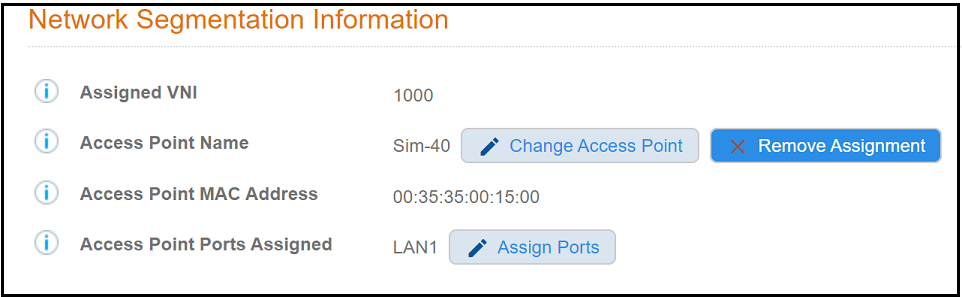
- After your selection is saved,
you can check that the "Network Segmentation Information" on the screen reflects
the selection, as shown in the following screen example:
You can use the buttons shown as follows:
- Change Access Point: This button allows you to change your selection from the Access Point drop-down list.
- Remove Assignment: This button removes the access point and ethernet port assignments from the unit.
- Assign Ports: This button invokes a popup screen that shows available ethernet ports you can select.
- Repeat the preceding steps to assign APs to other units in the property.
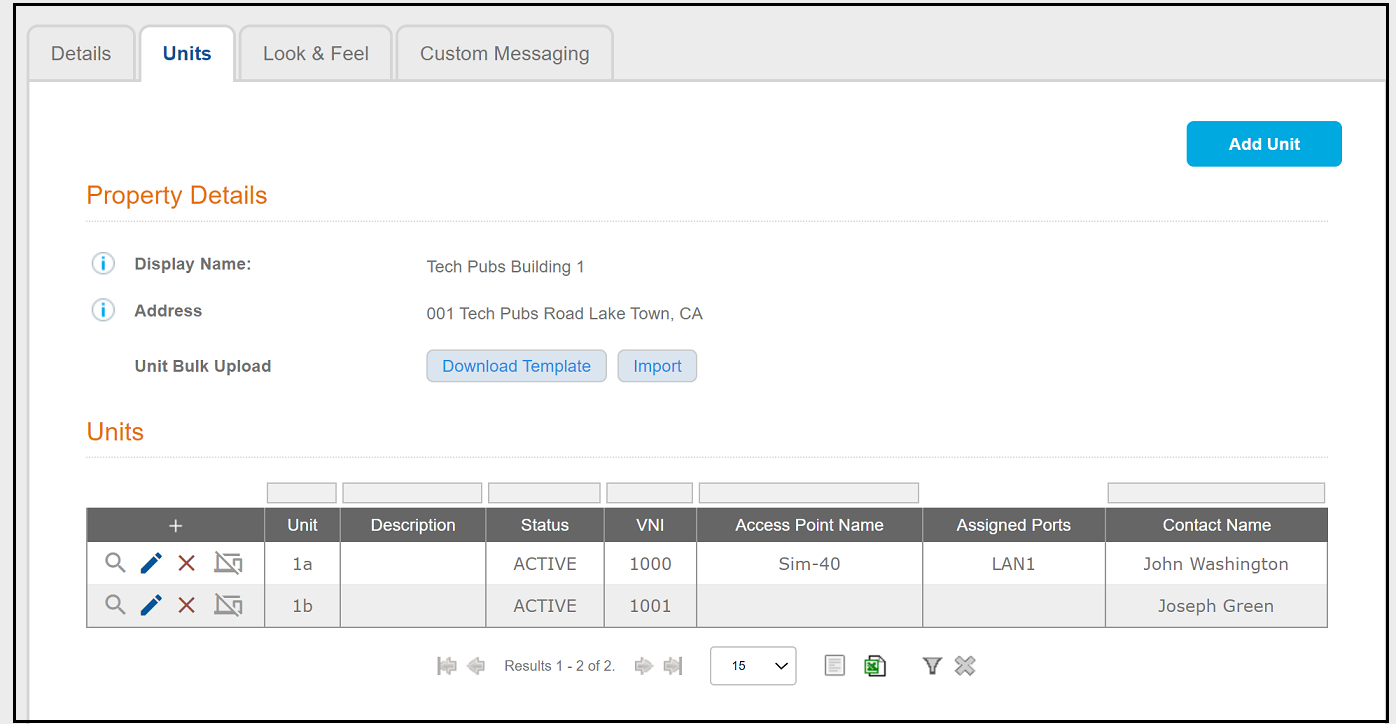
- If you return to the Units tab view of the property, the access points and port selections you have made now appear:
How an Access Switch and VLAN Get Assigned to a Unit
The port on the access switch (also called the "edge switch") that is physically connected to a specific unit is determined by the network administrator.
To complete the switch assignment, the end user must be authenticated. After authentication occurs, Cloudpath assigns a unique VLAN to the unit from a pool of VLANs configured on SmartZone for the network segmentation profile,
Therefore, the following steps must occur for the end user to be authenticated and the switch assignment to be completed.
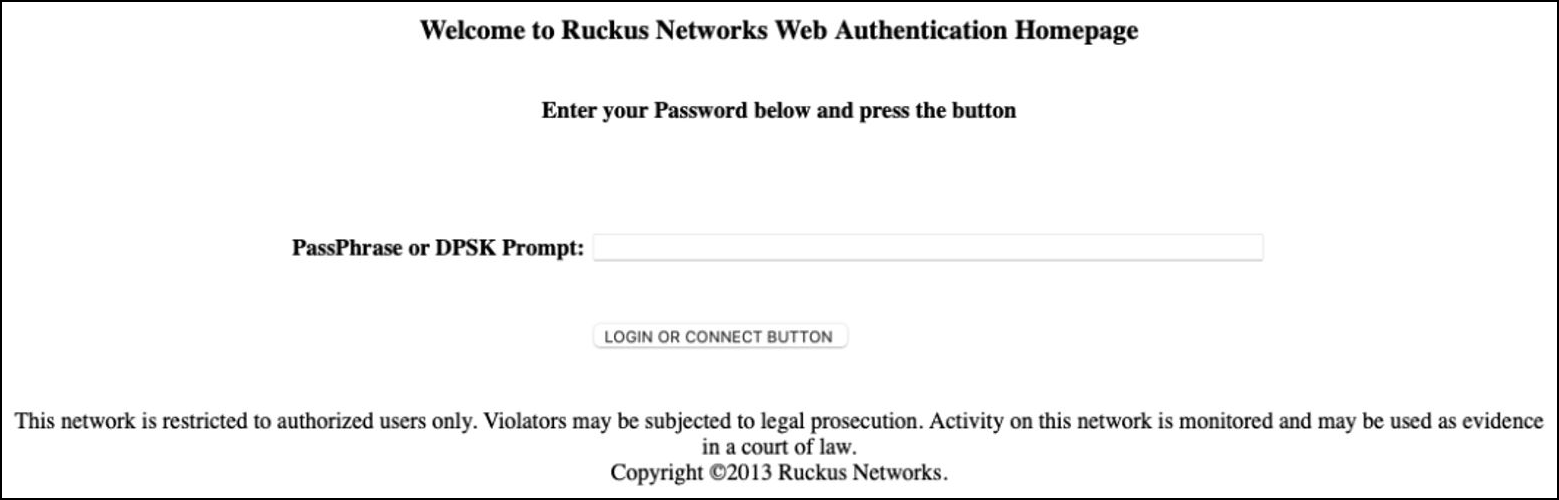
- The end user plugs their device into the switch port for their unit. This invokes a captive portal - the Web Authentication page - where the user logs in.
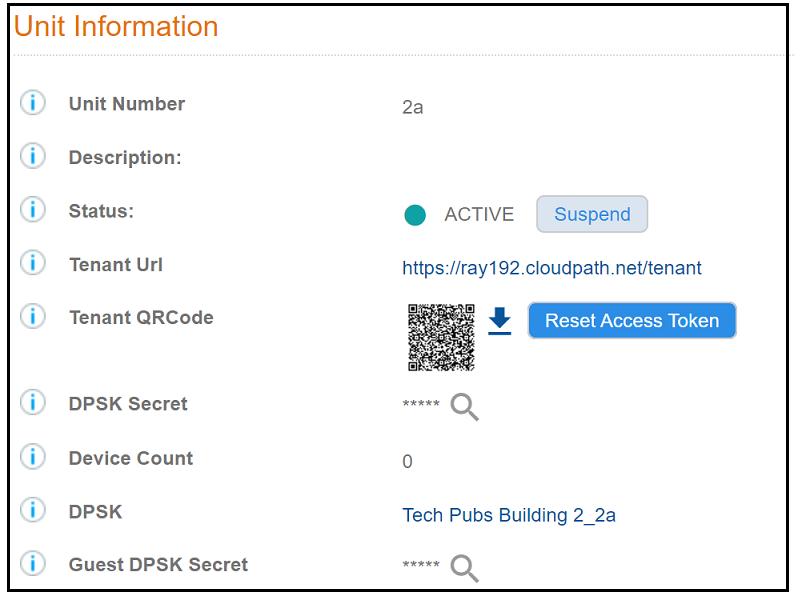
- In the "PassPhrase or DPSK Prompt" field (the exact name of this field is determined by the network administrator in Setup Access Switches in the "Password Label" field,) the DPSK secret for the unit (or the Guest DPSK, if applicable) must be entered. The DPSK secret must be provided by the network administrator to the end user. To find the DPSK secret, navigate to the following location in the Cloudpath UI: Managed Access > Properties, then click the wrench icon of the desired property, click the Units tab, then click the magnifying glass of the unit whose DPSK secret you need. The Unit Information portion of the Unit screen for Unit 2a is shown below:
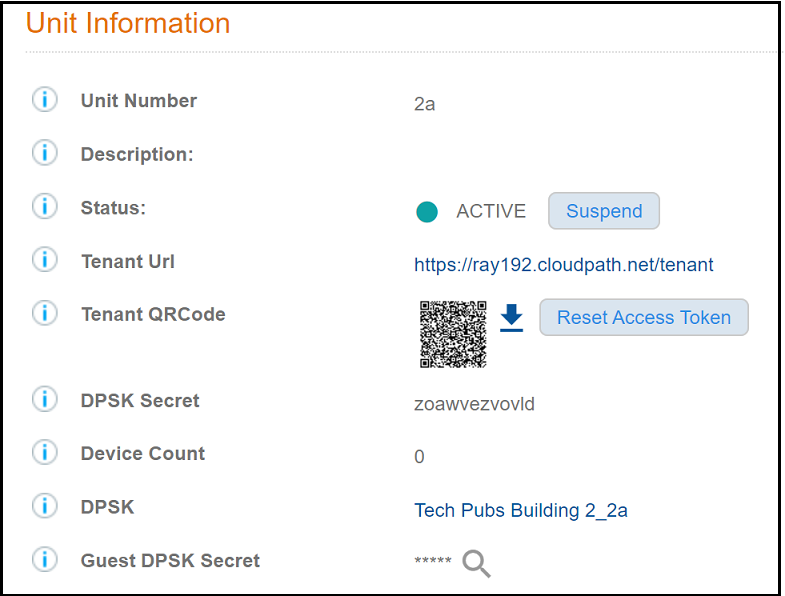
- Click the magnifying glass to reveal the DPSK secret, as shown in the example
below:
The key "zoawvezvovld" is the password that the unit 2a user would need to enter in the Web Auth page.
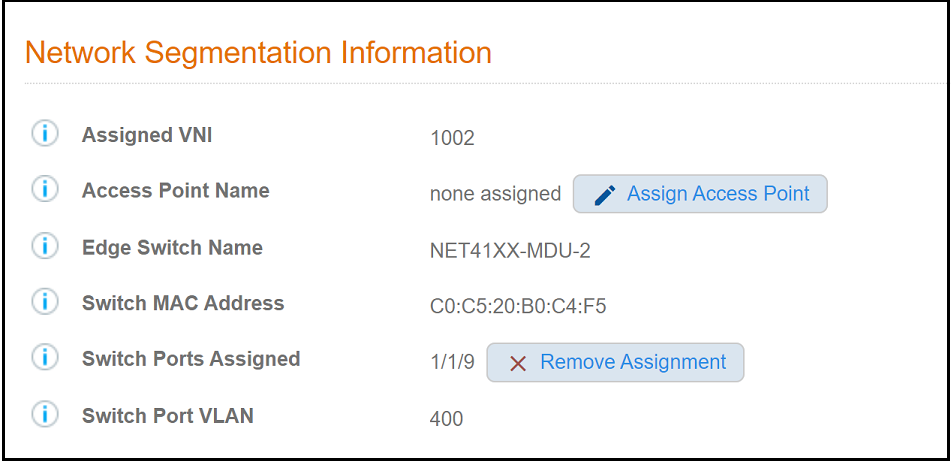
- As network administrator, you may want to check the "Network Segmentation Information" portion of the Unit screen for Unit 2a to make sure that the switch port and VLAN assignments are now reflected there, as shown in the example screen below:
- The preceding steps can be followed to assign switch ports and VLANs to other units in the property.
- To view all VLAN assignments in the network segmentation group:
- In the Cloudpath UI, navigate to Managed Access > Network Segmentation.
- Click the wrench icon for the network segmentation group.
- Click the Distribution Switches tab.
- Click the magnifying glass icon for the distribution switch.
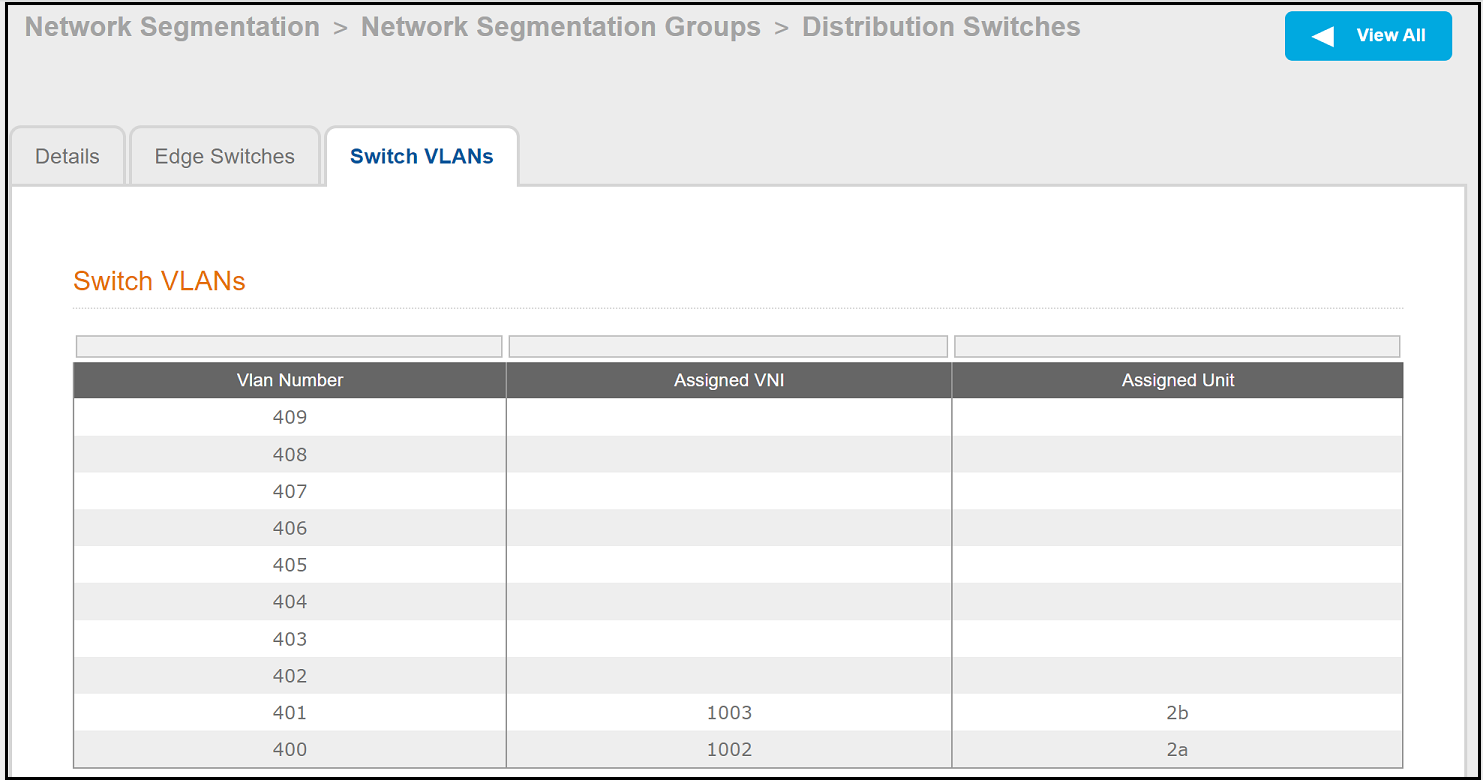
- Click the Switch VLANs tab. The Switch VLANs table is displayed,
as shown in the example below:
The table shows all VLANs that have been assigned to units in the network segmentation grouo as well as their corresponding assigned VNIs. The available VLANs and available VNIs are based on the configuration on SmartZone for this network segmentation profile.
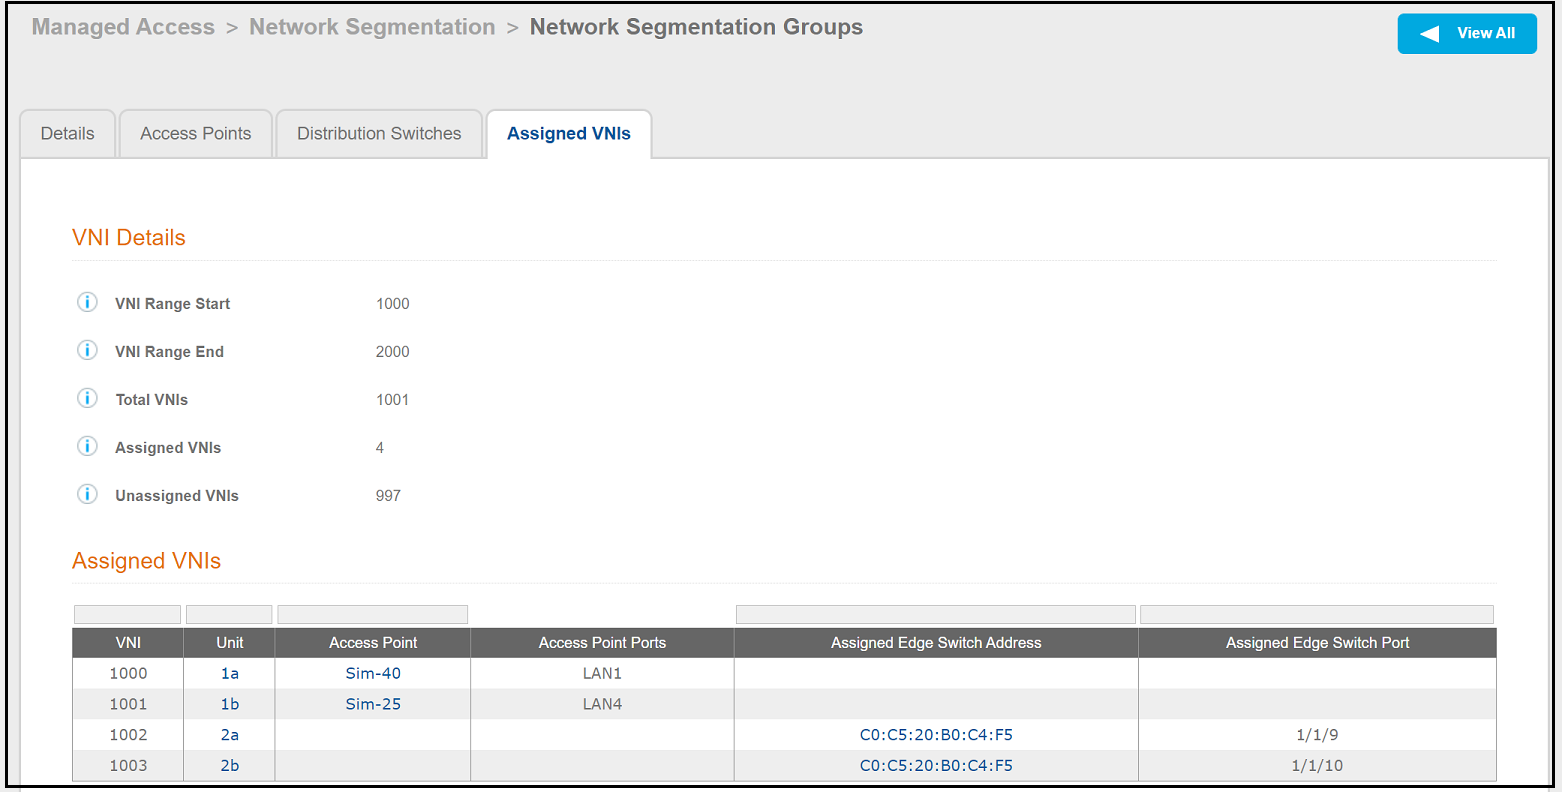
Example of Assigned VNIs After APs and Switches Have Been Added
The following example screen shows the information that the Assigned VNIs tab provides if your network segmentation group is currently using both APs and switches. Navigate in the Cloudpath UI to Managed Access > Network Segmentation Groups, then click the wrench icon for the group, then click the Assigned VNIs tab.