Creating an eDPSK Pool for a Property
Before you can create a property to add to
your Network Segmentation group, you need to create an eDPSK pool. One (and only one)
eDPSK
pool must be assigned to a property.
To create a new eDPSK pool, follow these steps:
- In the Cloudpath UI, go to Configuration > DPSK Pools.
- Click Create DPSK Pool.
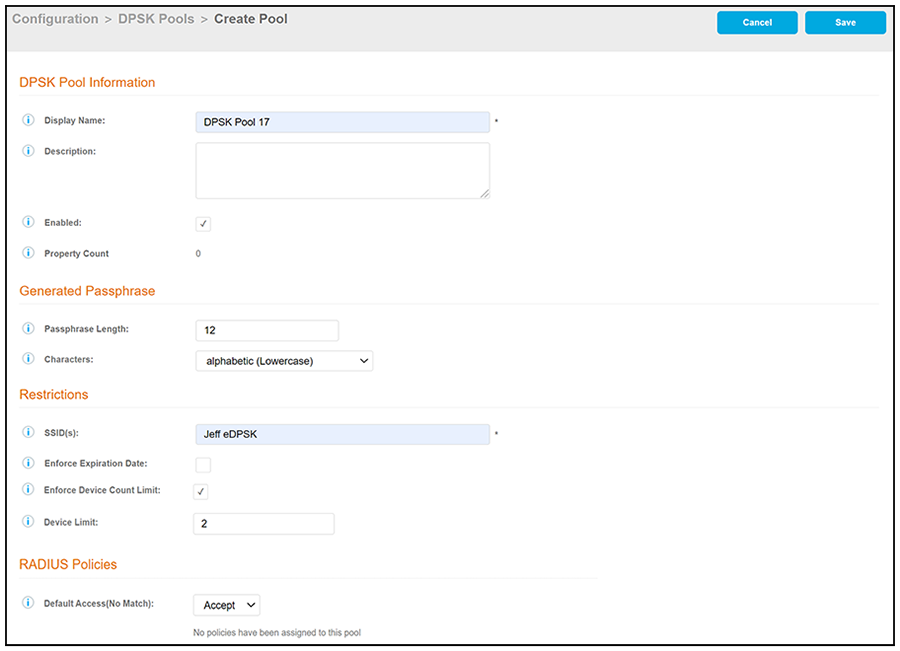
- In the ensuing Create Pool screen,
enter the information to create the pool, then click Save. The following screen
shows an example. For detailed steps, see the Cloudpath Enrollment System
External Dynamic Pre-Shared Key (eDPSK) Configuration Guide.
Note: The SSID field value must match the SSID that you created in SmartZone. Also, if you assign more than one SSID to the pool, the tenant portal will not include a button that displays the QRCode for either the wi-fi passphrase or the guest wi-fi passphrase. (For more information about how the tenant portal is used, refer to the Cloudpath Enrollment System Property Management Adminitration Guide.)
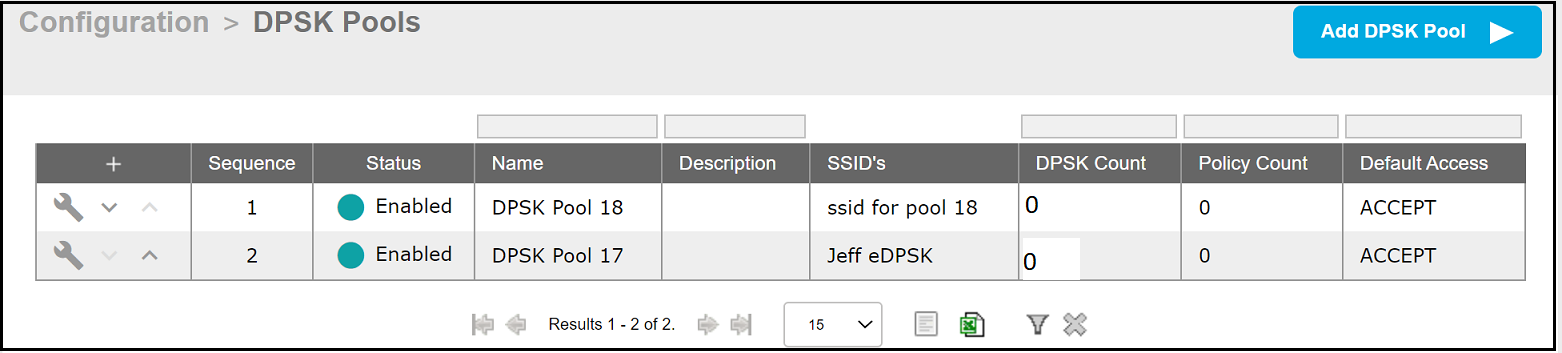
- Create any additional pools you will need. For example, if you plan to create two properties for your network segmentation profile, you should create two pools - one for each property. The following example screen (in the UI, navigate to Configuration > DPSK Pools) shows the creation of two pools that will be used later as part of an example.