Configuring the Certificate Template for the Microsoft CA
The certificate template allows the
certificates to be pulled from the Microsoft CA.
Section re-written for 5.8
- Navigate to .
- Click Add Certificate Template to create a new certificate template.
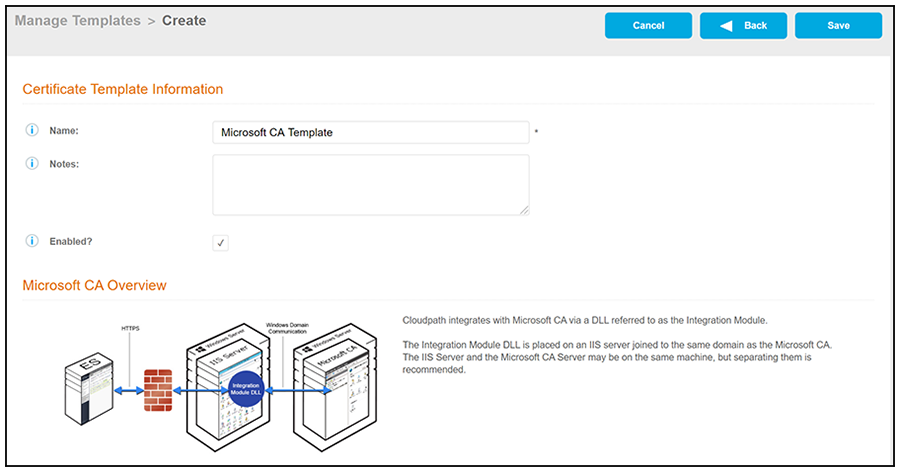
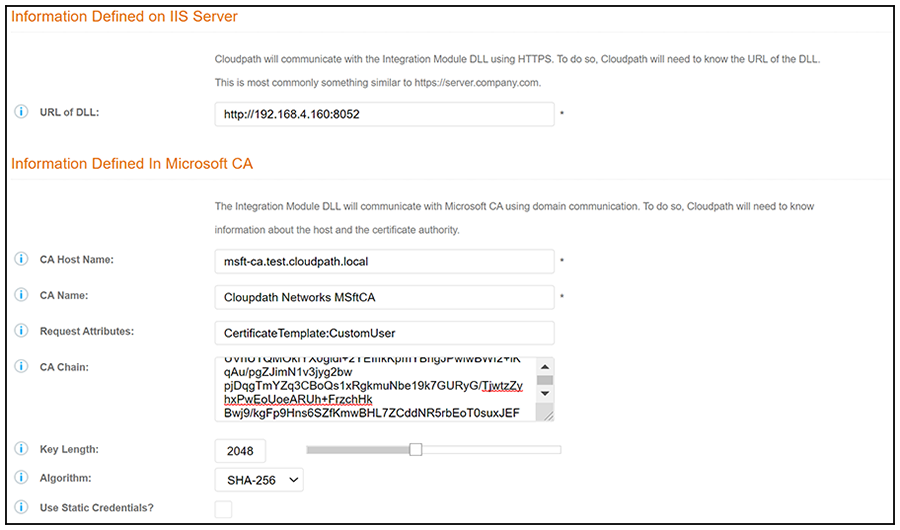
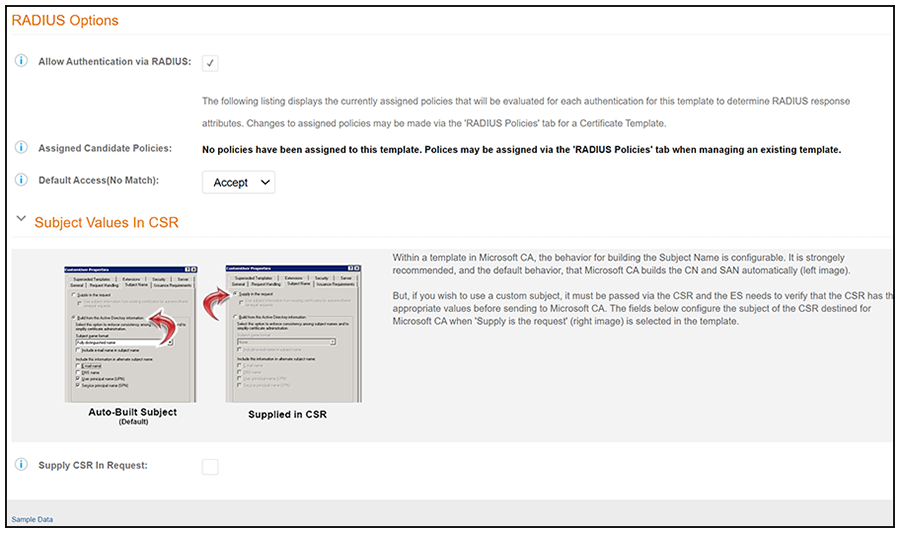
- Select Use a Microsoft Certificate Authority, then click Next. The following three screens show the complete Microsoft CA Certificate Template Information configuration screen that is displayed. Sample data is shown in these screens, then described following the screens.
- In the Certificate Template Information portion of the screen, enter the Name and Notes for the certificate template, and make sure the "Enabled" check box is selected.
- Enter the URL of the DLL in order for
Cloudpath to communicate with the Integration Module DLL using HTTPS.
Note: If you configure or change settings in the Microsoft CA certificate template, then you must download and install a new copy of the DLL and files.
- Enter the "Information Defined In
Microsoft CA" settings:
- CA Host Name: The DNS name of the CA server.
- CA Name: The name of the CA, which appears in the Certificate Authority console.
- Request Attributes: The attributes used when querying the CA. This typically includes, at a minimum, the certificate template name. For example, Certificate Template:User.
- CA Chain: Specify the CA Chain. The client configuration must include the root, and if applicable, the intermediate CAs. The certificates should be concatenated together in PEM format.
- Key Length: The key length, as dictated by the CA, for certificate signing requests.
- Algorithm: The algorithm, as dictated by the CA.
- Use Static Credentials?: By default, the system uses user-provided credentials when interacting with the Microsoft CA. Check this box if you want to configure static username and password to use when interacting with the Microsoft CA.
- The "RADIUS Options" section of the
screen contains the following:
- Allow Authentication via RADIUS: If checked, the RADIUS server will contain policy information and RADIUS attributes (VLAN, Filter ID, and so on) for this certificate template.
- Assigned Candidate Policies: Polices are not listed here until you assign one or more policies to this certificate template. After you complete the configuration of this template, you can assign policies by referring to the instructions in the Adding RADIUS Policies to the CA Certificate Template. Once added to a certificate template, policies are evaluated (in the order they are listed) for each authentication so that this template can determine the corresponding RADIUS response attributes.
- Default Access (No Match): When no policies are assigned, or when policies are assigned but no match is found against any of the policies, the default access for authentication will either be accepted or rejected, depending on this setting.
- Use the Specify Subject Values in CSR settings if you want to configure the subject of the CSR destined for Microsoft CA when the template is set to "Supply in request."
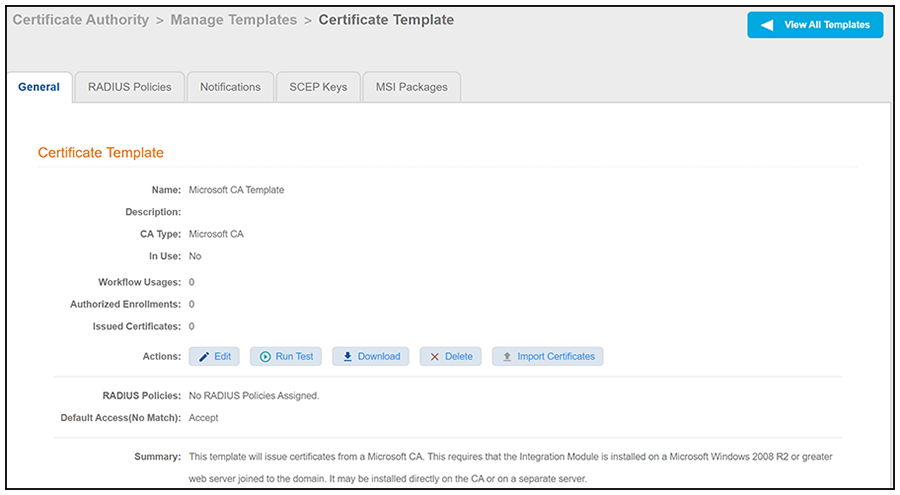
- Click Save. The five-tab view of
the newly created template is displayed, as in the following example:
screen shot below being re-sized
- From this view, you can do the following:
- Assign policies by clicking the RADIUS Policies tab. For more information, refer to Adding RADIUS Policies to the CA Certificate Template.
- Add notifications, SCEP keys, or MSI packages by clicking on the corresponding tabs.
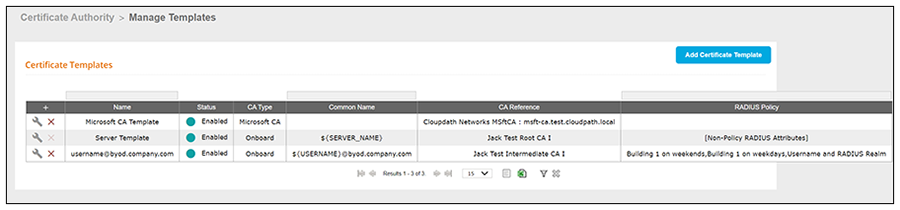
- Click "View All Templates" in the upper right portion of the screen to return to a view of all configured templates, as shown in the example screen below: