Activating and Editing the iBeacon Plugin
Activate the plugin to manage iBeacons.
The RUCKUS IoT Controller securely routes the data to the configured endpoints.
To establish a connection to a partner infrastructure, the administrator must perform the following steps.
- From the main menu, select .
- Click Plugins.
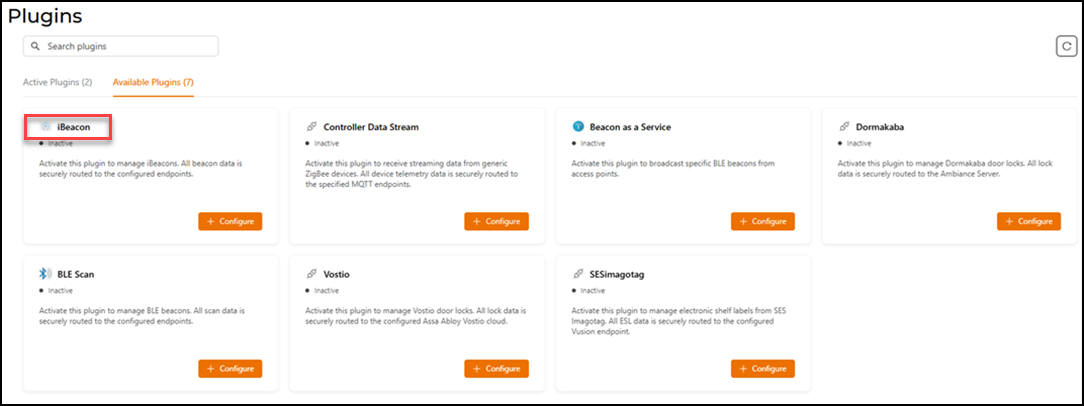
- Click the Available Plugins tab.
- In the iBeacon tile,
click +
Configure to activate the plugin.The iBeacon Configuration sidebar is displayed.
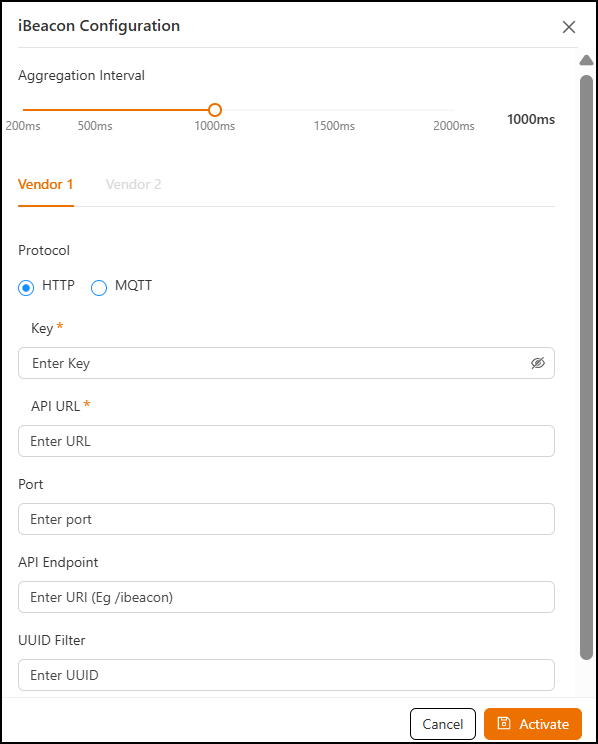
- Select either the HTTP or
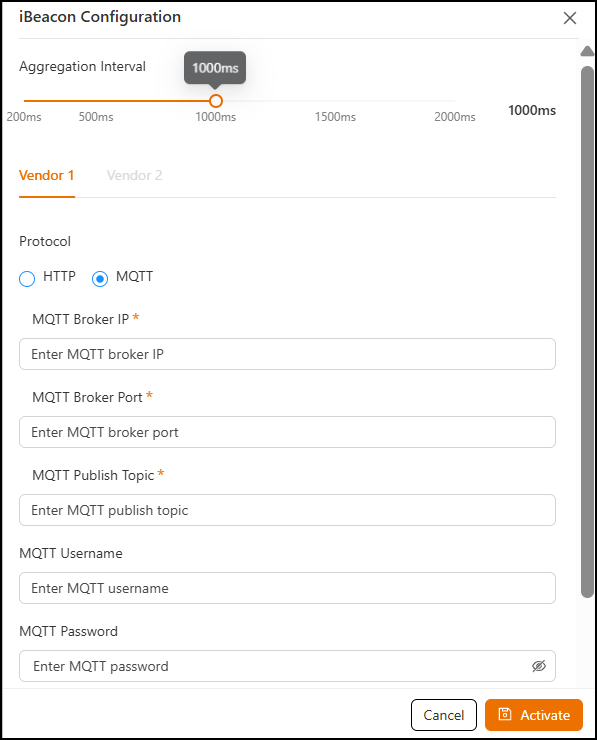
MQTT
protocol option.
- Aggregation Interval: Allows you to set the time interval between two packets.
- Key: Enter the key.
- API URL : Enter the API URL.
- Port: Enter the port number.
- API Endpoint: Enter the API Endpoint.
- UUID: Enter the UUID Filter. The filter allows only the BLE ADV packets with the specified UUID to be passed on to the vendor application.
- Enable heartbeat: Click the toggle to enable periodic heartbeat messages, which is useful for monitoring connection health. This option is disabled by default.
- MQTT Broker
IP: Enter the IP address or hostname of the
broker.This is a mandatory field.
- MQTT Broker
Port: Enter the port number.This is a mandatory field.
- MQTT Publish
Topic: Topic where messages from this device/system will
be published.This is a mandatory field.
- MQTT Username: Enter the username for authenticating with the MQTT Broker.
- MQTT Password: Enter the password for authenticating with the MQTT Broker.
- UUID
Filter: Enter the required UUID filter.The filter allows only the BLE ADV packets with the specified UUID to be passed on to the vendor application.
- Enable heartbeat: Click the toggle to enable periodic heartbeat messages, which is useful for monitoring connection health. This option is disabled by default.
- Click Activate to save the changes.
- (Optional) Click Configure to edit the existing configuration.
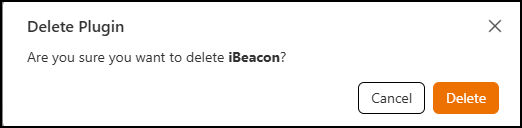
- (Optional) Click Delete to delete the plugin.