Pre-Approving IoT Devices
Pre-approving IoT devices is the process
of granting specific devices permission to access a network before they attempt to
connect.
This is typically carried out during the onboarding or deployment of new devices in
environments where security and device management are critical, such as industrial
settings
or smart homes.
Administrators gather device details, such as MAC addresses or install codes, and register them using a management interface. They associate the devices with specific access points, configure settings such as blacklisting or tagging, and set permissions. Once pre-approved, these devices are automatically allowed to connect, ensuring only trusted devices access the network. The outcome of pre-approval is enhanced security, streamlined device management, and reduced risk of unauthorized access.
Complete the following steps to pre-approve IoT devices.
- From the main menu, click
IoT Devices.The IoT Devices page is displayed.
- Click Pre-Approve IoT Devices.
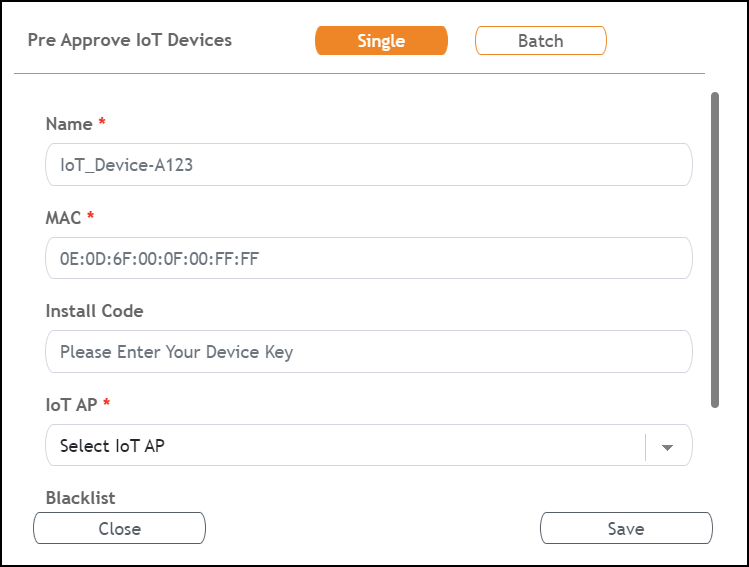
- For adding a single device,
click Single.Complete the following configurations.
- Name: Enter the device name.
- MAC: Enter the MAC address of the device.
- Install Code: Enter a device key.
- IoT AP: Select an IoT AP from the drop-down list that the device will connect to.
- Blacklist: Select Yes or No from the drop-down list. If Yes is selected, the device is prevented from accessing the network.
- Tag: Enter a name for the tag to help categorize or identify the device.
- Click Close to close the window without saving the changes.
- Click Save to save the entered information.
- For adding devices in bulk, click Batch.Complete the following configurations.