Gateway Onboarding
- Log into AP console and set IoT
Controller IP using the command
set iotg-mqtt-brokerip
                     <iot controller ip address>
. - Log in to controller UI. From the main menu, click IoT APs.
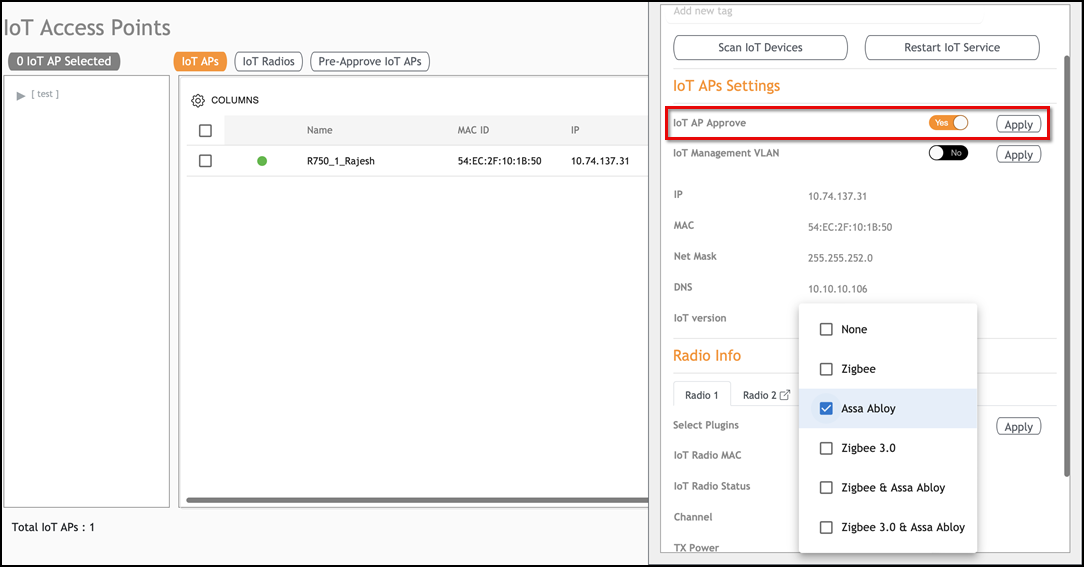
- Toggle the IoT AP Approve button to Yes to approve an AP.
- Configure the plugin by
performing the following steps.
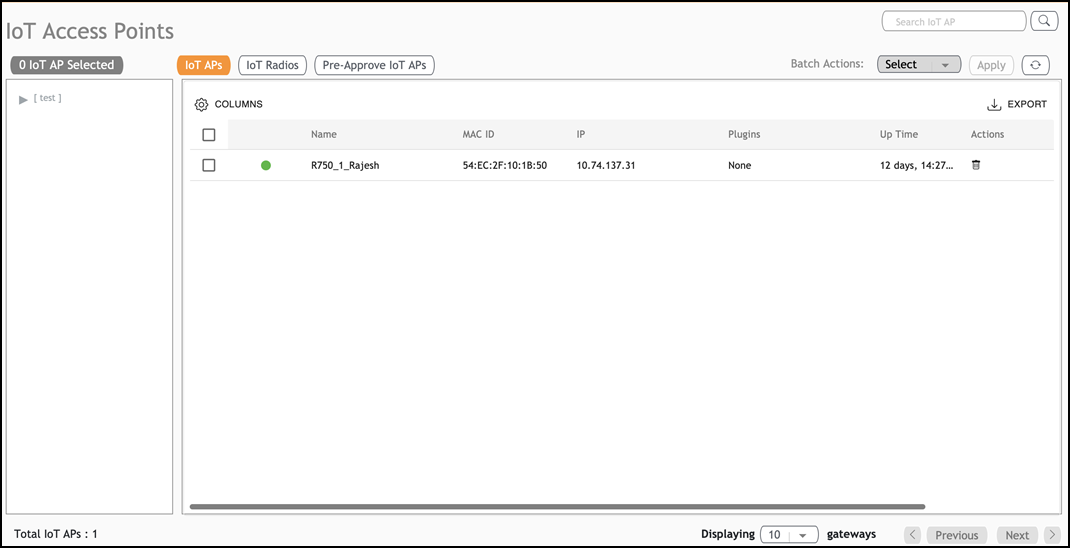
- Approve the AP in an IoT APs page. Ensure the Plugins column displays None.
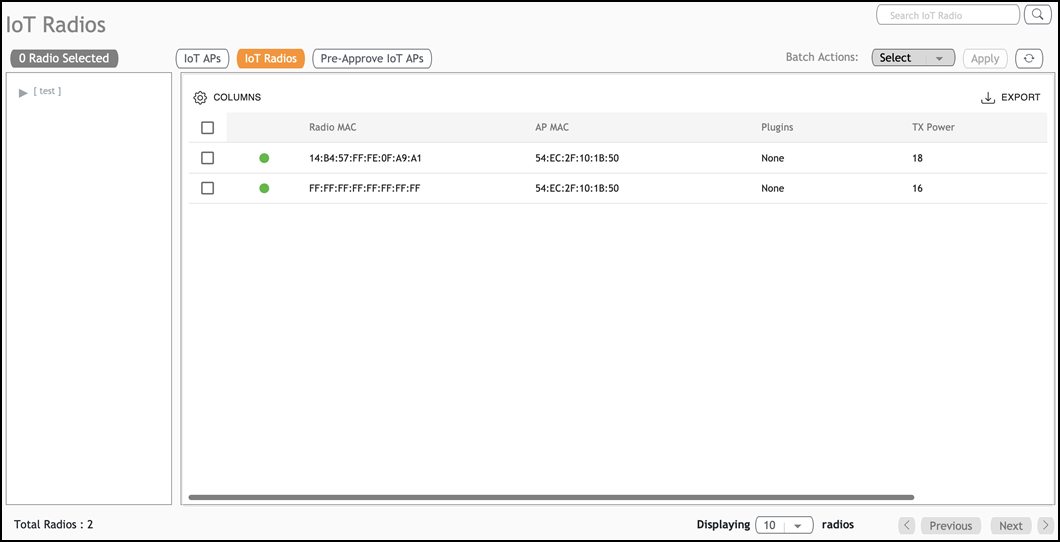
- (Optional) Click the IoT Radios tab. Select a radio and ensure the Plugins column displays None.
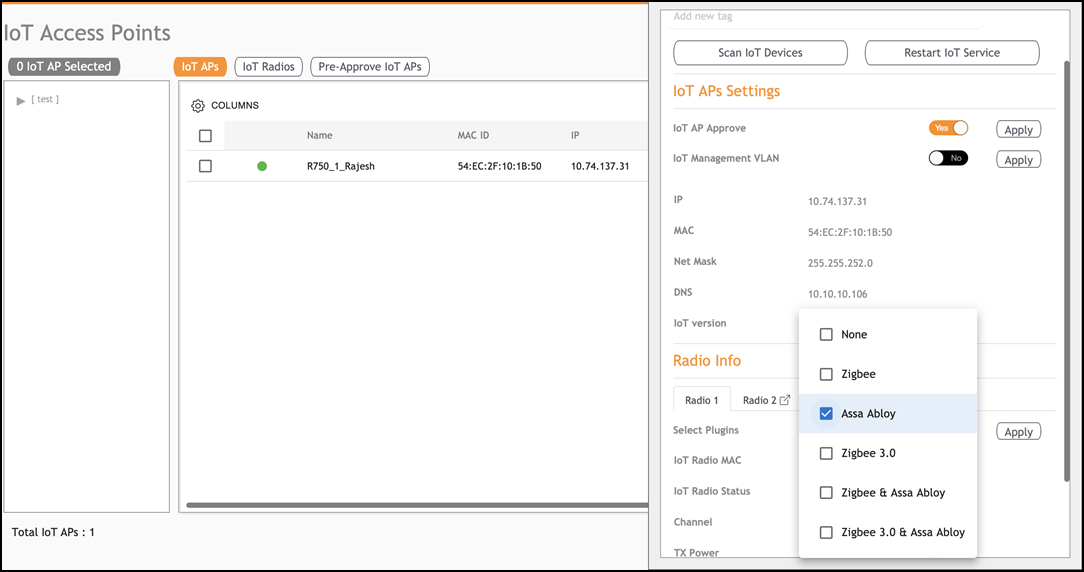
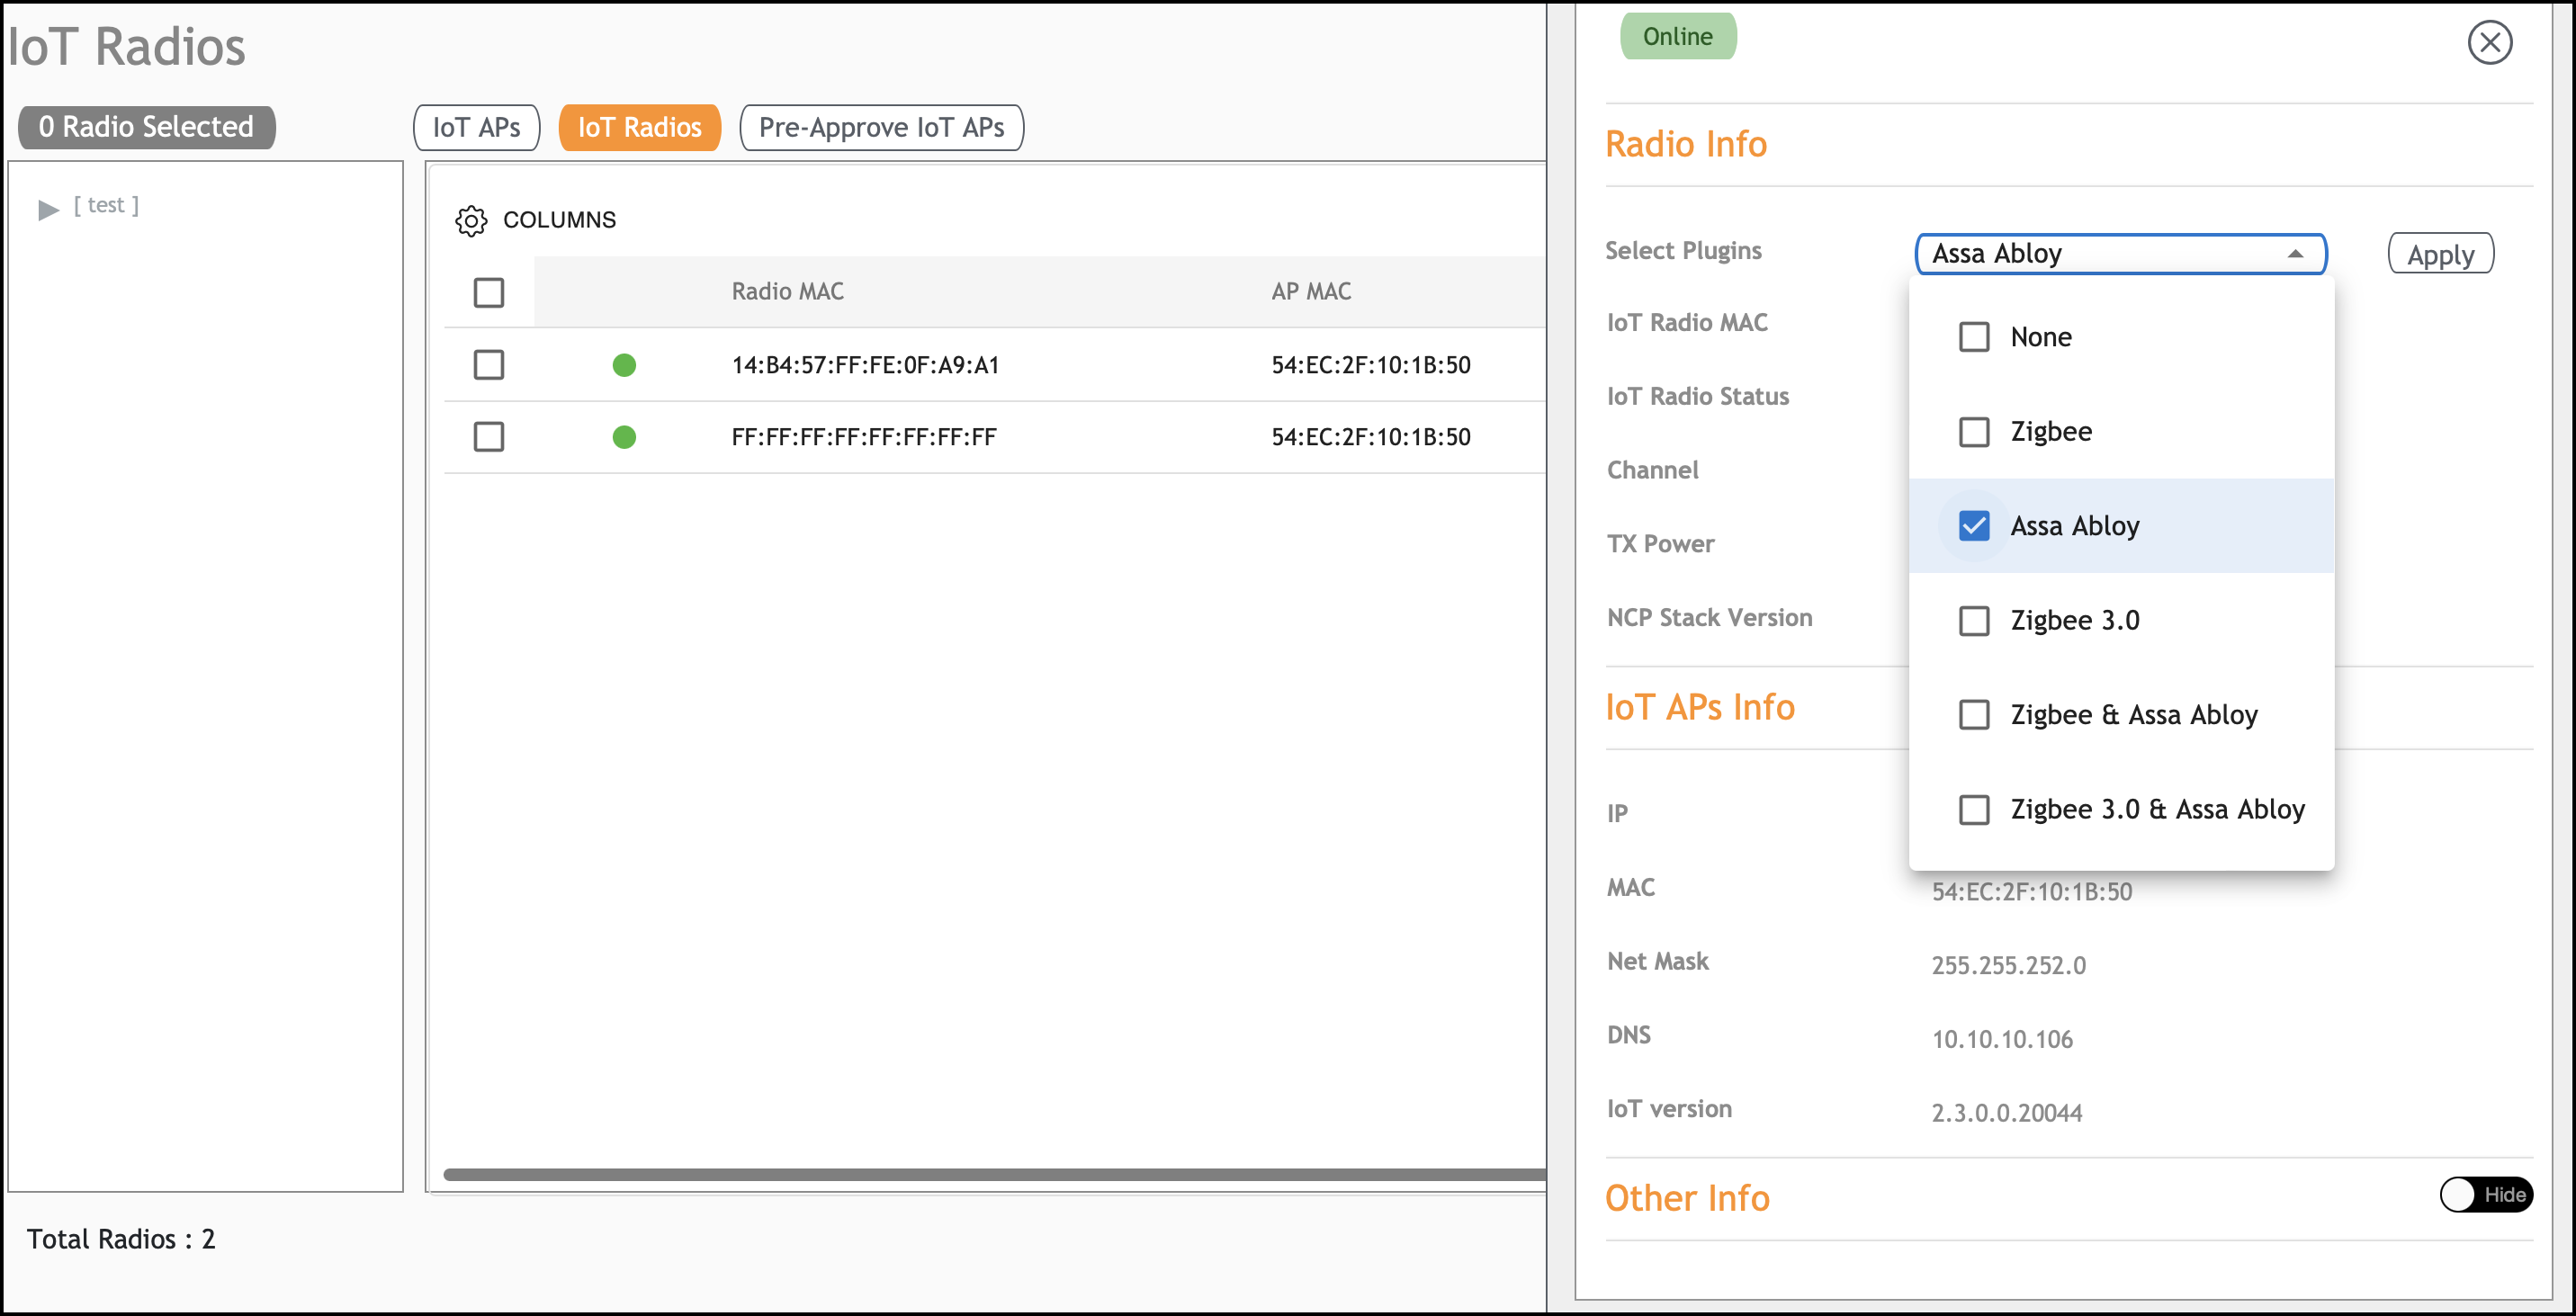
- On the IoT AP Settings page, click on a specific IoT AP; the sidebar appears, displaying , and the Radio Info settings. Under the Radio Info tab, select the radio where the plugin needs to be enabled, then click the Select Plugins drop-down list to choose the required plugins. The plugin changes are applied.
- (Optional) To configure a specific radio, go to the IoT Radios page; the sidebar appears, displaying the Radio Info settings. In the Radio Info section, click the Select Plugins drop-down list and choose the required plugins. Click Apply. The plugin changes are applied.
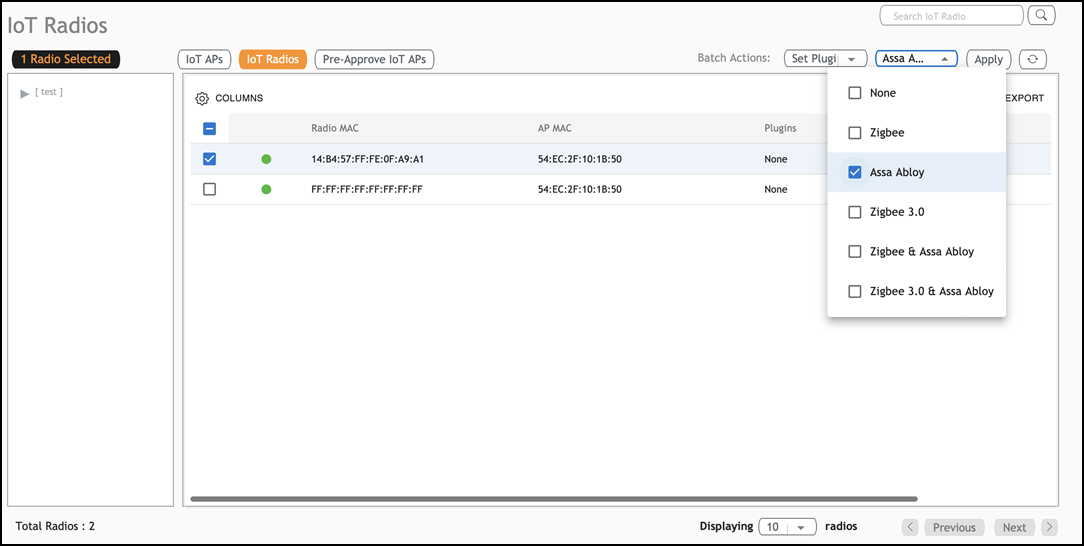
- (Optional) To configure multiple radios, go to the IoT Radios page, select multiple radios, and click Batch Actions to select Set Plugins from the drop-down list. From the Set Plugins drop-down list choose the required plugins. Click Apply. The plugin changes are applied.