Configuring Captive Portal (External Web Authentication)
On ICX switches web authentication is enabled at the VLAN level. A Captive Portal profile must be applied to the web authentication-enabled VLAN. For more information, refer to Creating captive portal profile for external web authentication.
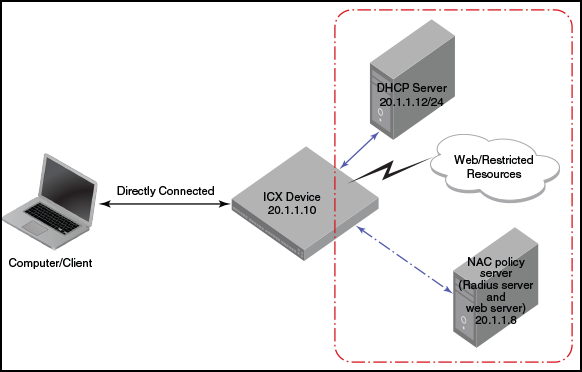
Complete the following steps to configure external Web Authentication on a device.
- Enter the global configuration mode.
- Set up any global configuration required for the ICX device, RADIUS server, NAC policy
server, and other servers.
- Assign an IP address to a virtual interface (VE) for each VLAN on which external Web Authentication will be enabled.
- Configure the RADIUS server to authenticate the host username and passwords.
The server has both a RADIUS server and a web server. Use the following commands to make RADIUS configuration on ICX switch.
device(config)# radius-server host 20.1.1.8 auth-port 1812 acct-port 1813 default key 2 $d3NpZ0BVXFpJ web-auth
Note: The RADIUS key configured should be the same as the key configured in the external web server. - Create a Web Authentication VLAN.
- (Optional) Configure Web
Authentication to use secure (HTTPS) or non-secure (HTTP) login and logout
pages.Web management access over HTTPS is enabled by default. For TPM-enabled devices, TPM certificates are available by default to establish encrypted communication between the server and client. For more information about digital certificates for web access, refer ICX Digital Certificates.Note: The protocol configured in the Captive Portal profile must be the same as the protocol configured as part of web management access.
To enable the non-secure web server on the switch, enter the following commands.
device(config)# web-management HTTP
device(config)# vlan 20
device(config-vlan-20)# webauth
device(config-vlan-20-webauth)# no secure-login
- Enable Web Authentication on the VLAN.
- Attach the configured Captive Portal profile to the Web Authentication-enabled VLAN.
The Captive Portal profile name must not exceed 32 characters in length.
- Configure the Web Authentication mode as Captive Portal mode to authenticate the users in a VLAN through external Web Authentication.
- Configure the external Captive Portal on the NAC server to create a guest or web login page for external Web Authentication.