Create a MAC Registration Workflow
Note: Creating this workflow includes a step for adding a MAC registration step. At that
time, you have the option of creating a new registration configuration or selecting
an existing configuration. If you want to create a registration configuration before
creating your workflow, refer to
Using the MAC Registrations Main Page
- Go to and select Add Workflow.
- With the "Create a new Workflow" button selected, click Next.
- On the Create Workflow page, enter the new workflow information and Save.
- Click Get Started to add a workflow step.
- Add an Acceptable Use Policy for the network.
- Click the Insert arrow to create a step in the enrollment workflow.
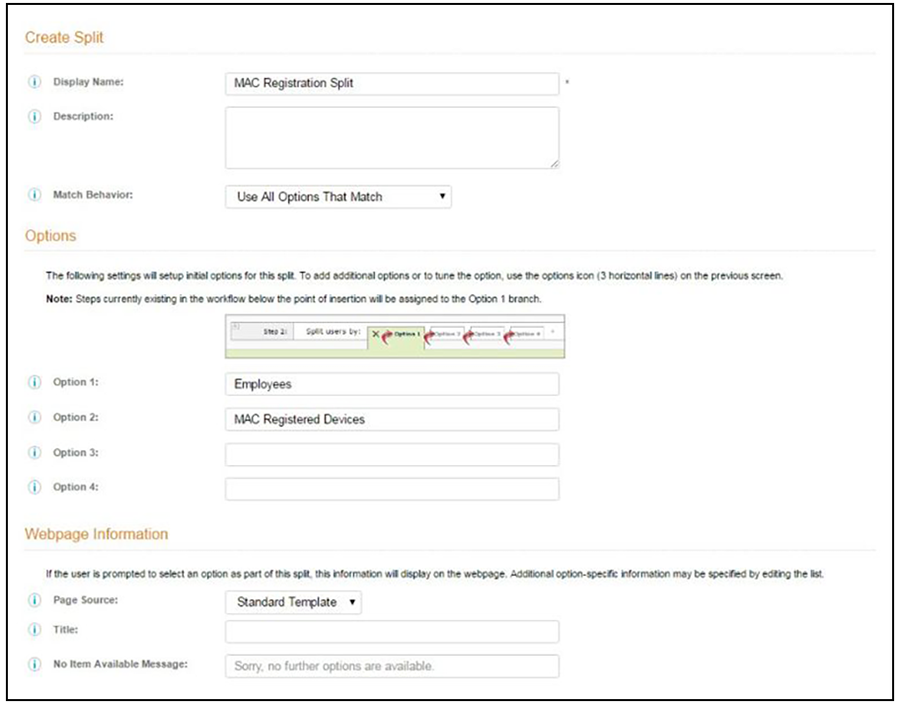
- Add a step to split users into two branches.
- On the Create Split page, in the Options section, enter the names for the two workflow branches.
- Leave the defaults for the other fields and Save.
The remaining sections describe how to configure the MAC Registered workflow. The Employees workflow is configured per your network needs.