Creating Hotspot Services
Updated navigation paths and put in new screen shots. Added additional info on Unleashed.
Added info about enabling MAC Auth Bypass too.
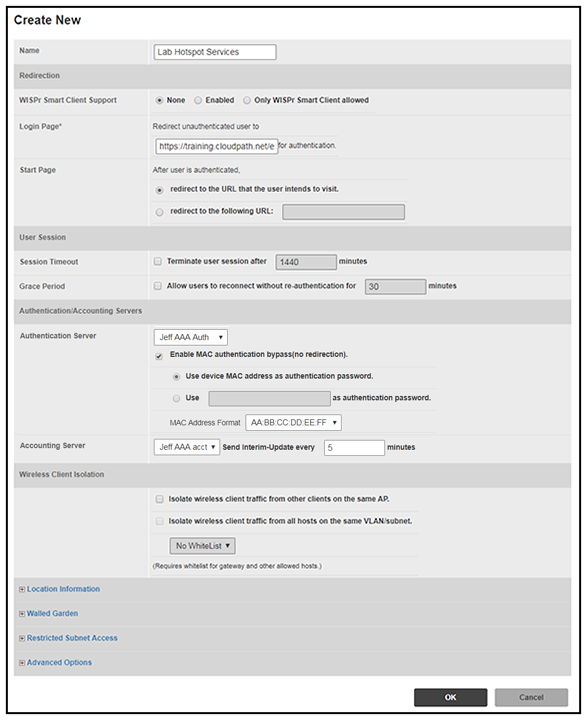
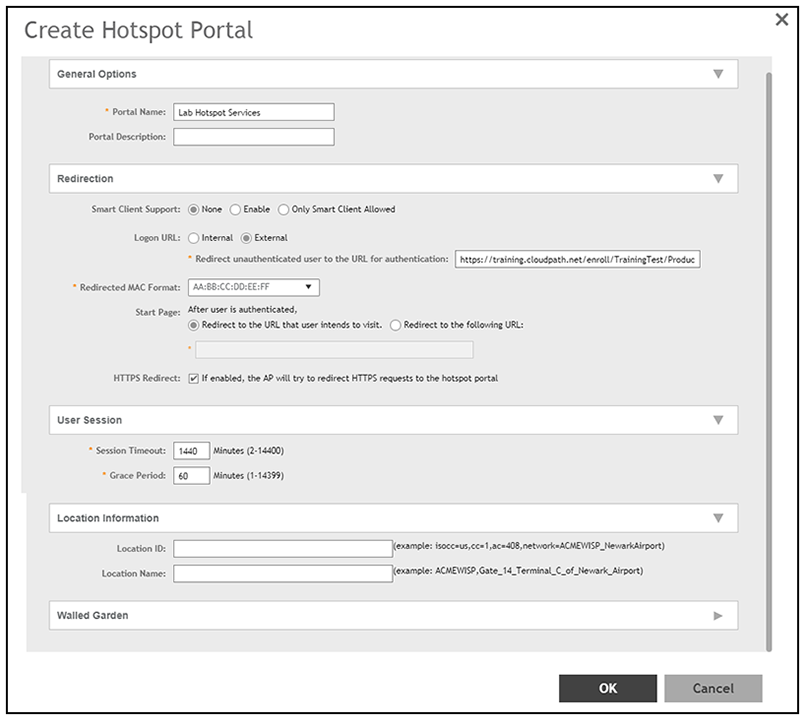
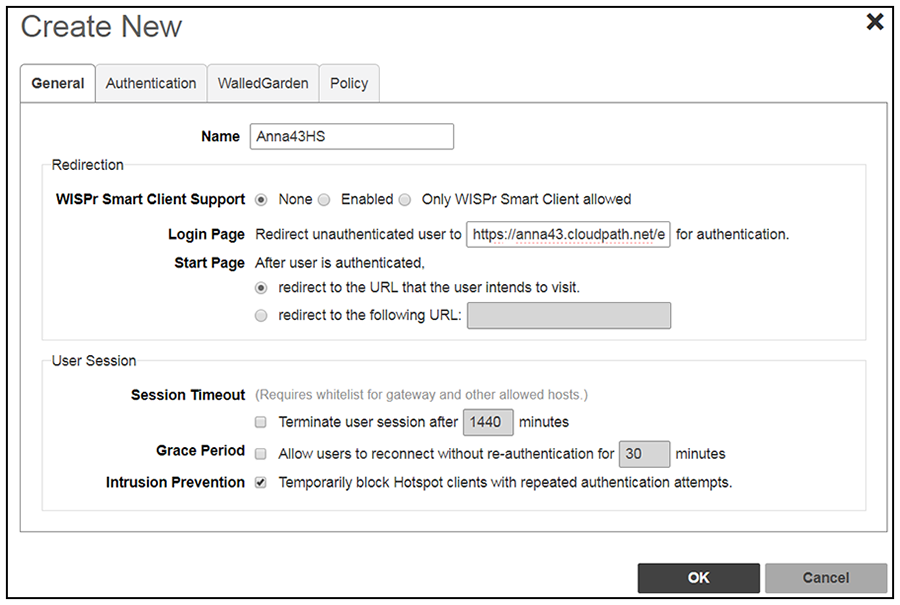
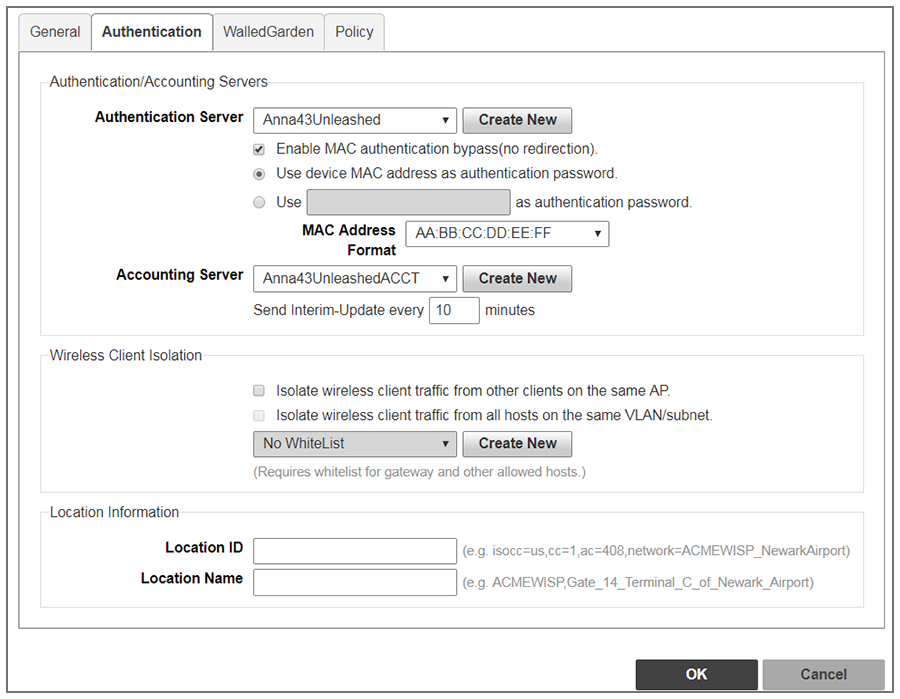
- Navigate to: For ZoneDirector, go to Services & Profiles > Hotspot Services. For SmartZone, go to Services & Profiles > Hotspots & Portals > Hotspot WISPr. For Unleashed, go to Admin & Services > Services > Hotspot Services, then use both the General tab and the Authentication tab, as instructed later in this section.
- Name the Hotspot Service.
- Point the unauthenticated user to the Cloudpath Enrollment Portal URL, which can be found on the page, in the Workflows table.
- Check Redirect to the URL that the user intends to visit.
- Select the Cloudpath RADIUS Authentication Server. Applicable only for ZoneDirector and Unleashed (Authentication tab) in this screen.
- Select
Enable MAC authentication bypass (no redirection). Applicable only for ZoneDirector and Unleashed (Authentication tab) in this screen. Selecting this field allows users with registered MAC addresses
to be transparently authorized without having to log in.
- For MAC Address Format (which appears when you select Enable MAC authentication bypass (no redirection) in the preceding step, it is recommended that you select the following option from the drop-down list: AA:BB:CC:DD:EE:FF
- Select the Cloudpath RADIUS Accounting Server. Applicable only for ZoneDirector and Unleashed (Authentication tab).
- Leave the defaults for the remaining settings. Click OK.