Adding Policies to a MAC Registration List
You can add as many policies as you want;
policies are evaluated in the order they are listed, and the RADIUS attributes of
the first
matching policy are used.
Reviewers - Should I say "device"
instead of "user?"
For a user to successfully connect to the network, the
user must be a match for at least one policy (or you can allow users to connect
even if they
do not match a policy). Steps to Add Policies
Follow these steps to add a policy:
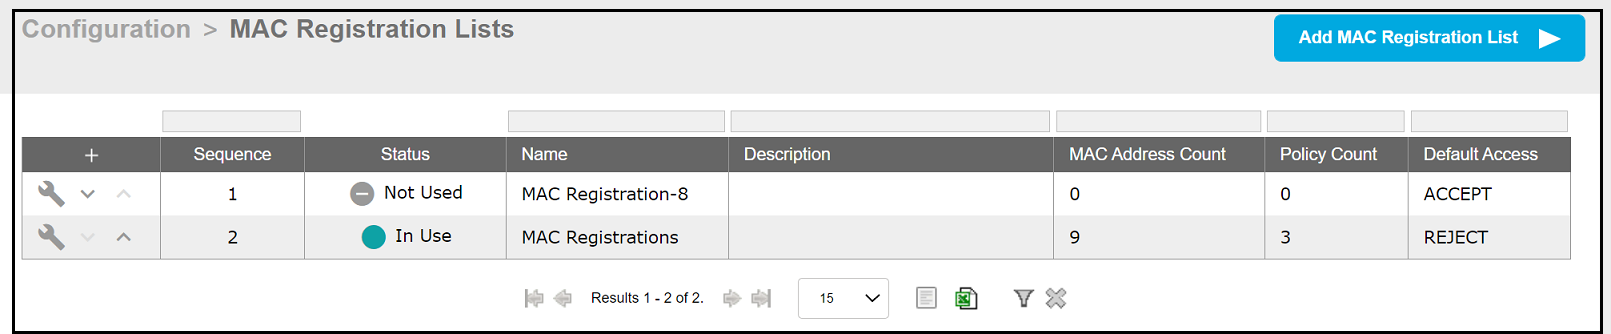
- In the Cloudpath UI, go to Configuration > MAC Registration Lists to view all existing MAC registration lists:
- Click the wrench icon for the desired MAC registration list; for example the MAC-Registration-8 entry in the screen above.
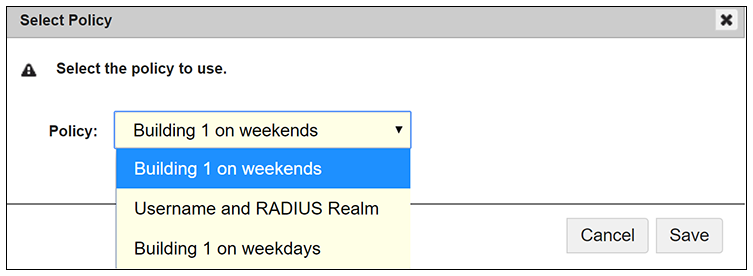
- In the ensuing screen, click the RADIUS Policies tab, then click Assign Policy. The Select Policy Drop-down list appears, as shown in the following example list. The policies that you have already configured are available for you to add:
- Select the policy you wish to add, then click Save.
- Continue to add policies as you desire. If you have added all available policies, you will receive the message: " All Defined Policies have been assigned."
Policy Rules
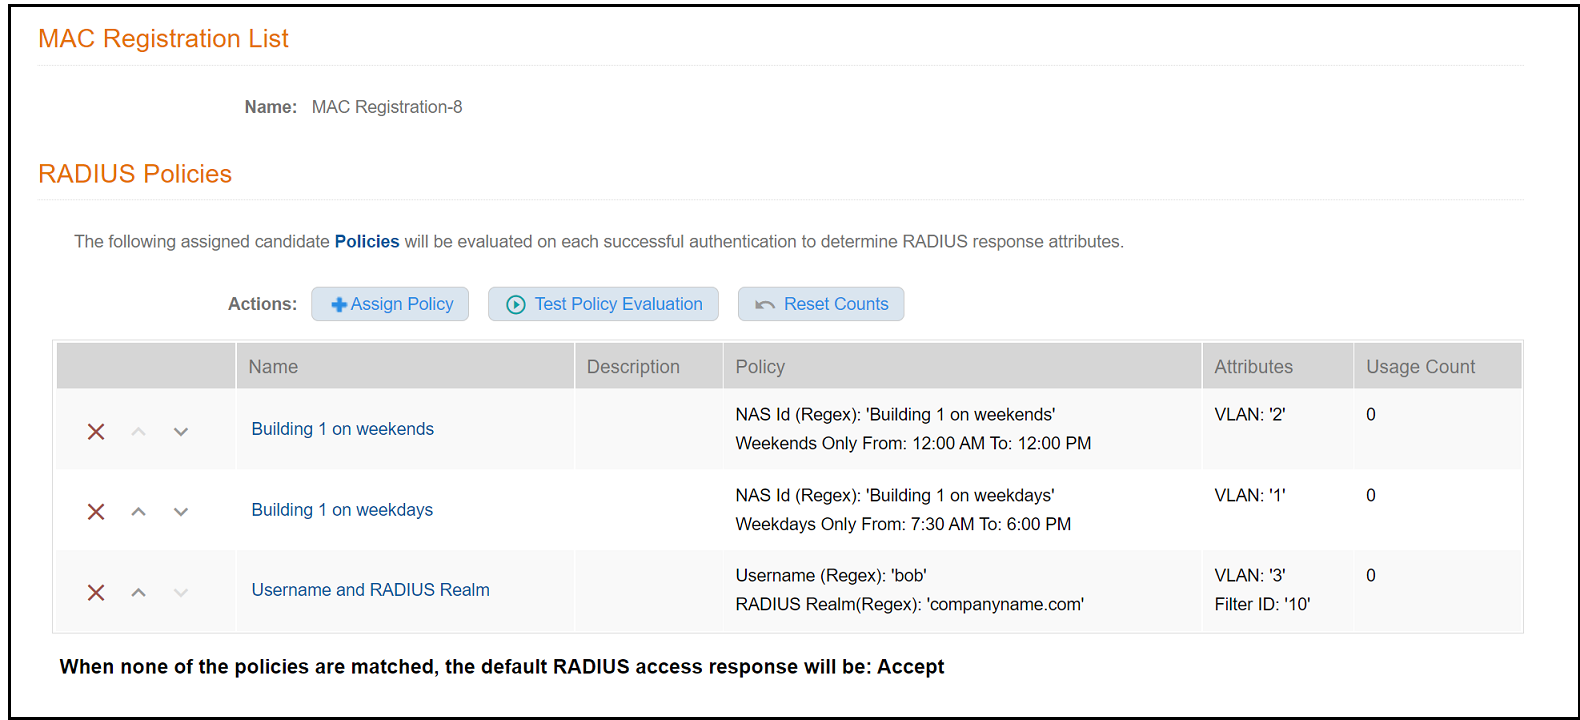
The following illustration shows an example of how the page appears after three policies have been added:
- There may be many policies whose criteria are matched
by a user, but the first policy that is a match is the one that gets applied.
For example, if you have three policies, as shown above, the order in which you
have them listed is the order in which they will be tested for matches with an
enrolling user.
Note: You can use the arrows in the screen show above to list the policies in the desired order. If you want to remove a policy from being used in a specific MAC registration list, click the X next to the policy, then confirm the removal of the policy when prompted.
- Because the "Building 1 on weekends" policy is listed
first, the matching criteria in that policy (listed in the Policy column) will
first be checked against an enrolling user. If there is a match, the policy is
applied to the user (meaning that the attributes listen in the Attributes column
are applied to the user). If there is no match, the next policy ("Building 1
on
weekdays") is checked against the enrolling user, and so on.
Note: If none of the policies match a specific user, the default access setting (configured when you create a MAC registration list) is used to either accept or reject the user. In the example above, at the bottom of the illustration, the default access it to accept the user because that is how the field was set when MAC Registration-8 (the example MAC registration list above) was configured.