Configuring PEAP on Cloudpath to Integrate with the Ruckus Controller
Once you configure a PEAP WLAN on your controller, you need to add a corresponding
PEAP configuration to a workflow on your Cloudpath system.
This procedure in this section includes steps for:
- Adding a PEAP Branch to Your Workflow (below)
- Adding a PEAP Device Configuration to Your Workflow
- Configuring Cloudpath to Communicate with the External RADIUS server
- Testing the PEAP User Experience
- Troubleshooting Tips
Note: The concept of workflows and how to create one is described in detail in the
Cloudpath Deployment Guide and the
Cloudpath Quick Start Guide. Therefore, the purpose of the procedure in this section is to demonstrate how to
add a PEAP branch to an existing workflow. The same steps included below could also
be used to create a new workflow with a PEAP plugin.
Adding a PEAP Branch to Your Workflow
- Log in to the Cloudpath user interface.
- Go to Configuration > Workflows.
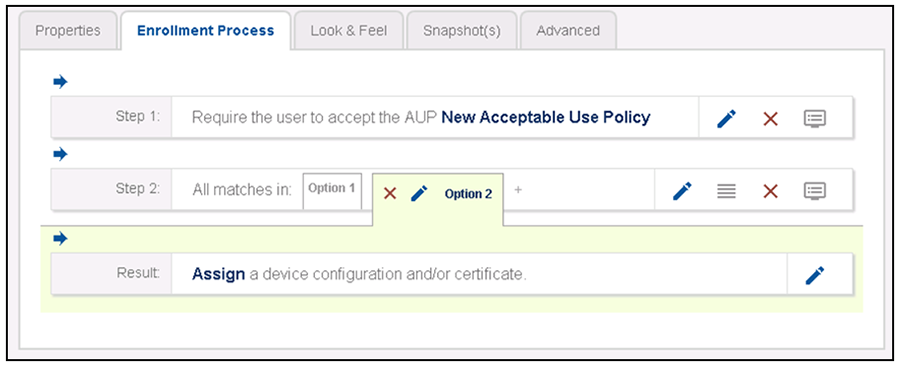
- Click on a workflow to which you want to add a PEAP branch. An example of a very simple workflow before adding a PEAP branch is shown below:
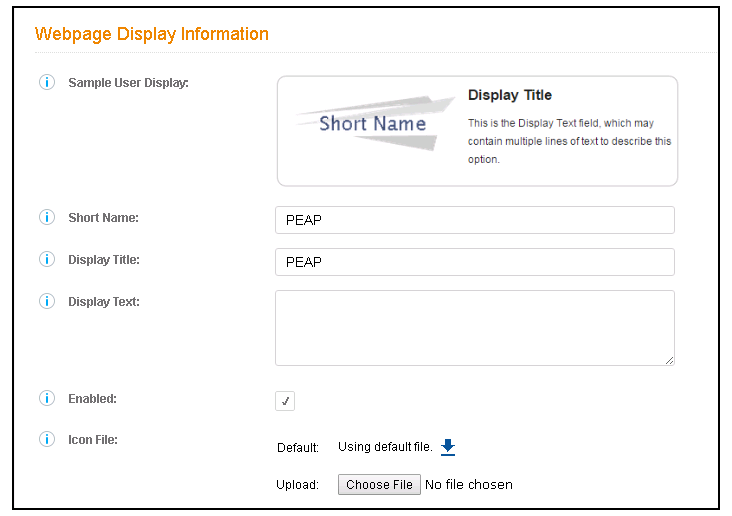
- Click the + button to create a new branch in your workflow.
- On the next screen (Configuration > Workflows > Modify Step), click Done.
Adding a PEAP Device Configuration to Your Workflow
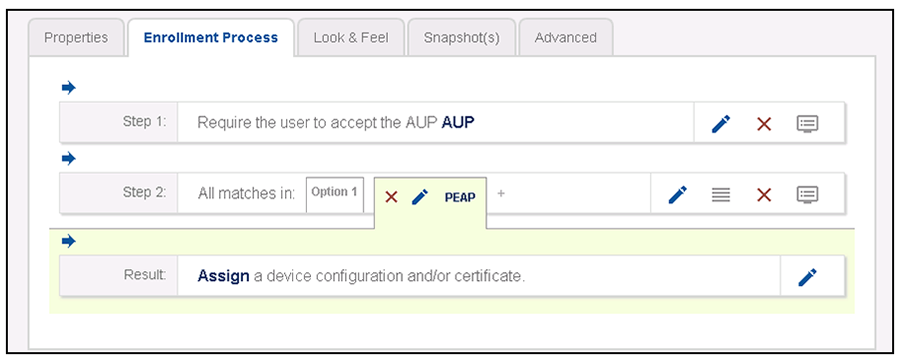
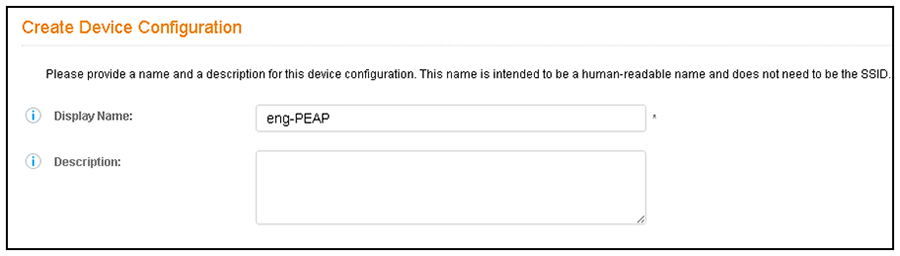
- In the workflow, with the PEAP tab highlighted, click the pencil icon to the right of the Result line to "Assign a device configuration and/or certificate."
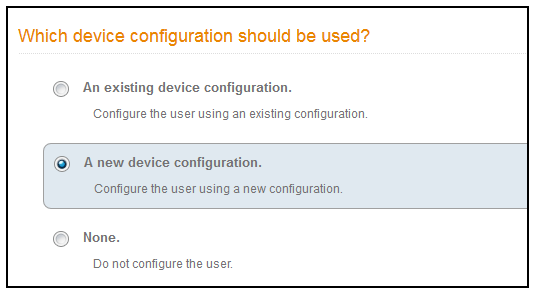
- Select "A new device configuration," then click Next.
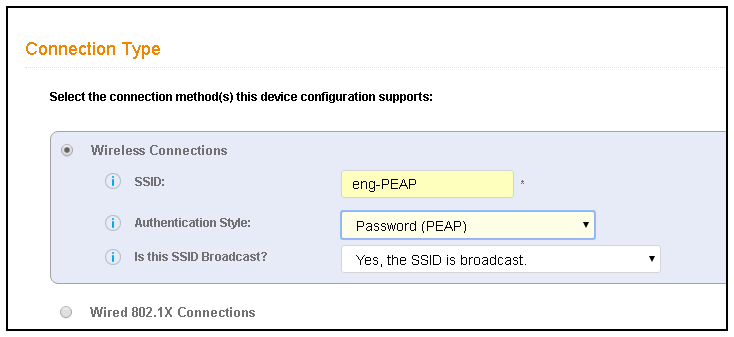
- The Connection Type screen is displayed; required fields are described below the screen:
- The Wireless Connections button must be selected.
- SSID: This name must match the PEAP SSID exactly as you configured it on the controller:
- For a Ruckus ZoneDirector controller, it is the name configured in General Options Section of Creating a New WLAN.
- For a Ruckus SmartZone controller, it is the name configured in General Options Section of the Create WLAN Configuration Screen.
- Authentication Style: Select Password (PEAP) from the drop-down list.
- Is this SSID Broadcast?: Leave the default value of Yes, the SSID is broadcast.
Configuring Cloudpath to Communicate with the External RADIUS server
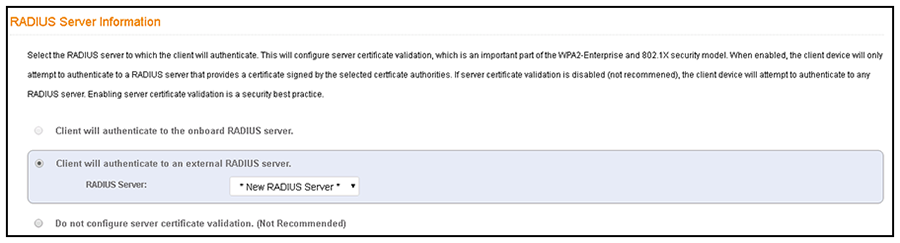
- For the screens you are presented with next, you can keep all the default values and continue to click Next to progress through the screens, until you get to the following screen:
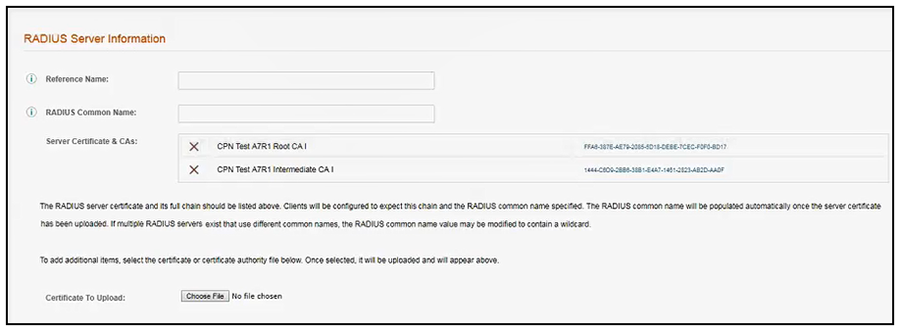
- On the screen that appears next (below), use the Choose File button to upload the root CA and any intermediates certificates to allow the Cloudpath system to communicate with the external RADIUS server. The following illustration is an example of the RADIUS Server Information screen after the root CA and its intermediate certificate have been uploaded.
- On the Additional Options screen, which is displayed next, leave the default values and click Next.
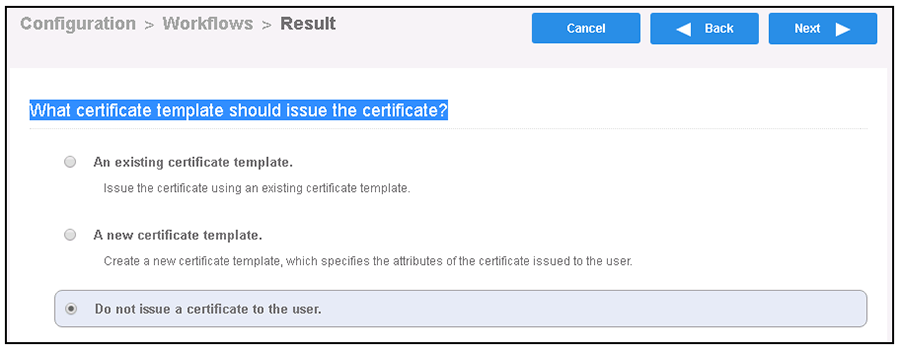
- On the "What certificate template should issue the certificate?" screen, select "Do not issue a certificate to the user."
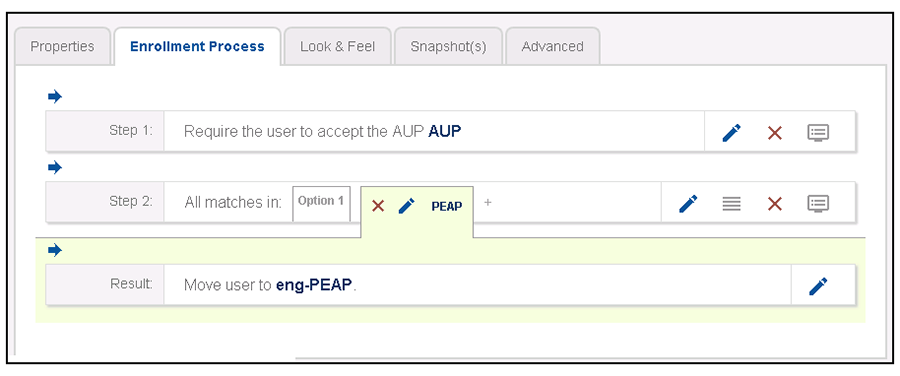
- You are returned to the workflow. Make sure the Result step has been added successfully, as shown below:
Testing the PEAP User Experience
- Test the Enrollment process by clicking on the enrollment portal URL for the workflow at the top of the Configuration > Workflows screen.
- When are you presented with the with the Welcome screen, click Start.
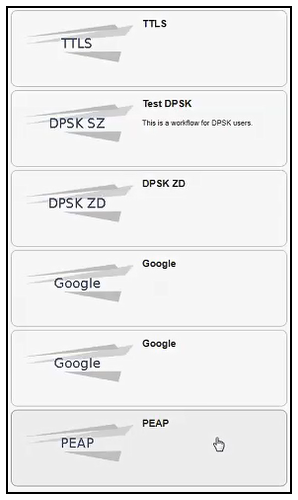
- When you are presented with various branches of your workflow, click the "PEAP" branch:
- Follow any prompts to continue.
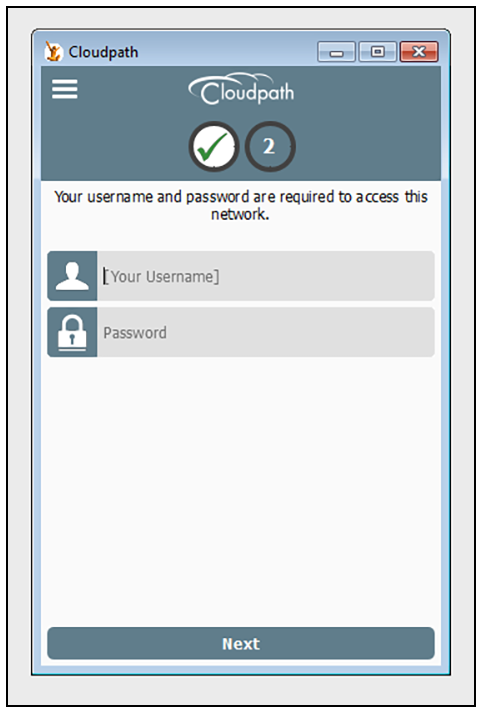
- The user is presented with a screen similar to the one shown in the following figure to enter username and password.
- Proceed with the enrollment. If enrollment is successful, you will receive some status screens indicating the following status as the process is in progress:
Troubleshooting Tips
If an error occurs during the workflow-publishing or enrollment process, check the following:
- Make sure that you have selected Password (PEAP) as the Authentication Style in the Cloudpath Connection Type screen.
- Make sure that you have added the correct Cloudpath PEAP SSID to the final result step in your workflow.
- Verify that the shared secret configured of your external RADIUS server matches the shared secret on the Create AAA Authentication Server configuration screen on your controller.
- Verify that the Cloudpath server can ping the external RADIUS server, and vice versa.
- Verify that you have the correct Root and any Intermediate CAs for the external RADIUS server.