Performing a Local Upgrade
The local upgrade option may be useful in
situations where the APs cannot connect to the RUCKUS firmware servers, or if the
firmware
build you want to install is not available through the online upgrade method.
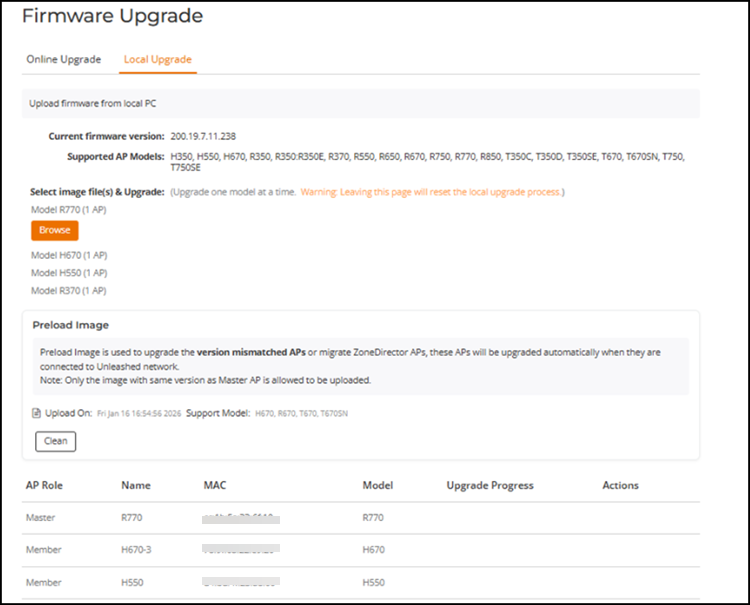
- Select .
- Select the Local Upgrade tab.
- In the Select image
file(s) & upgrade section, click
Browse.
RUCKUS Unleashed will perform a check to make sure it is the proper image for the AP model before proceeding.
Note: Each AP model has a different firmware image file that must be loaded onto the Master AP and then distributed to all member APs of that model. So, for example, if you have a mix of two different RUCKUS Unleashed APs, you could upgrade all the APs of one model first and then proceed to upgrade the APs of the other model, or the other way around, but you cannot upgrade both models at the same time.Note: While the upgrade process will check to make sure you do not try to upgrade a RUCKUS Unleashed AP with the incorrect model firmware, there is no check to ensure that you do not upgrade or downgrade a RUCKUS Unleashed AP to a RUCKUS Solo AP (standalone) firmware image. If you do this, the AP will no longer function as a RUCKUS Unleashed AP until the RUCKUS Unleashed firmware is re-loaded onto it. - Locate the firmware image file on your local computer, and click Open. The file is uploaded to the Master AP, and the Browse button is replaced with an Upgrade button.
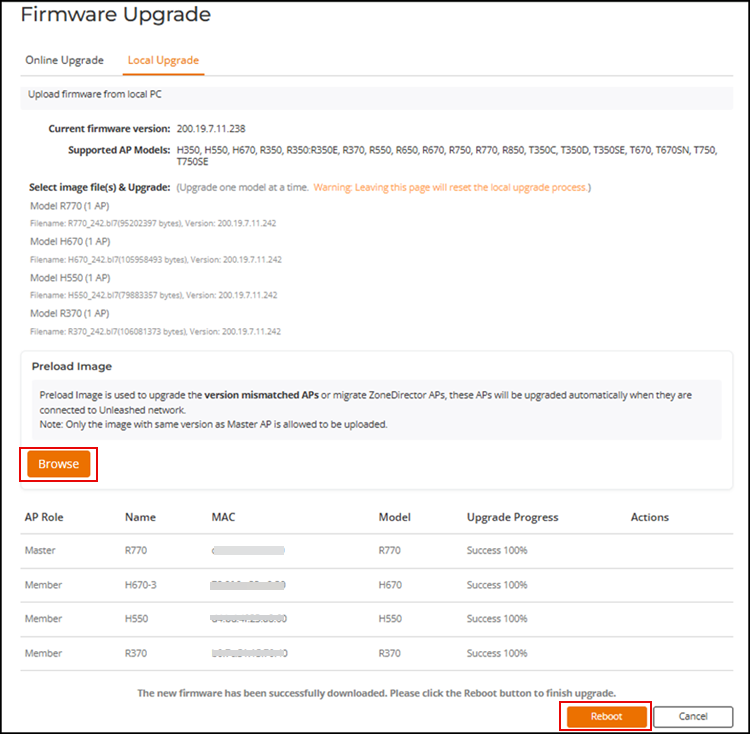
- Click Upgrade to begin the upgrade process.
- If multiple AP models exist, you will need to upgrade one model at a time. Repeat the previous steps to upload firmware for each AP model. The progress for each AP is listed in the Upgrade Progress column in the table. After the Upgrade Progress for all APs has reached 100%, the firmware has been fully loaded onto each AP.
- Click Reboot to reboot the APs and set the new firmware as the active firmware.