Configuring the Stateless DHCPv6 Server on Layer 2 Software Images
Perform the following steps to configure a stateless DHCPv6 server on a Layer 2 software
image.
Note: For the DHCPv6 server solution to work on ICX Layer 2 software image, an IPv6 RA provider
in the Layer 2 network is required.
Consider the following when configuring the stateless DHCPv6 server on Layer 2 software images:
- For stateless DHCPv6 servers, one DHCPv6 subnet can be configured on the management VLAN.
- In SLAAC (Stateless Address Auto-configuration), the client does not require the DHCPv6 server to get the IPv6 address. It receives the prefix, prefix-length, and the Default Gateway from the RA and the address is auto-configured.
- The DHCPv6 client can only get other information, such as DNS and domain-name, from the DHCPv6 server.
- The configuration of the nd other-config-flag, using the
ipv6 nd other-config-flagcommand, is required for the stateless DHCPv6 server to receive DNS and domain name configuration. When theipv6 nd other-config-flagcommand is used, the O flag is set to 1. Refer to the Configuring an IPv6 address on the Router Interface section for more information. - When the client sends an Information-Request to the server, the server replies with information such as domain-name and DNS server.
- Since the IPv6 address is not assigned by the DHCPv6 server, the lease entry is not seen on the server.
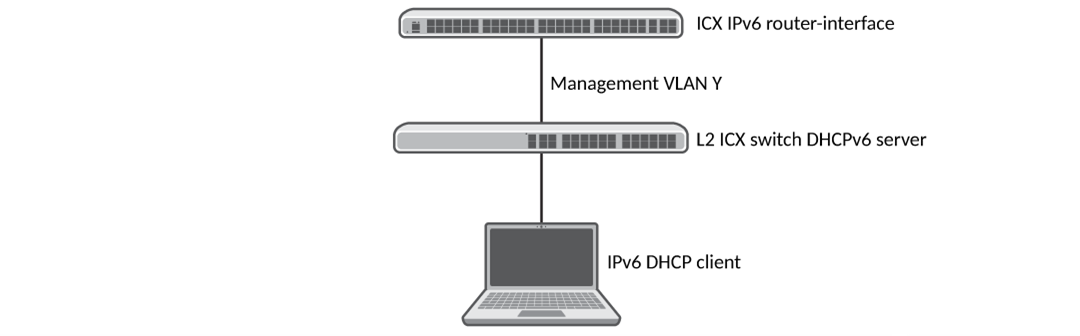
The figure below shows an ICX DHCPv6 server working in a Layer 2 session.
- Enter global configuration mode by issuing the
configure terminalcommand. - Enter the
ipv6 dhcp6-server enablecommand to enable the DHCPv6 server. - Enter the
domain-namecommand, entering a domain name, to configure the domain name server (DNS) domain name. - Enter the
dns-servercommand, specifying an IPv6 address, to specify the IPv6 address of the DNS server. - Enter the
renewal-timecommand, specifying an interval, to set the time interval after which the client transitions to the renewing state upon receipt of an IPv6 address.If the renewal time is not configured, half of the valued of the configured preferred lifetime is considered as the renewal time. - Enter the
subnet6command, specifying an IPv6 prefix, to configure a subnet for the DHCPv6 server and enter DHCPv6 subnet configuration mode. - Enter the
range6command toto assign IPv6 addresses in the specified range. - Enter the
exitcommand until you return to global configuration mode. - Enter the
ipv6 addresscommand, specifying an IPv6 address, to configure an IPv6 address in the range of the configured subnet6.
The following example configure a stateless DHCPv6 server on a Layer 2 software image and configures an IPv6 address in the range of the configured subnet6.
switch# configure terminal
switch(config)# ipv6 dhcp6-server enable
switch(config-dhcp6)# domain-name example.com
switch(config-dhcp6)# dns-server 8fef:400:efdd:301::10  8fef:400:efdd:301::20
switch(config-dhcp6)# renewal-time 50
switch(config-dhcp6)# subnet6 8fef:400:efdd:301::/64
switch(config-dhcpv6-subnet)# range6 8fef:400:efdd:301::100 8fef:400:efdd:301::200
switch(config-dhcpv6-subnet)# exit
switch(config-dhcp6)# exit
switch(config)# ipv6 address 8fef:400:efdd:301::3/64
Follow the steps in the Configuring an IPv6 address on the Router Interface section to configure an IPv6 address on the router interface.