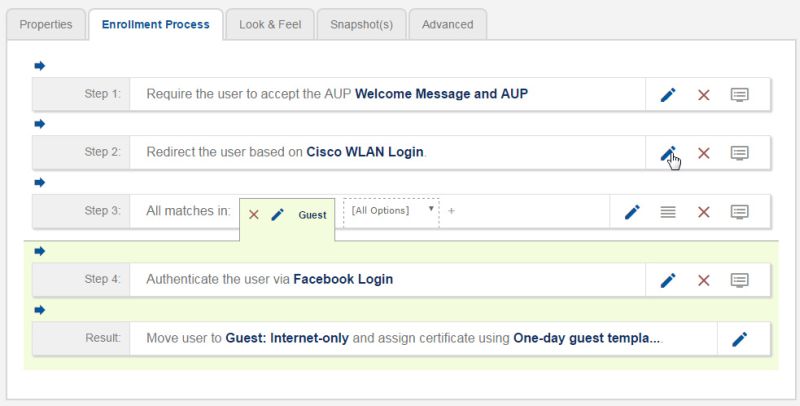
Add the Redirect Step to the Workflow
- Navigate to .
- Select your passthrough workflow configuration.
- In the workflow, insert the redirect step.
Note: In this example, the redirect occurs after the user accepts the AUP. However, the redirect step can be placed anywhere in the enrollment workflow.
- The workflow plug-in selection page opens.
- Click Redirect the User.
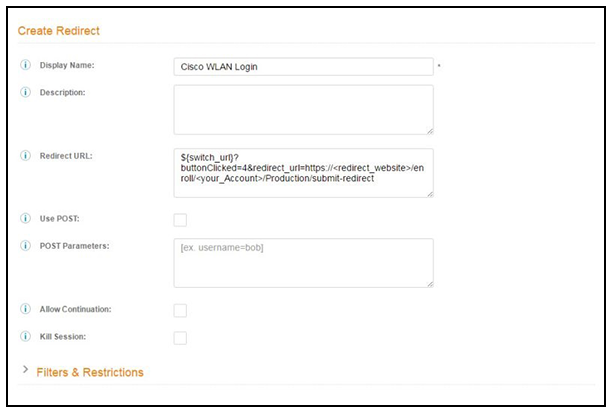
- Select Use a new redirect and click Next. The Create Redirect page opens.
- Enter the Reference information for the Cisco WLAN passthrough.
- Enter the
Redirect URL in this format:
${switch_url}?buttonClicked=4&redirect_url=https://<redirect_website>/enroll/<your_Account>/Production/submit-redirect - Leave Use POST unchecked.
- Check the Allow Continuation box. If this is left unchecked, the submit-redirect call is ignored.
- If needed, configure
Filters & Restrictions to control when this redirect is utilized.
By default the redirect is applied to all users. However, you can specify a filter such that the redirect is applied only to enrollments matching the filter.
- Save the workflow.
In this workflow example, the WLC passes the user to the Cloudpath captive portal, to accept the AUP. The Cisco WLAN redirect opens the firewall so that the client can access Cloudpath for the onboarding process. If the user selects the guest enrollment path, the device is moved to the Guest - Internet Only: network and given a short-term guest client certificate.