Performing Initial System Setup
After a successful deployment and activation (or login), the system setup wizard takes you through a few steps.
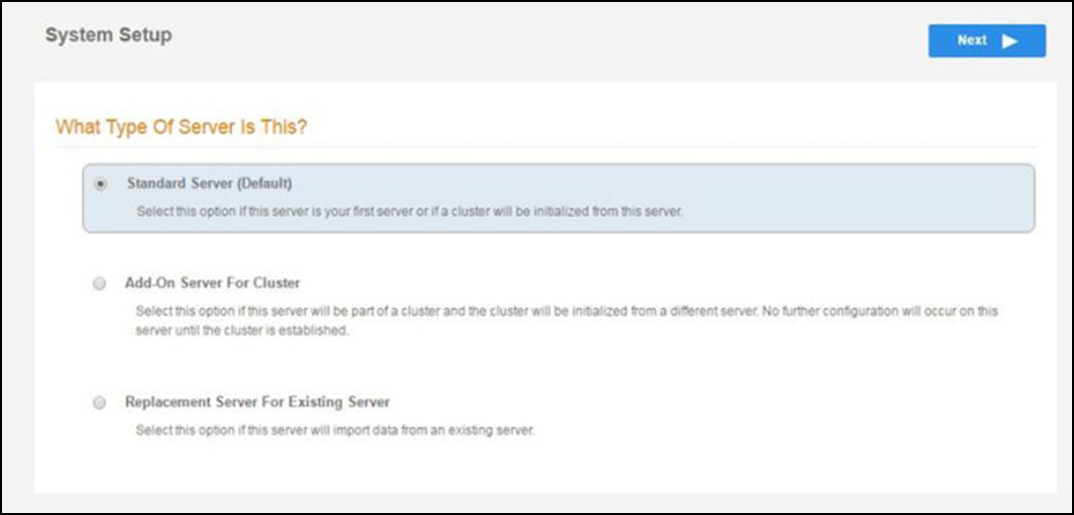
- Select the server type
In most cases, select Standard Server, the default. This selection takes you through a setup wizard, which prompts you for the basic information required for a Cloudpath server.
- If you are setting up this server for replication, you can choose to set the server as an Add-On or Replacement server. These selections provide an alternate set up process, requiring less information for the initial setup. Add-On and Replacement servers receive most of their configuration from the primary server in the cluster.
- If you are setting
up this server to replace an existing server, and you are importing
the database from the existing server, select Replacement
Server for Existing Server.
Note: For Add-on or Replacement servers, you will not be required to go through the full system setup.
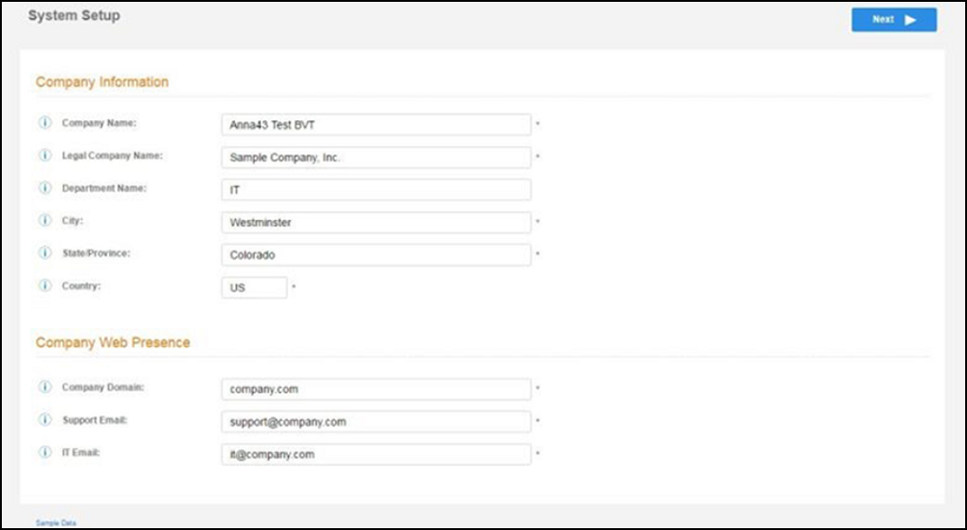
- Enter Company Information and Company Web Presence settings, then click Next.
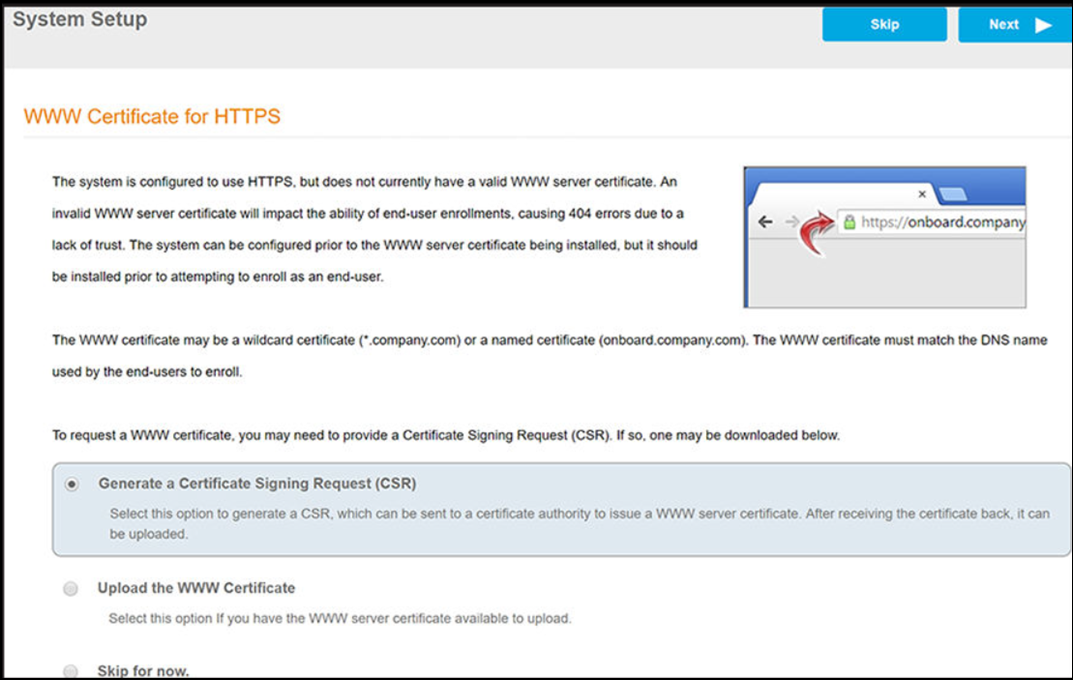
- Assign the web server
certificate. In the WWW Certificate for HTTPS screen,
choose the applicable radio button, then click Next.
Cloudpath supports web server certificates in P12 format, password-protected P12, or you can upload the individual certificate
components: the public key, chain, and private key or password-protected private key.
• If you select the Generate a Certificate Signing Request (CSR) radio button, perform Step 4.
• If you select the Upload the WWW Certificate radio button, perform Step 5.
• You can select the Skip for now radio button for the initial configuration. However, you should perform this step prior to attempting
to enroll as an end-user. To return at a later time to the Certificate for HTTPS page, navigate to then click Upload WWW Certificate. For now, proceed to Step 6.
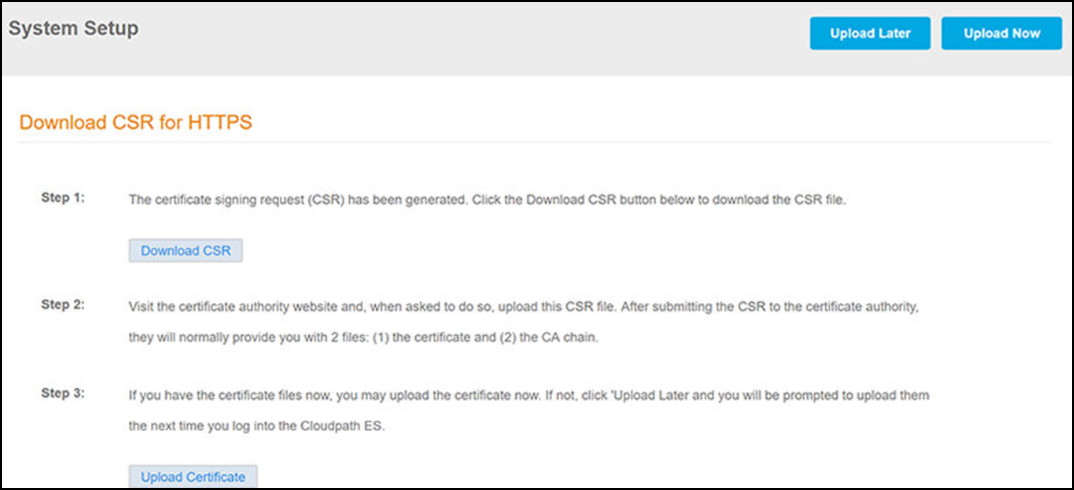
- (Only if you selected the
Generate a Certificate Signing Request (CSR) radio
button) You should now be at the Create CSR for HTTPS screen.
- Enter the required information.
- Click Next.
- Click Download CSR to download the .csr file.
- Upload the CSR to any CA website to receive a certificate.
- Follow the instructions for the CA website to download the public key and chain. The public key usually has a filename similar to the domain name. The chain will vary depending on the CA, but it typically contains the word "Root," "Intermediate," " Bundle," or something similar, and may have the filename extension of .chain.
- Click Upload Certificate.
- Click Next to continue with the system setup.
- Proceed to Step 6.
- (Only if you selected the
Upload the WWW Certificate radio button, which you
should only have done if you already have received your WWW certificate from a
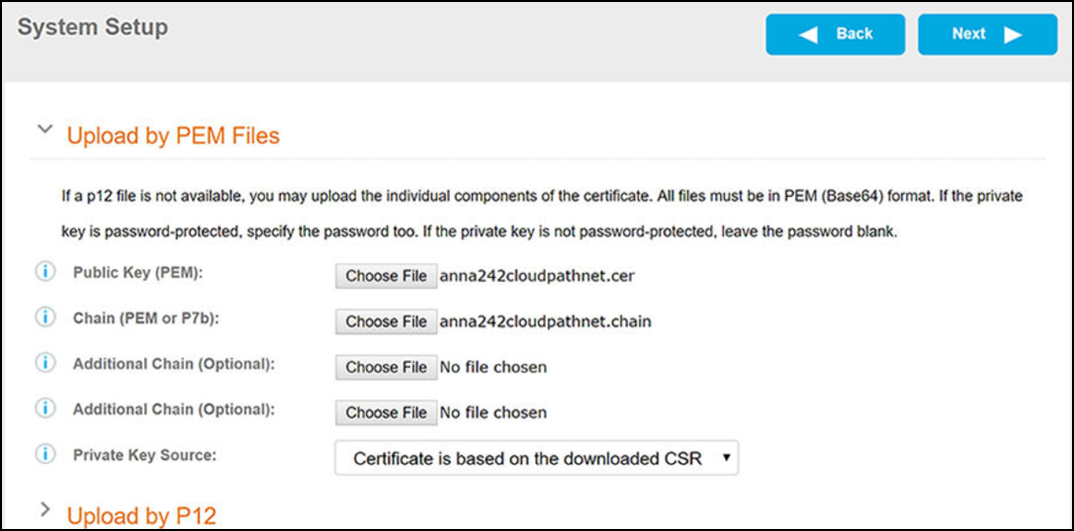
public CA) You should now be at the following screen.
- Upload your certificates from the Upload the WWW Certificate screen. You can do one of the following: 1) Upload the Public Key, the Chain, and the Private Key Source, or 2) Upload the P12 file. The example shows that PEM files have been selected for upload.
- Click Next to continue with the system setup.
- Proceed to Step 6.
- Select the default
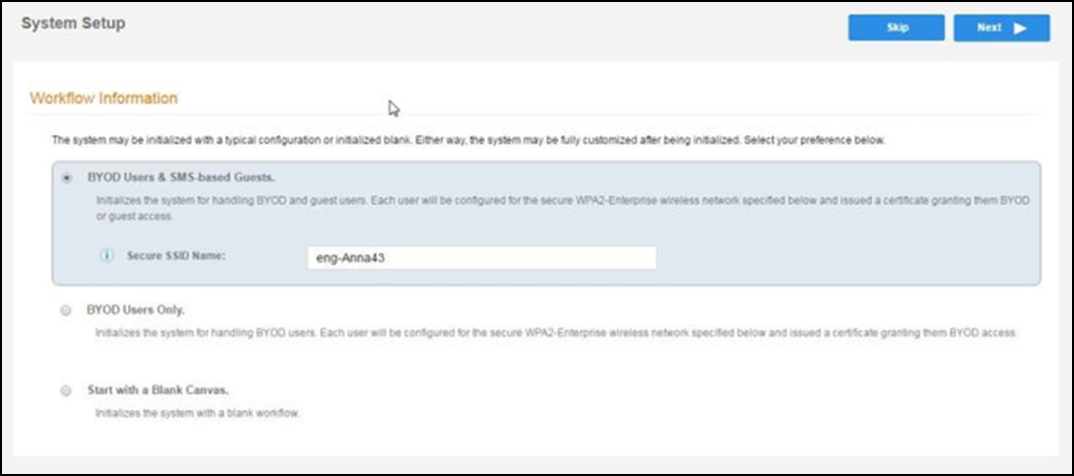
Workflow.Unless setting up a short-term demo, RUCKUS recommends selecting Start with a Blank Canvas for all trials, proofs of concept (POCs), and new customers.
- To initialize the system with a sample configuration, select BYOD Users & SMS Guests or BYOD Users Only. This creates an initial workflow for BYOD users and sponsored guests (or BYOD users only) that you can use as a template, or simply add a device configuration and use immediately.
- To create your own workflow, select Start with Blank Canvas.