Deploying the Cloudpath VHD Image on Azure
This procedure describes the requirements and steps to prepare for and deploy RUCKUS Cloudpath to a Microsoft Azure Cloud subscription account.
Prior to beginning this procedure, ensure you have met the following prerequisites:
- You must have a valid RUCKUS customer account (to obtain the necessary Cloudpath virtual hard disk (VHD) image file).
- You must have downloaded the Cloudpath VHD image file (fromhttps://support.ruckuswireless.com) to your system.
- You must have a valid Azure Subscription and account.
- You must have installed the AzCopy tool on your system. AzCopy is available for both Windows and Linux systems. For more information, visit the AzCopy Download page.
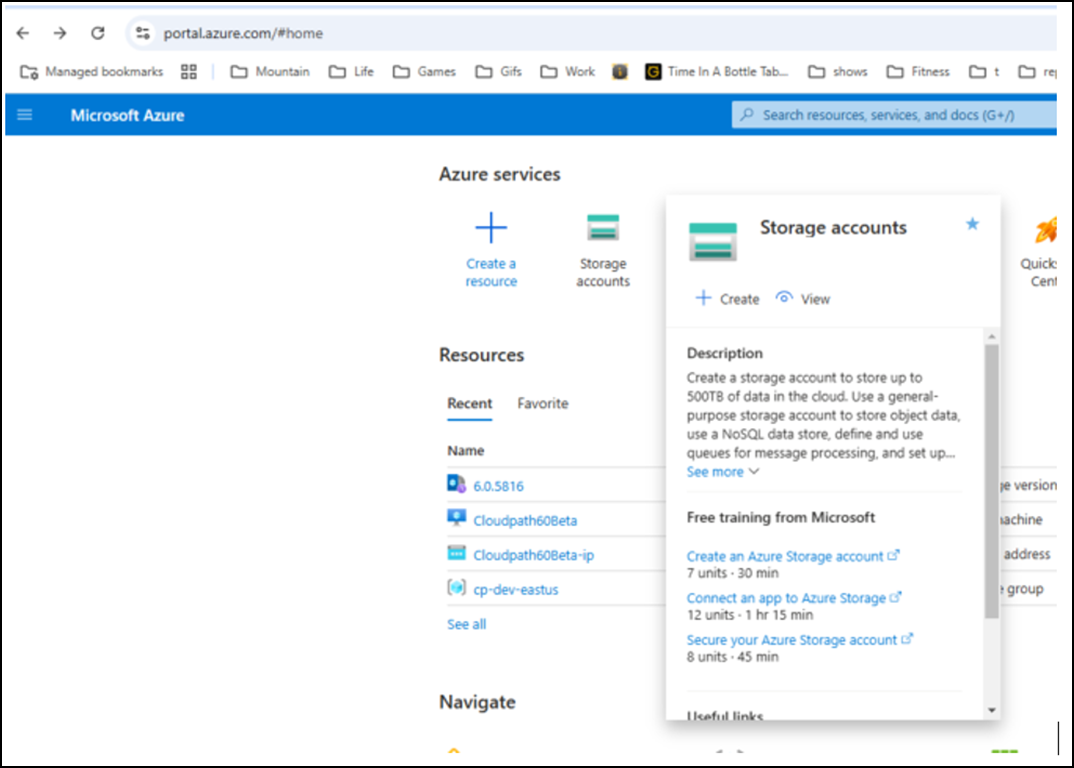
- Create your Azure storage
account.
- Log in to the Azure Portal and ensure that you have the necessary permissions to upload files to a storage account.
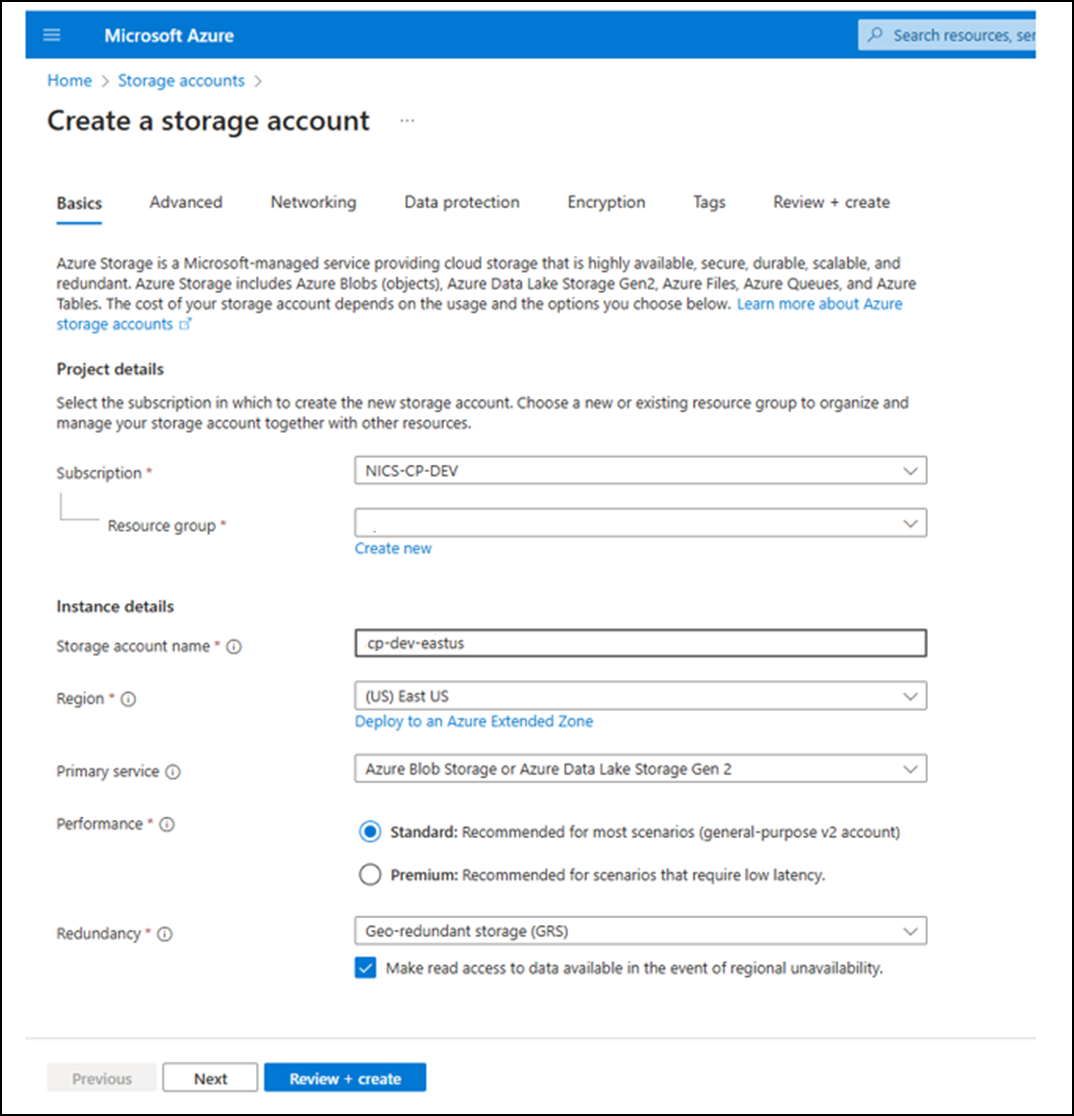
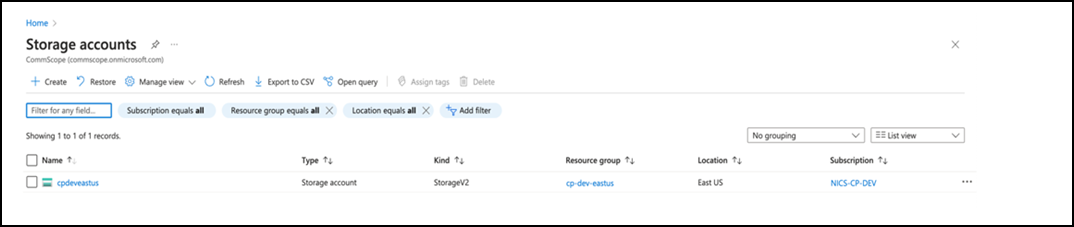
- Create a new storage account (if you do not already have one).
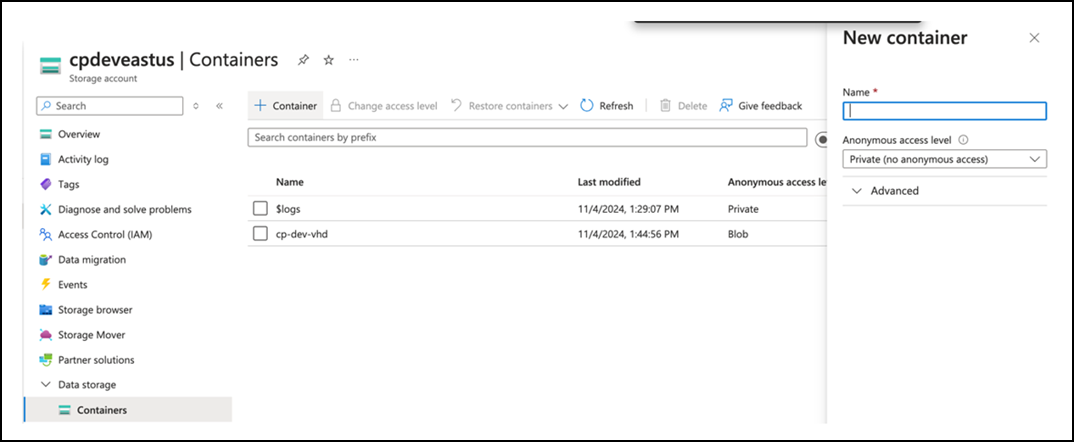
- Create a Blob Container.
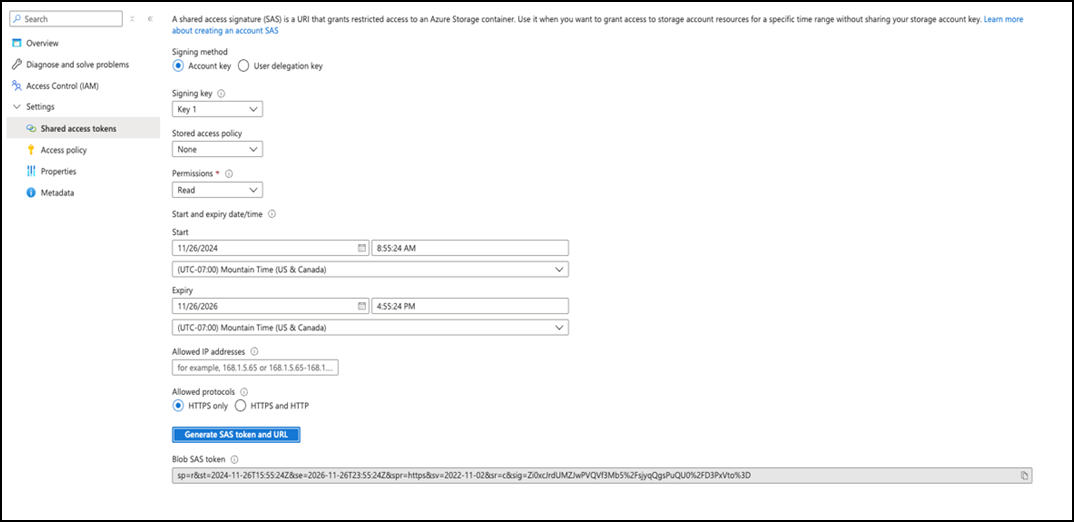
- Generate a Shared Access
Signature (SAS) token.
- Click on the container where you want to store the Cloudpath VHD file.
- Select .
- In the
Shared Access tokens page, configure
the following:
Permissions: Select at least Write and Create permissions.
Start and Expiry Date/Time.
Allowed Protocols: Select HTTPS only for security.
- Click Generate SAS token and URL or a similar button.
- After the SAS
token is generated, you will seethe generated token in the Blob
SAS Token field. For example:
sp=r&st=2024-11-26T15:55:24Z&se=2026-11-26T23:55:24Z&spr=https&sv=2022-11-02&sr=c&sig=Zi0xcJrdUMZJwPVQVf3Mb5%2FsjyqQgsPuQU0%2FD3PxVto%3D
- Copy the VHD file from your
local system to your Azure storage.This step utilizes the AzCopy tool. AzCopy does not support scenarios where the source or destination is being actively changed during the file transfer.
- Before Copying the VHD file: You will need to install the AzCopy tool on your system. AzCopy is available for both Windows and Linux systems. For more information, visit the AzCopy download page.
- Copy the Cloudpath VHD
file using the
azcopycommand in the command shell on your local system..azcopy copy "source-url" "destination-url"
Cloudpath_6.0_6056 source-url: https://cpdeveastus.blob.core.windows.net/cp-dev-vhd/Cloudpath_cloud_template_6056.vhd?se=2036-06-30T00%3A00%3A00Z&sp=r&spr=https&sv=2022-11-02&sr=b&sig=Yo2aF6WLXAm1ghxjew8%2BPAC7K6MMCL2CPWE5zS5LLK4%3D
Cloudpath_6.0_5912 source-url: https://cpdeveastus.blob.core.windows.net/cp-dev-vhd/Cloudpath_cloud_template_5912.vhd?se=2036-06-09T00%3A00%3A00Z&sp=r&spr=https&sv=2022-11-02&sr=b&sig=34mS5i%2Bvb2S7JAtJRKmN%2FOBbJW8KHNRqMeCXek1ZPx0%3D
Cloudpath_6.0.5870 source-url: https://cpdeveastus.blob.core.windows.net/cp-dev-vhd/Cloudpath_cloud_template_5870.vhd?se=2036-06-09T00%3A00%3A00Z&sp=r&spr=https&sv=2022-11-02&sr=b&sig=qiNK%2FT42aoEE%2BDQOLyzVjzh%2FzPrnvEm2UCPXLbzhynw%3D
Cloudpath_6.0.5816 source-url: https://cpdeveastus.blob.core.windows.net/cp-dev-vhd/Cloudpath_cloud_template_5816.vhd?sp=r&st=2024-11-07T03:59:44Z&se=2027-11-07T11:59:44Z&spr=https&sv=2022-11-02&sr=b&sig=GUFKFq2Pp3XVjh8Wix9rB1cnxs20zIWVNcnllXtwHXc%3D
destination-url: https://<your-storage-account>.blob.core.windows.net/<your-container>/<desired-vhd-name>?<your-SAS-token>
Your-storage-account: for example, mystorageaccount.
Your-container: for example, my-cp-vhd-container.
Desired-vhd-name: for example, Cloudpath_cloud_template_5816.vhd or use your desired file name with the .vhd extension. The .vhd filename extension is required.
Your-SAS-token: This is the one you generated in the preceding step.
- Wait for the copy
operation to be completed. You may see the output from
the
azcopycommand as shown below:This indicates that the AzCopy tool is analyzing your source/destination to identify what needs to be copied.
INFO: Failed to create one or more destination container(s). Your transfers may still succeed if the container already exists.
This indicates a permissions issue, network/firewall restriction, or a mismatch in storage account capabilities. The message is a warning and the transfer of individual files may still proceed if the target container already exists. If this or other failure-related messages appear, troubleshoot as necessary; refer to Find errors and resume jobs by using log and plan files in AzCopy.
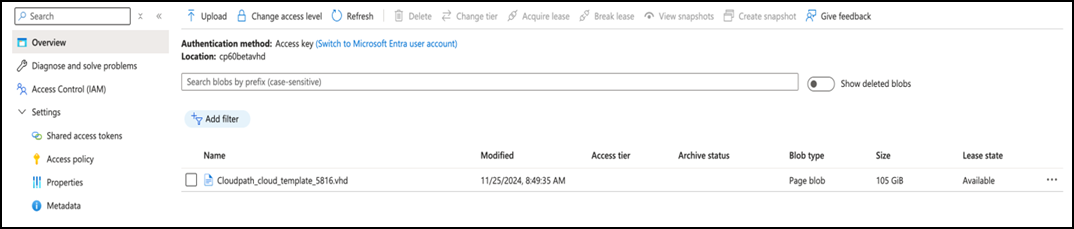
INFO: Successfully transferred: Cloudpath_cloud_template_####.vhd INFO: Transfer summary: This indicates that the copy operation completed successfully and provides a summary of the transfer actions. Go to your to verify. The size of the file is approximately 105 GB.
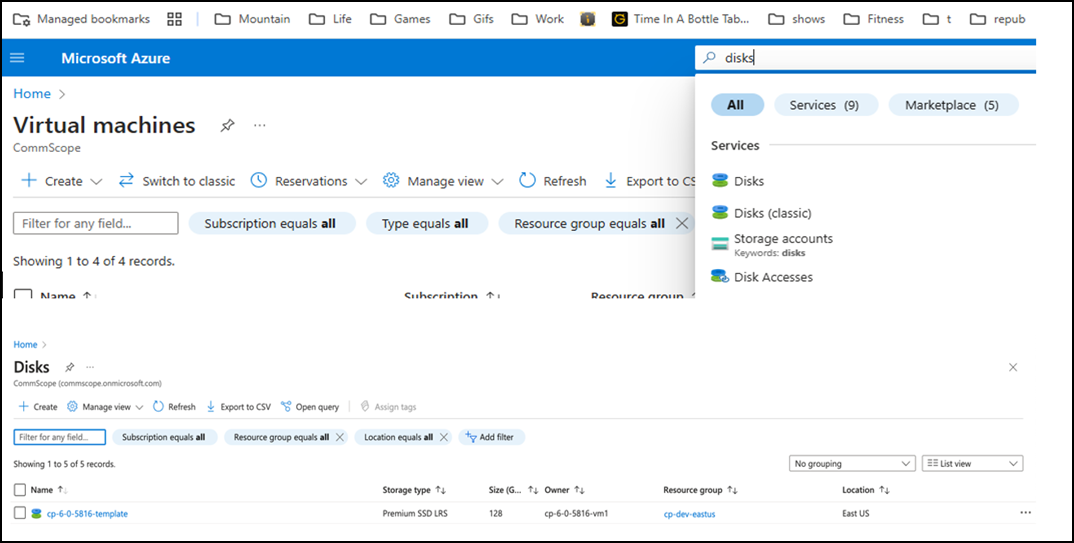
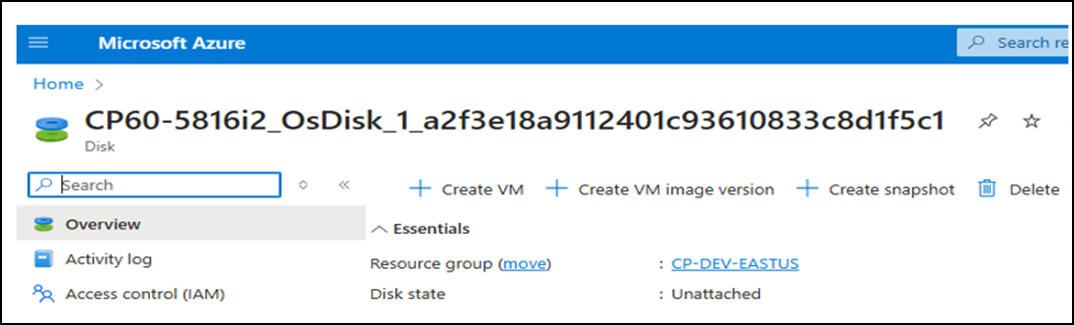
- Create a Managed Disk from the VHD.
- Select Disks in the Azure portal.
- Create a new managed
disk.
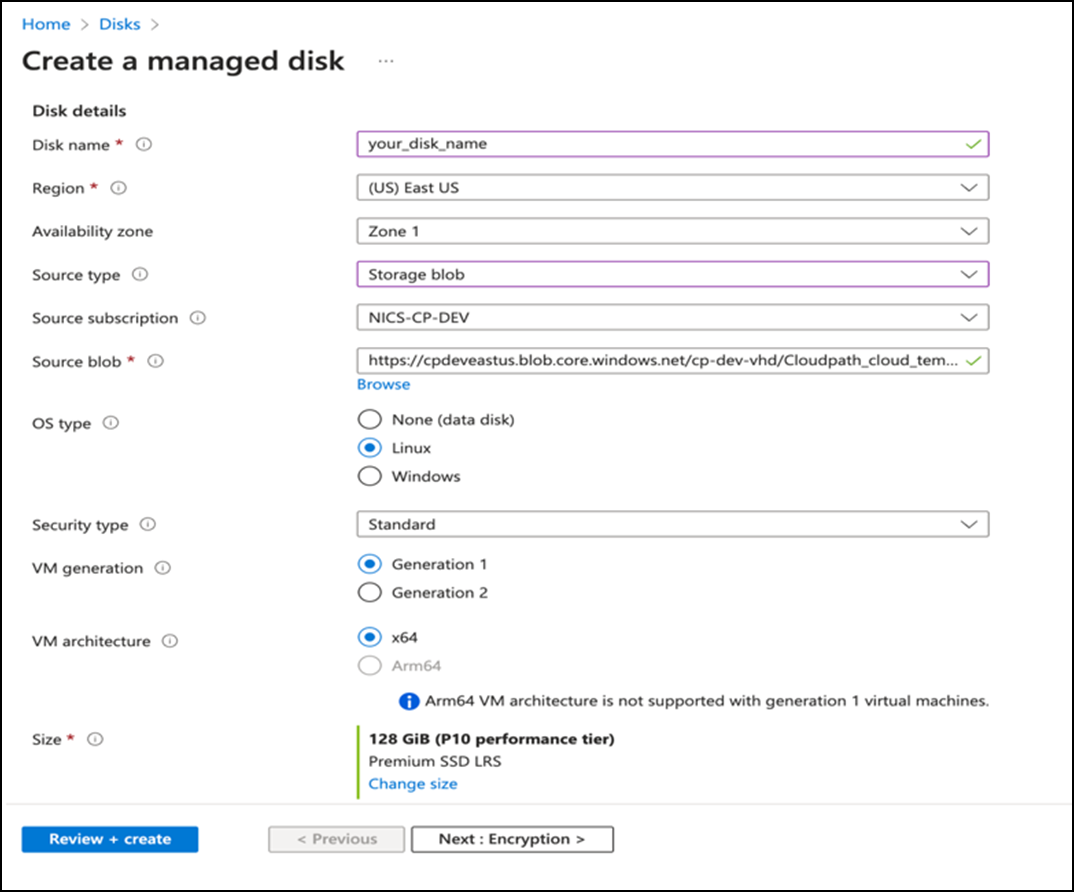
- Click + Create to create a new disk.
- Configure the required Disk name and the Region where you want the new managed disk to reside.
- For Source type, select Storage Blob.
- For Source blob, click Browse and navigate to your storage account container to select the desired .vhd file, then click Select.
- In the Size field, ensure the disk size is the same or larger than the size of the VHD file. RUCKUS recommends 128 GB or more, depending on your VM needs. If necessary, click the Change size link and select a different size, ensuring that the Disk Type is Premium SSD.
- Review and deploy the new managed disk configuration.
- Deploy a Virtual Machine (VM)
from the managed disk.
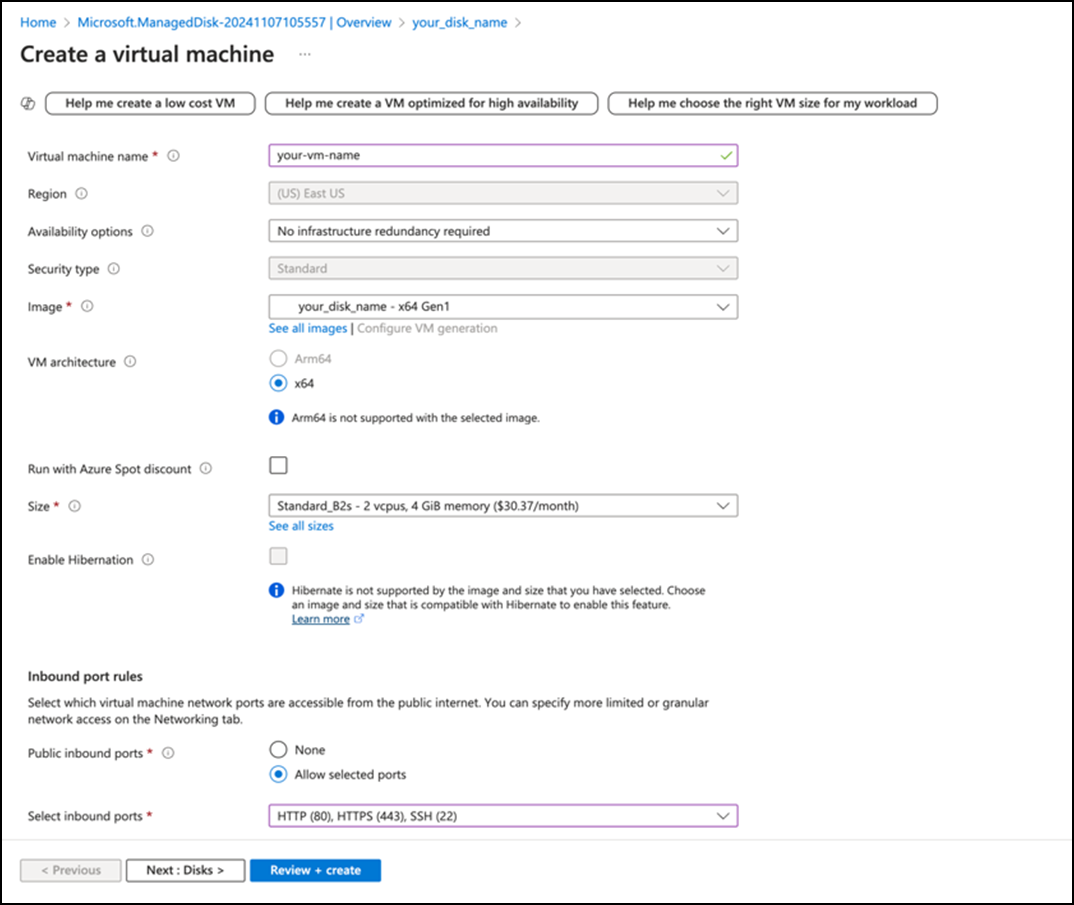
- Create a new VM.
- Ensure the Image field is prepopulated with the managed disk that was just created.
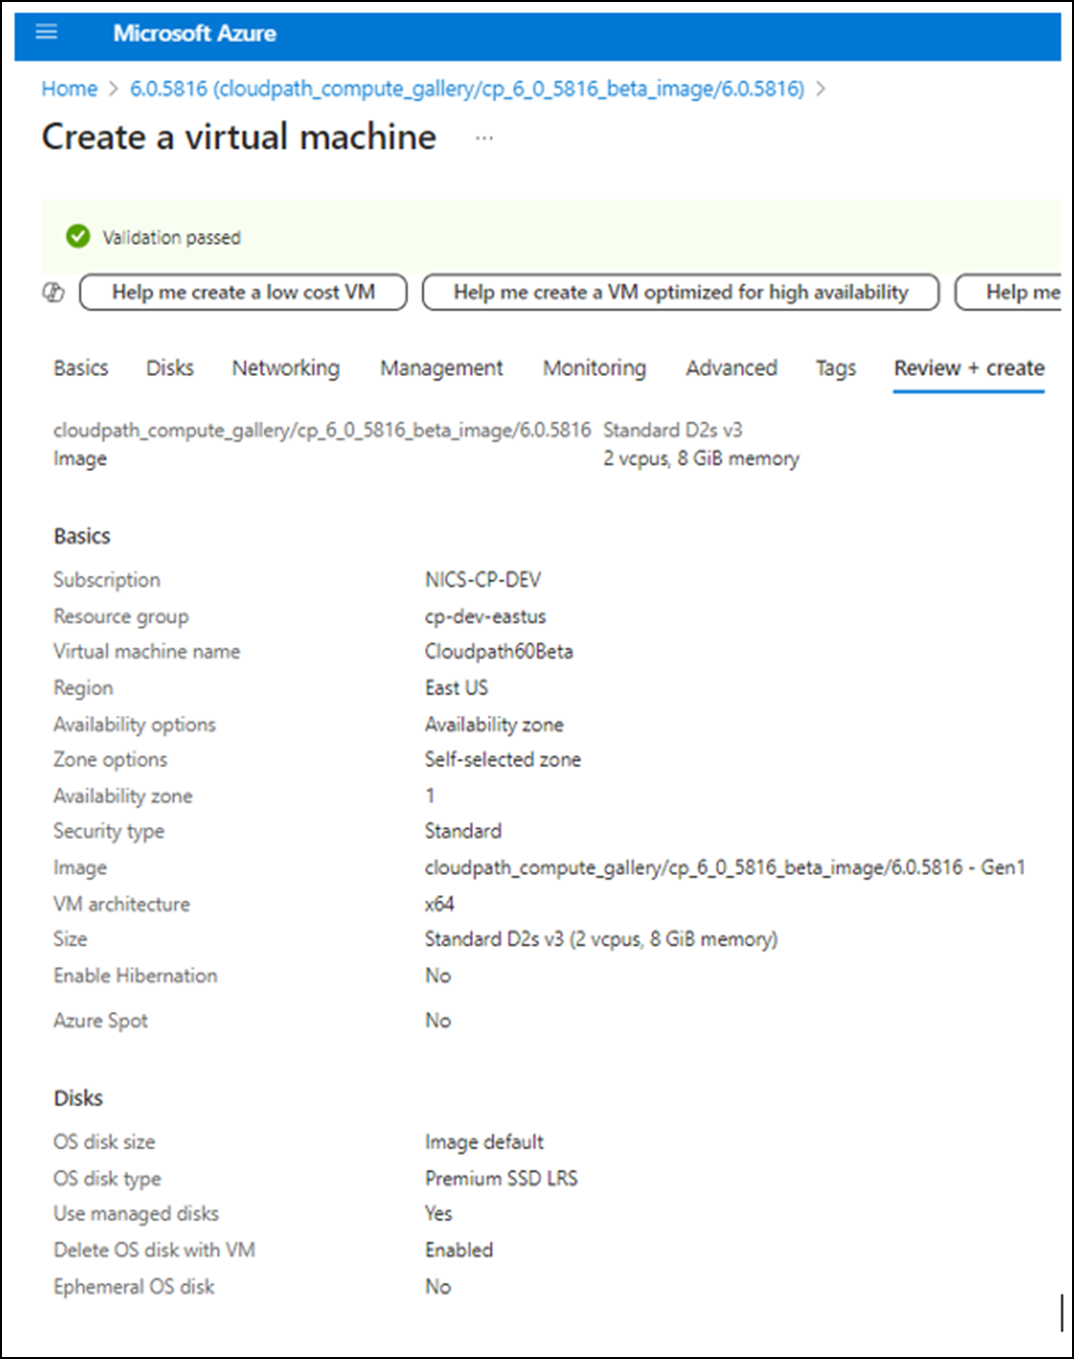
- Configure the remaining VM settings to meet your needs.
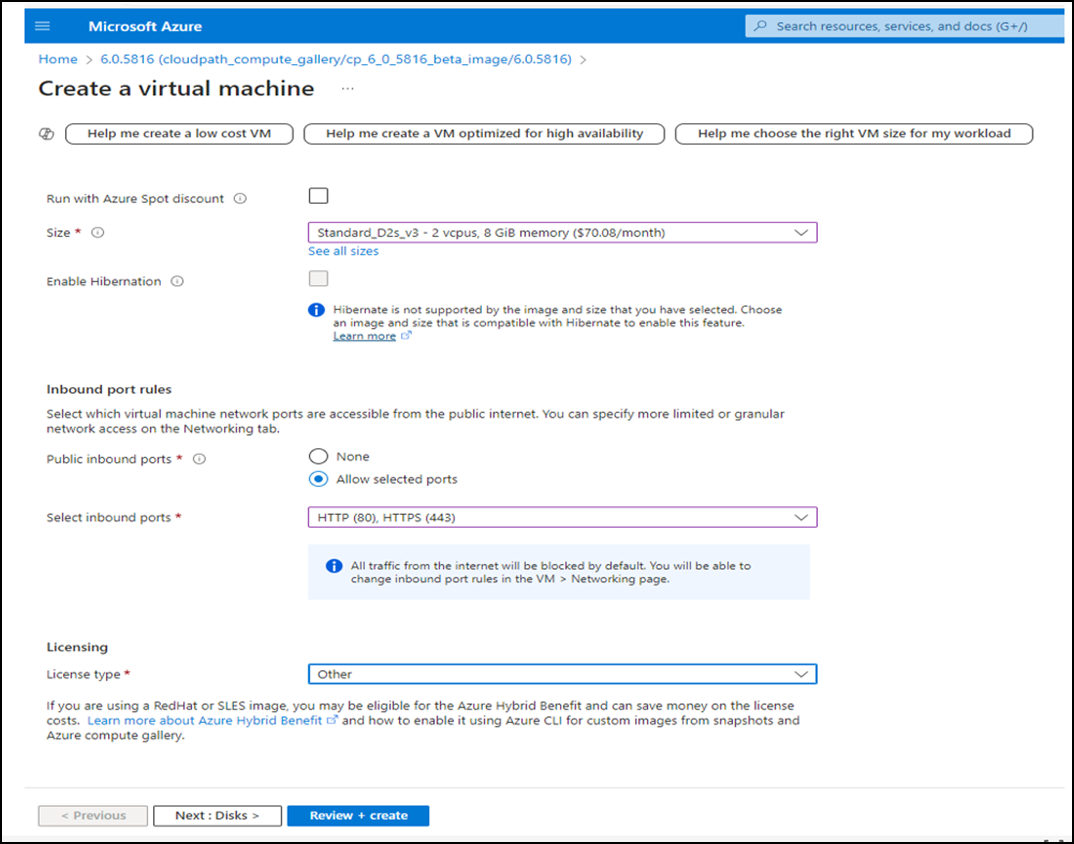
- For
Size, select the instance size for the VM to
determine the server resource allocation. The following information can
be used as a reference.Note: The Azure server size Standard_D2_v3 and equivalents were used to create this guide and are the minimum server sizes RUCKUS recommends.
- Non-Production POC - Deploys using 6 GB RAM and 2 vCPUs x 1 Core. Recommended for software trials, feature testing, and other non-production systems.
- 4,000 or Fewer Users - Deploys using 8 GB RAM and 2 vCPUS x 2 Cores. Recommended for production systems with fewer than 4,000 users.
- 8,000 or Fewer Users - Deploys using 12 GB RAM and 2 vCPUS x 4 Cores. Recommended for production systems with fewer than 8,000 users.
- More than 8,000 Users - Deploys using 16 GB RAM and 2 vCPUS x 4 Cores. Recommended for production systems with more than 8,000 users.
- More than 20,000 Users - Deploys using 20 GB RAM and 2 vCPUS x 4 Cores. Recommended for production systems with more than 20,000 users.
- Allow HTTP and HTTPS for Select inbound ports (we will add SSH later) and set the Licensing type to Other.
- If the Administrator account section is displayed on this page, select the Password option.
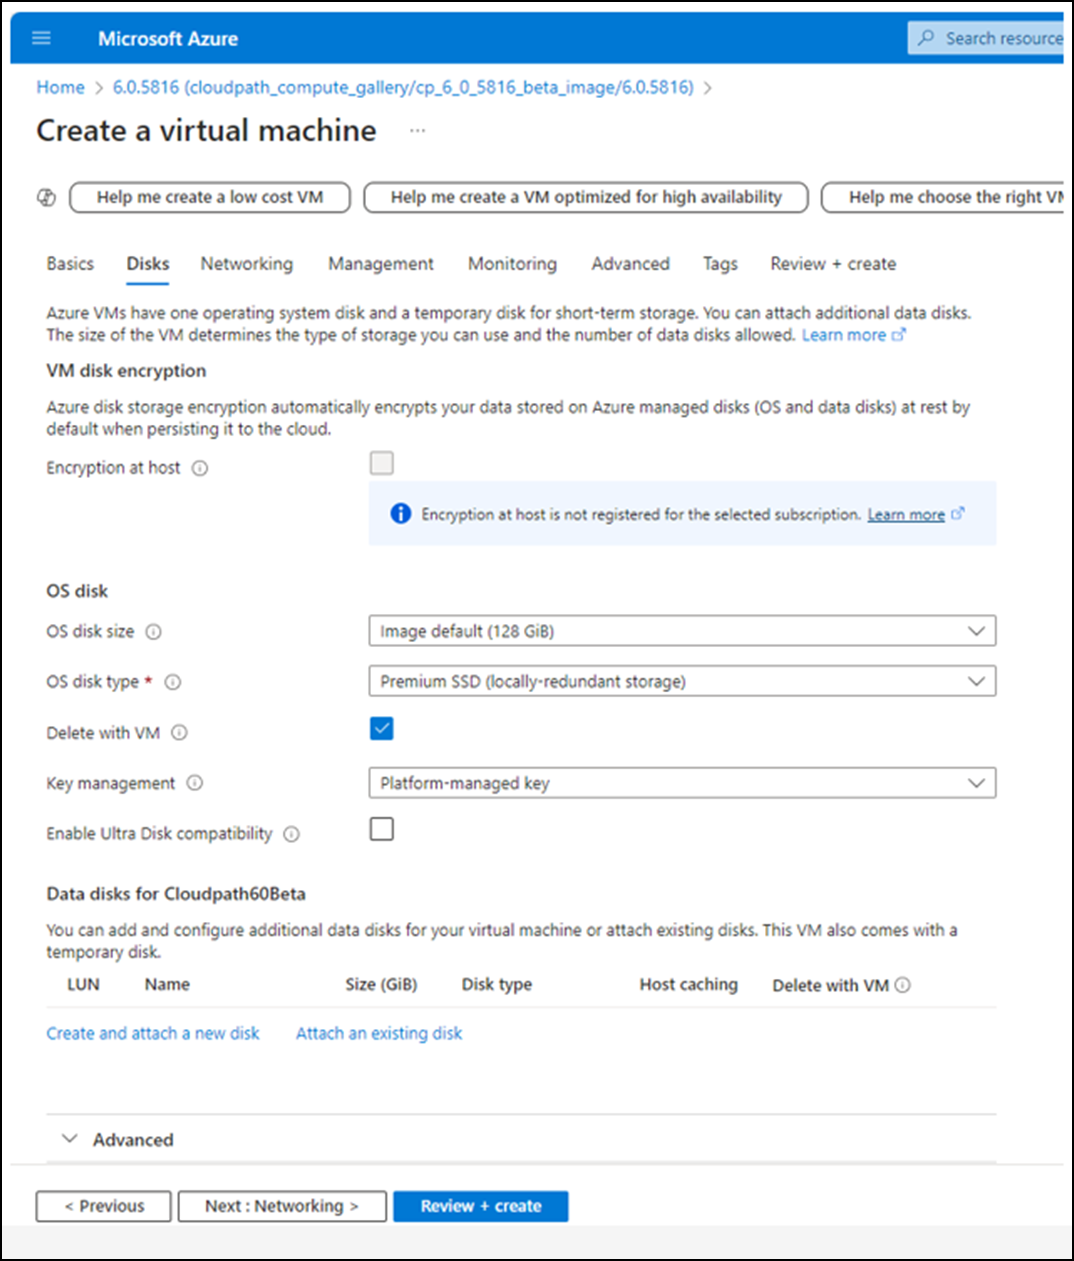
- Click Next: Disks.
- Click Next:
Networking.
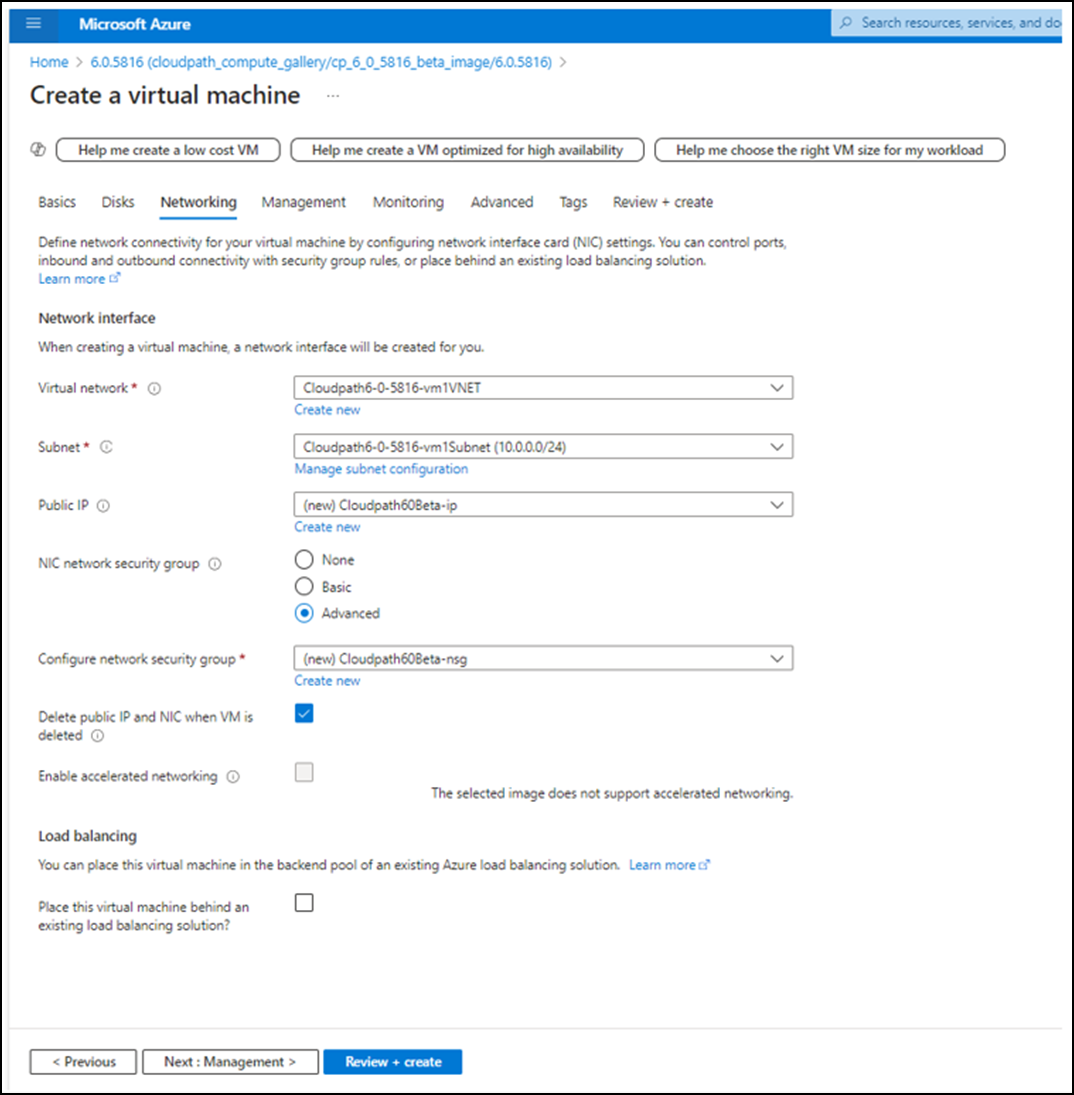
- Select the desired network and load balancing settings. Make sure the selected subnet has L3 access to the wireless controller and directory services.
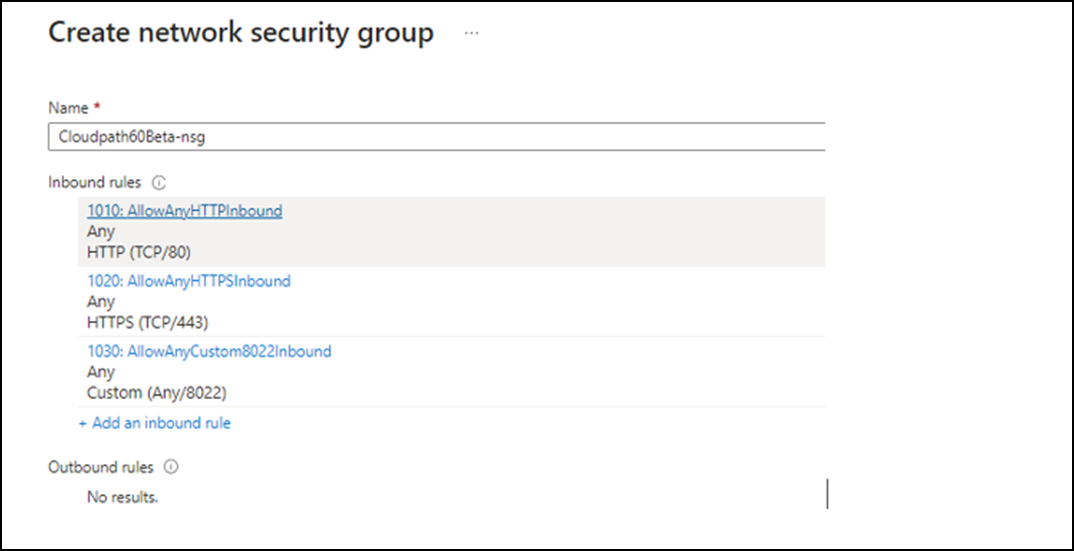
- Under Configure network security group, click Create new group and add inbound allow rules for HTTP, HTTPS, and Custom 8022 (SSH port). These can be modified and added to as needed.
- Click Next:
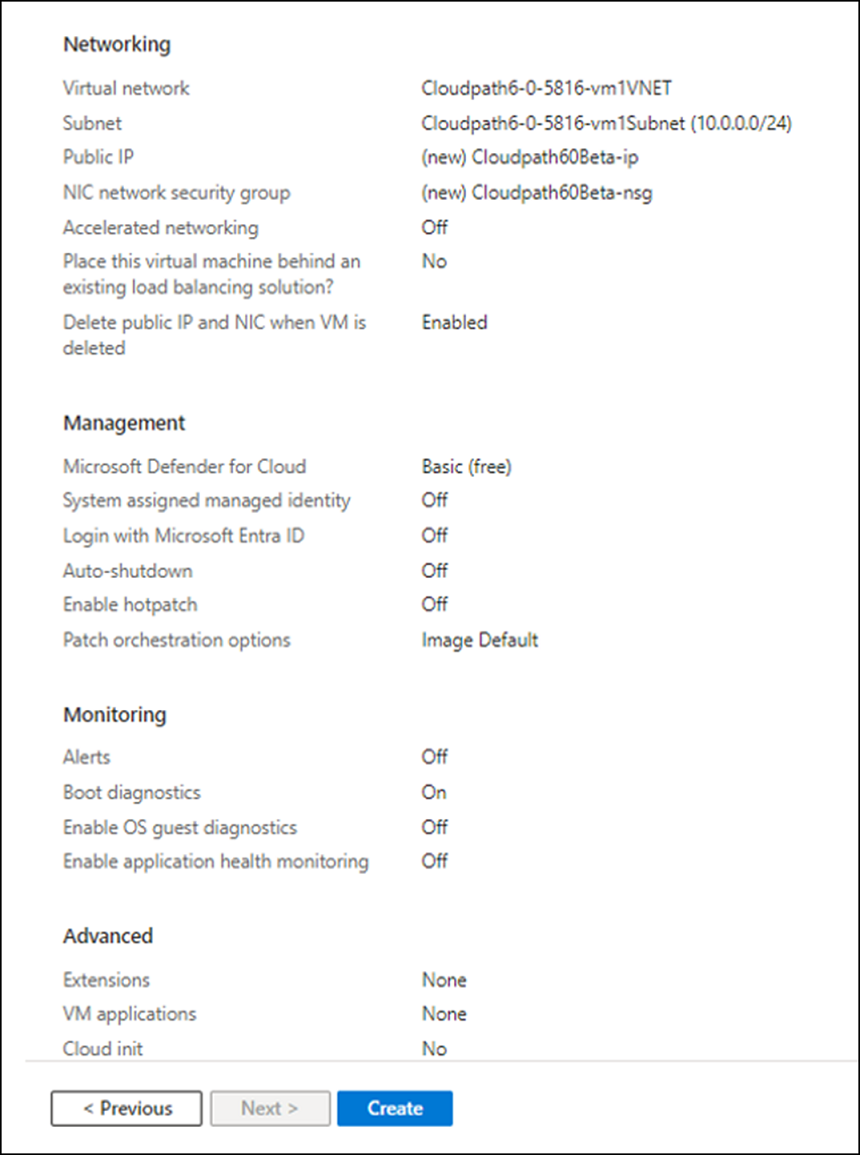
Management.Keep default settings except in specific use cases.
- Click Next:
Monitoring.Optional settings; modify if desired.
- Click Next:
Advanced.For a basic setup default settings are fine. High-load environments may benefit from some of the advanced performance options.
- Click Next:Tags.(Optional) Add a new tag by entering a Name/Value pair. Up to 50 tags may be added.
- Click Review + Create to trigger Azure validation of the VM configuration.
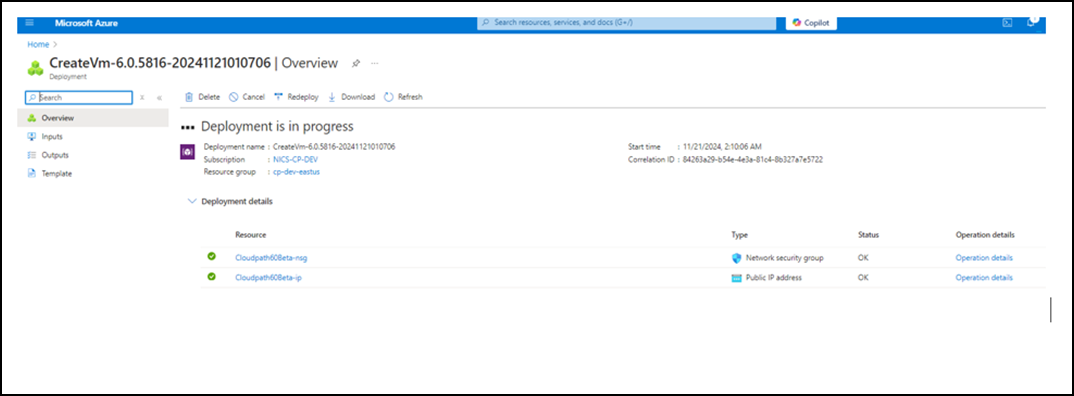
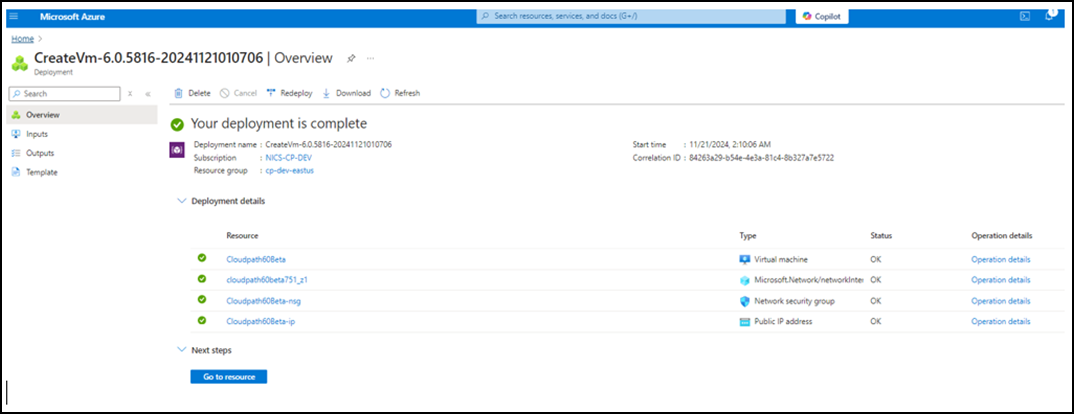
- Click Create to deploy the newly created VM.
- Click Go to
resource.
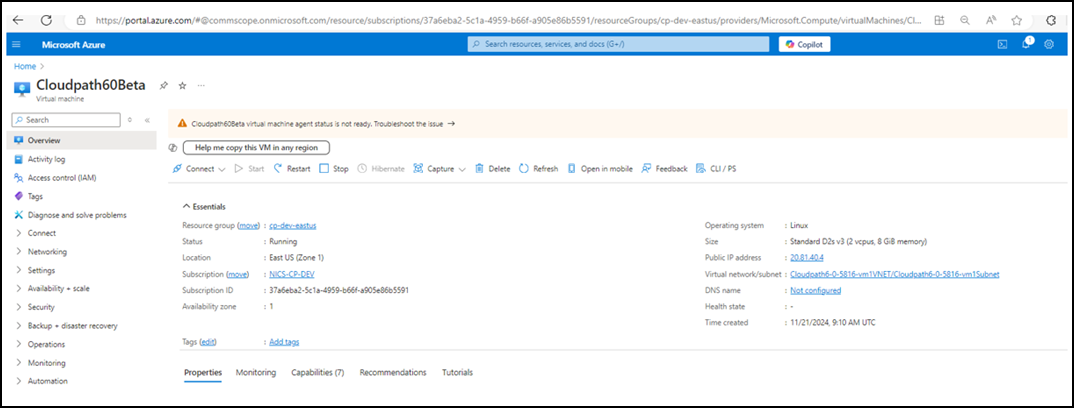
- Verify the server details, paying particular attention to the Network settings of the newly created VM. Confirm that a Network Security Group (NSG) is associated with the VM and that its Inbound security rules allow SSH, HTTP, and HTTPS traffic. If no inbound port rules are configured, create a new Network Security Group and add inbound rules for SSH, HTTP, and HTTPS.
- Configure DNS name if not using an outside DNS host.
- Repeat Steps 3 through 5 if you want to build another Cloudpath VM for a cluster.