Creating an AV Profile
- On the ICX web management
interface (Main UI), select AV Profiles in
the main menu.The AV Profiles overview page is displayed.
- In the AV Profiles section of the page, click + Create.
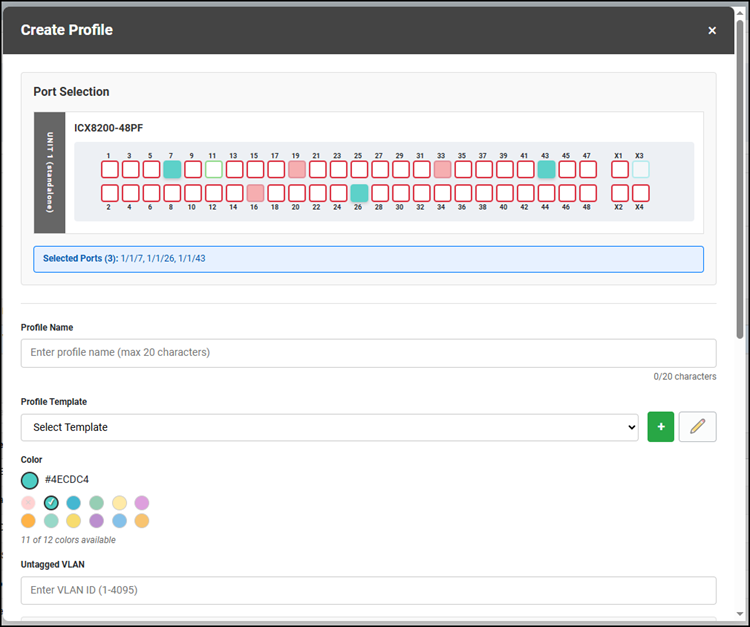
- In the Port Selection section, select the ports to add to the new profile.
- For Profile Name, enter the name of the profile.
- For Profile Template, select a profile template from the
list.If the desired template is not in the list, refer to Creating a New AV Profile Template.
- For Color, you can select any available color to indicate which ports are part of this AV Profile.
- For Untagged VLAN, enter the VLAN ID.
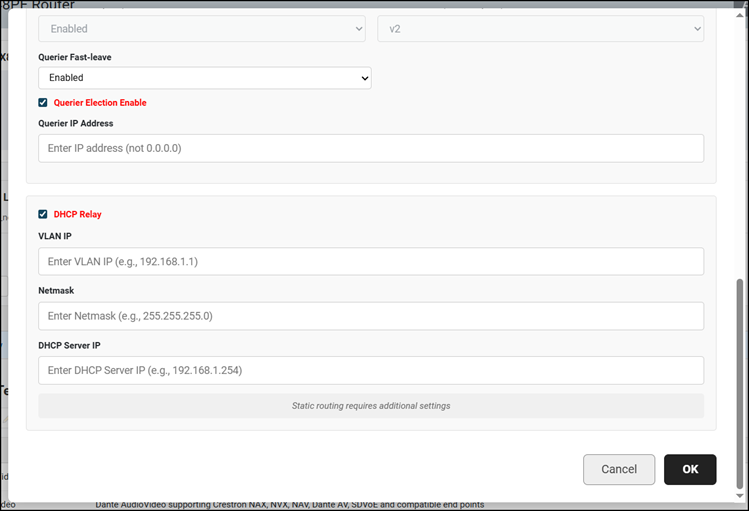
- For Querier Fast-leave, select Enabled or Disabled from the drop-down list. This option is enabled by default and is applicable to all AV profiles except Data profiles.
- (Optional) Enable querier election by clicking the Querier Election Enable checkbox and then entering the IP address in the Querier IP Address field.
- (Optional) Enable DHCP relay by clicking the DHCP Relay checkbox and then entering IP addresses for the following fields:
- When all the information is correct, click OK to create the new AV profile.