Cloning a Workflow
Cloning a workflow can be a useful tool during development because you can make exact
copies of current workflows. From these copies, you can make desired updates to create
new workflows without having to start every workflow from scratch.
updated for 5.9
The steps use an example to
instruct you on cloning a workflow: - In the UI, go to Configuration > Workflows to display your current workflows. Suppose you want to clone the workflow called "Production_23" shown in the Grid View of Configured Workflows.
- Click Add Workflow.
- On the ensuing screen, do the following:
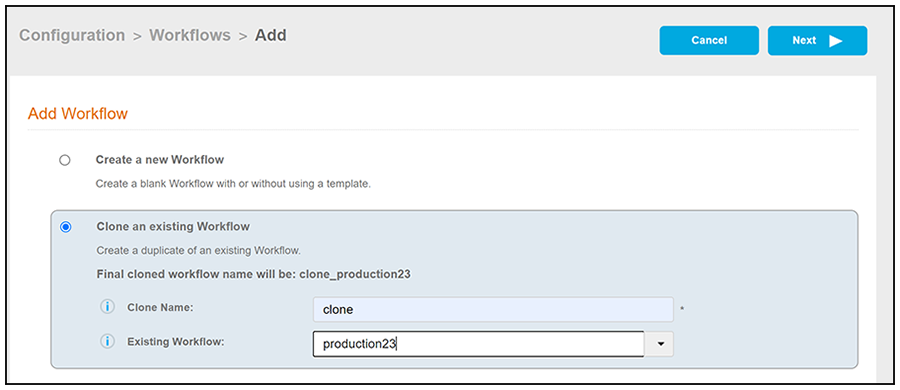
- Select the "Clone an existing Workflow" button (see screen below).
- In the Clone Name field, enter the name you want for the cloned workflow. The name you provide will be pre-pended with an underscore to the name of the selected existing workflow.
- From the Existing Workflow drop-down, select the workflow you want to clone.
- Click Next.
- When the cloning completes, the cloned workflow appears in your list of workflows just like any other workflow. The example below shows the new workflow: "clone_Production_23".
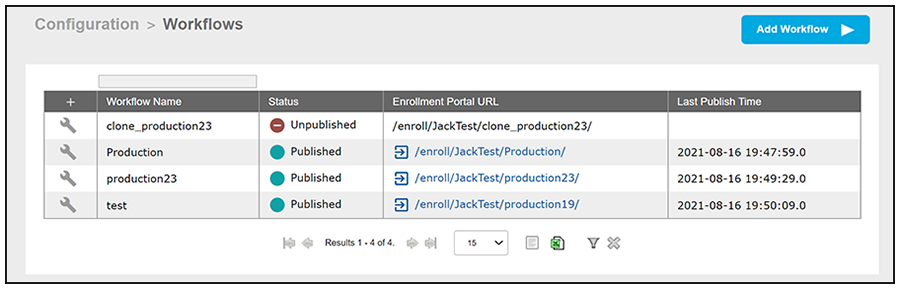
- A cloned workflow appears in the list of workflows.
- A cloned workflow is an identical copy of the workflow from which it was cloned.
Note: Items that are not part of the actual workflow will not be cloned. Examples include MAC authorization lists, approvers lists, authentication servers, and so on.
- Plug-ins that require unique names are also renamed with "clone_" prepended to their
original names, as shown in the preceding illustration with the Use Policy and Notification
plug-ins.
Note: After cloning is complete, you can rename a cloned workflow and plug-ins to any names you want.
- Editing a cloned workflow has no impact on the workflow from which it was cloned.
- You can also make a clone of a clone.
- A cloned workflow is not automatically published, but it can be published at any time.