Charge User for Service
The sole function of this plugin, called "Charge user for service," is to charge the user for a service, but you must build other steps in your workflow to define the service being provided. If a user is to be limited to a certain amount of times to use a service, such as being granted internet access, you must make sure that the correct timeouts on a corresponding MAC Registration step or Certificate-assignment step are set. Examples are provided later in this section.
To make this workflow step work properly, you need to do the following:
- Add necessary entries to the walled garden on your controller.
- Create an application using the PayPal developer's site.
- Configure the workflow step in Cloudpath to communicate with your PayPal application.
Required Walled Garden Sites for Access
You need to add the following entries to the WISPr/captive portal walled garden for the enrollment to work correctly:
For information on setting up the walled garden, refer to the following applicable section:
- For SmartZone, refer to Setting Up the Walled Garden.
- For Unleashed, refer to Setting Up the Walled Garden.
- For ZoneDirector, refer to Setting Up the Walled Garden.
What You Need to Do on the PayPal Developer's Site
Follow these basic steps:
- Create a business account on the PayPal developer's web site.
- Refer to the available PayPal developer's documentation on how to create the application you desire for Cloudpath.
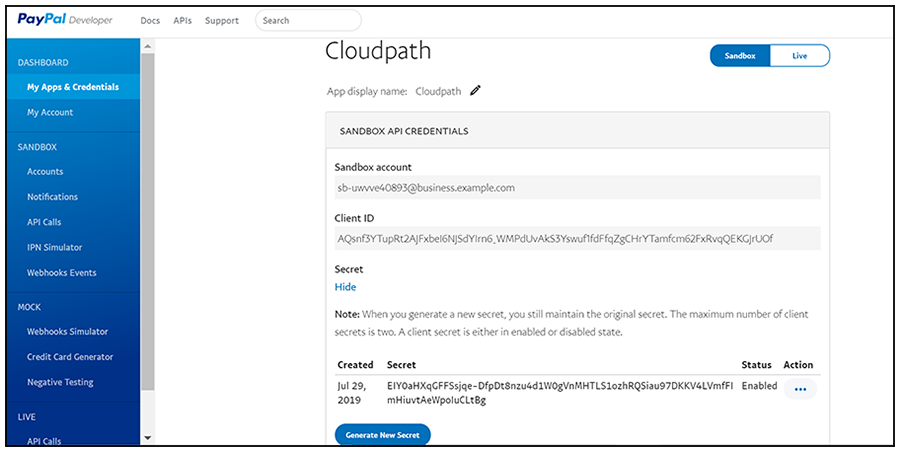
- Give the application a meaningful name so that you know it's intended to communicate
with Cloudpath. The following figure shows an example application on the PayPal developer's
"Sandbox" (test) location:
Note: The example figure above contains information that you will need when you configure the workflow step in Cloudpath. The Client ID and Secret are the key elements of this application because they will need to be copied and pasted into the Cloudpath configuration, described later. Note that if you change those values in the PayPal application, they will need to be changed in exactly the same way in Cloudpath, or the plug-in will fail.
Adding the Corresponding "Charge for Service" Workflow Step in Cloudpath
To add and configure the charge-for-service step in Cloudpath, follow these steps:
- In your workflow, click the " Insert Step Here" right-pointing arrow at the desired location to invoke the "Which Type of Step Should Be Added" screen (refer to Enrollment Step Selection).
- Scroll down and click the "Charge user for service" button:
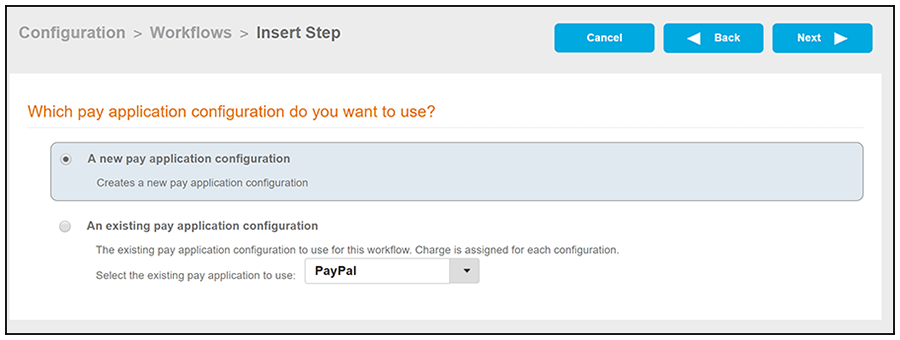
- The "Which pay application configuration do you want to use?" screen appears. If a pay application configuration already exists, the screen appears as shown below:
- For purposes of this example, select "A new pay application configuration," then click Next to invoke the Configure a Pay Application page.
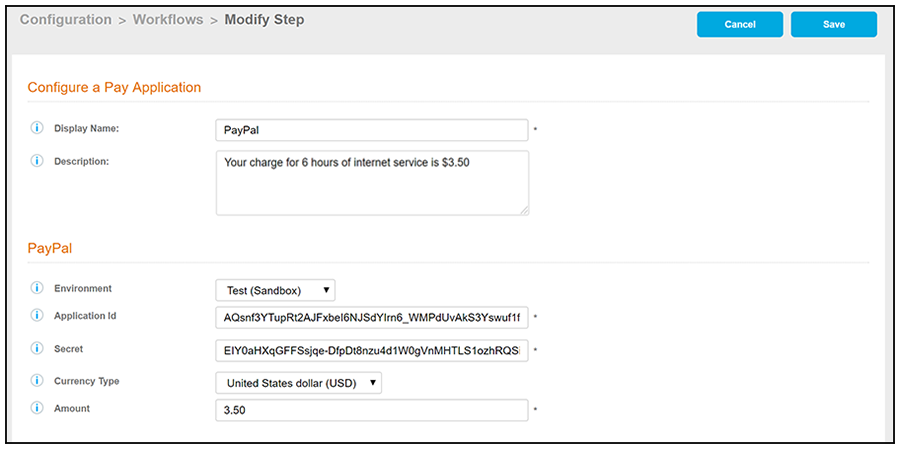
- Configure the Pay Application page:
- Display name: Name of the step as you want it to appear in the workflow. This name is visible only to Cloudpath administrators.
- Description (optional): Wording that you want the user to see when they are presented with the third-party service charge screen. (This description, if entered, will appear under the Ruckus logo shown in Service Charge Screen Preview.)
- Environment: Choose between "Test (Sandbox)" and "Production (Live)."
- Application ID: This ID is automatically assigned to your application by PayPal. In PayPal, however, it is called "Client ID," as shown in PayPal Developer's Page . Copy the Client ID from the PayPal Developer's page and paste it directly into the Application ID field in the Cloudpath UI Pay Application Configuration Screen.
- Secret: This secret is automatically assigned to your application by PayPal. Copy the Secret from the PayPal Developer's page and paste it directly into the Secret field in the Cloudpath UI Pay Application Configuration Screen.
- Currency Type: From the drop-down list, select the currency type to use when the customer is billed.
- Amount: Enter the amount to be charged. You can use decimals for the appropriate currency. (Commas and other formatting are not permitted.)
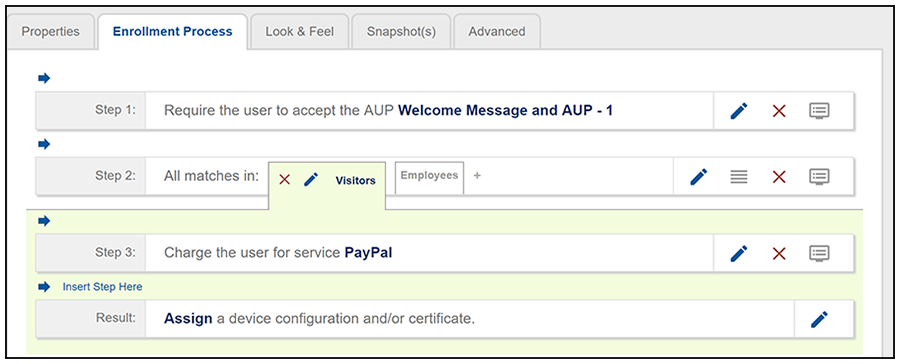
- After you save the configuration in the previous step, you are returned to your workflow. Check that the PayPal step has been added, as shown in the following example:
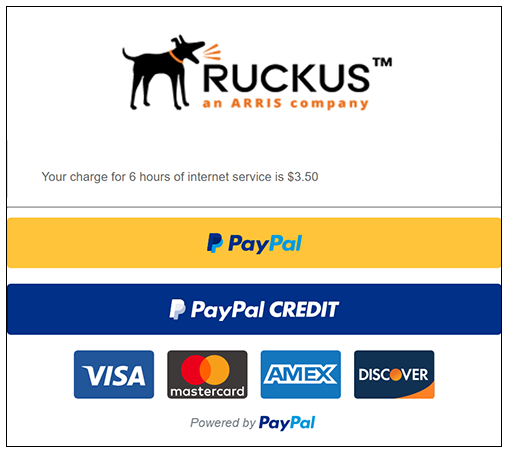
- To the far right of the PayPal step, you can click the Preview icon to view how the
user will be presented with this service-charge step:
The user will then make a selection to proceed with their payment.
- You can add additional steps as desired. You at least want to make sure that you add
any other steps to support what the user is being charged for. In this example, the
user is told there is a charge of $3.50 for six hours of internet use. Therefore,
you want to be sure that the user's session ends after six hours. Methods for doing
this include:
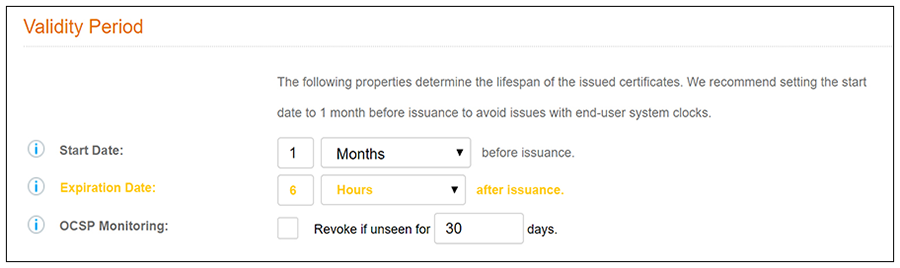
- Making sure to issue a certificate that expires after the desired amount of time. You can go to Certificate Authority > Manage Templates, click the pencil icon of the template you are using for onboarding in the workflow, scroll to the "Validity Period" section of the configuration screen for this template, and set the certificate to expire six hours after issuance, as shown below:
- Using a MAC Registration step in your workflow, and making sure that the expiration
is set as desired. Go to
Configuration > MAC Registrations. Click the pencil icon of the applicable MAC Registration, and in the "Registration
Information" part of the screen, set the fields, as shown below:
You might be interested in using the "Charge for Service" plug-in with a Timed Access Workflow, described in the Using the Timed Access Workflow Template section. At the end of that section, which shows a sample workflow that automatically creates and uses MAC Registration lists, you could place a "Charge for Service" plug-in between Steps 5 and 6 in the workflow shown in Timed Access Workflow Fully Expanded, and you could configure the timed MAC Reg lists to match the amount of time for which the user is being granted access.