Request Access from a Sponsor Online
The figure below shows an example of a completed workflow that uses this plug-in:
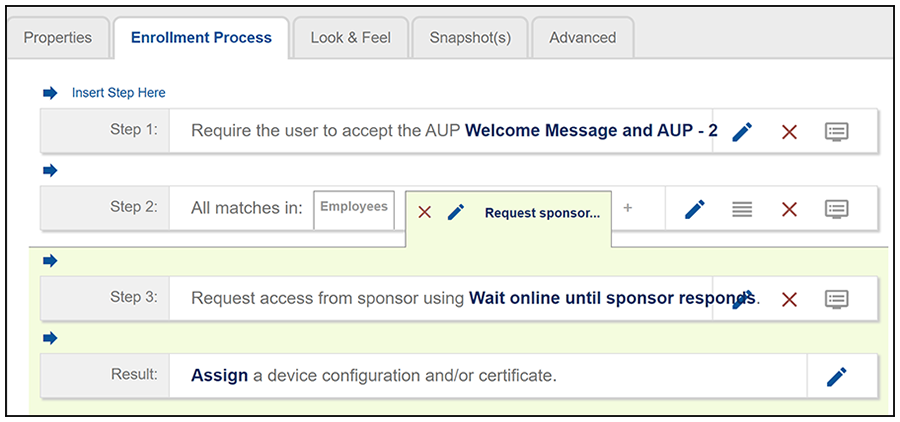
This information that follows instructs you how to configure this particular plug-in, and shows you how the interaction between user and sponsor can occur.
Configuring the "Request Access from a Sponsor Online" Plug-in
To use this plug-in, you would first want to create a tab such as the one shown above called "Request sponsor..." (full name could be "Request sponsor access while waiting online"). Then, follow these steps:
- With the "Request sponsor..." tab highlighted, click the arrow below to insert a step into the workflow.
- You will then create what is shown as Step 3 in the above workflow by scrolling down the list of available plug-ins and clicking the "Request access from a sponsor online" button.
- On the ensuing page, select the button called "A new access request configuration,"
then click
Next.
Note: If no existing access request configuration exists, you will be taken directly to the next step.
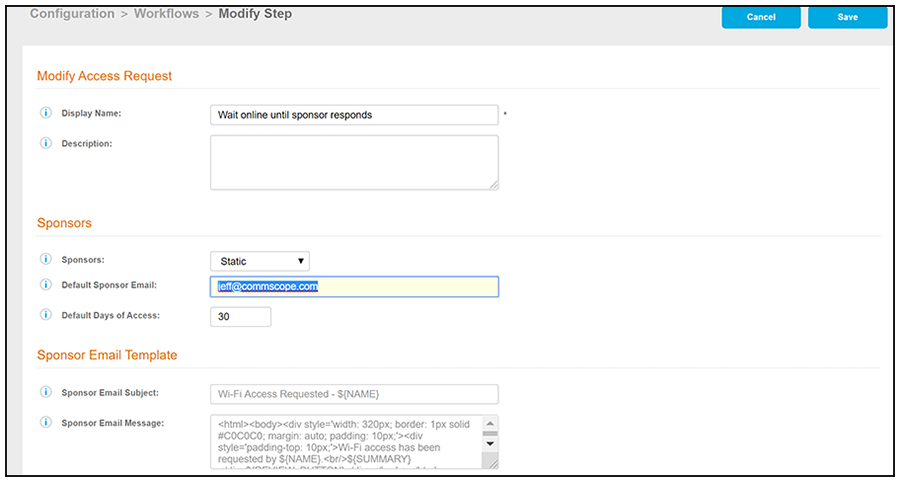
- Configure the Create Access Request page:
In the Default Sponsor Email field, enter the email address of the sponsor. The enrolling user's request for approval will be sent to this email address.
- Set the other values as desired, then click Save. You can click the "i" icons to get information about the fields on the screen.
How the Enrollment Process Works for the "Request Access from a Sponsor Online" Plug-in
After your workflow is complete, you can publish the workflow, then test the enrollment process by clicking on the enrollment URL. The following example covers the basics of the online sponsor request:
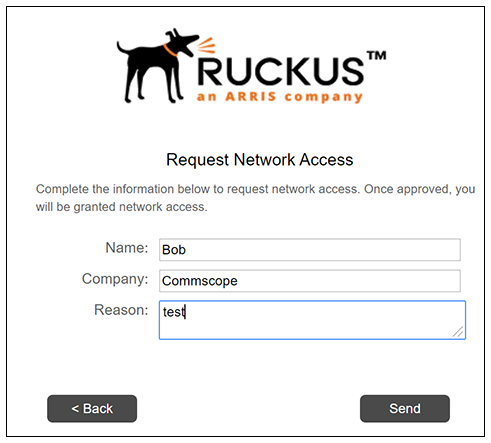
- After the enrolling user selects the branch for requesting access from a sponsor while the user remains online, the Request Network Access window is presented to the user. The user enters the requested information, as shown in the following example, then clicks Send.
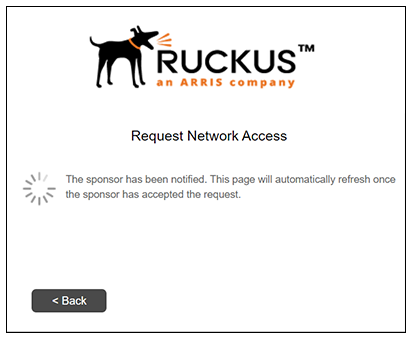
- Once the user sends their information, the following occurs:
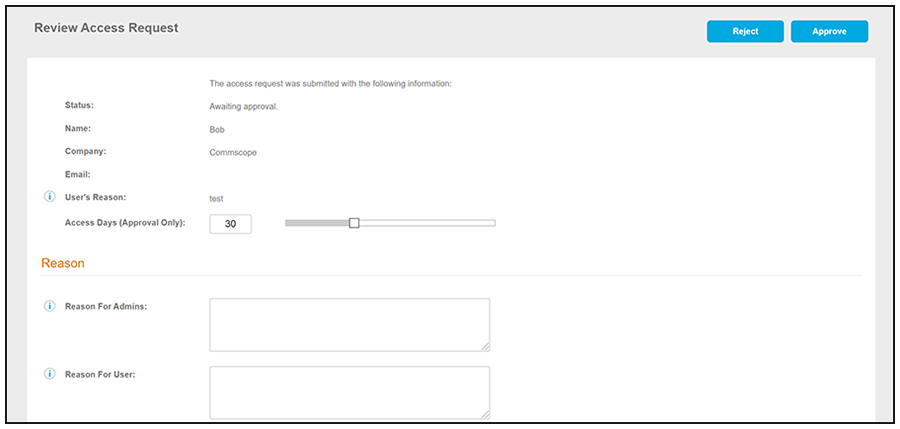
- It is now up to the sponsor to take action. The sponsor must click "Review" in the notification. The sponsor is then presented with a screen where the request can either be rejected or approved:
- The sponsor can enter information in the Reason section, if desired, and should then click either the Reject or Approve buttons.
- If the sponsor approves the request, the user is presented with a window that states the request has been approved, and the enrollment proceeds. If the sponsor rejects the request, the user is presented with a window that states the request was rejected and that the user should contact the sponsor for assistance.