RUCKUS Network Director Administration and Management
Logging In to RUCKUS Network Director
Note: No special system configuration
is necessary for RUCKUS Network Director. The web interface
and APIs are available over HTTPS once the system is started.
Complete the
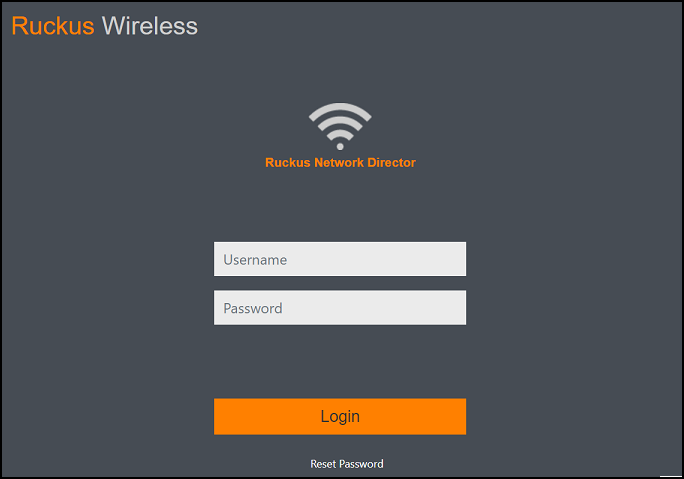
following steps to log in to the RUCKUS Network Director Admin portal. - Launch the web browser and browse to the RUCKUS Network Director Admin portal (https://[RUCKUS Network Director IP]:8443). The RUCKUS Network Director login page is displayed.
- In the login fields, enter the default login
credentials and click Login.
- Username: admin
- Password: Enter the password that you have configured in the RND installation setup using the CLI.
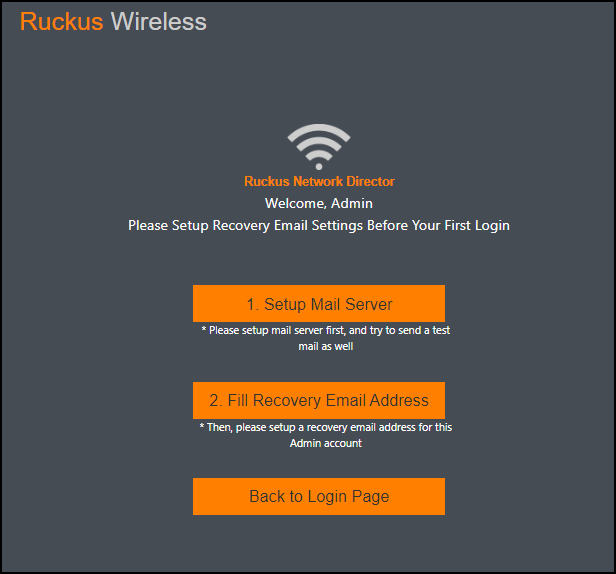
The Setup Recovery Email Setting Before Your First Login page is displayed.
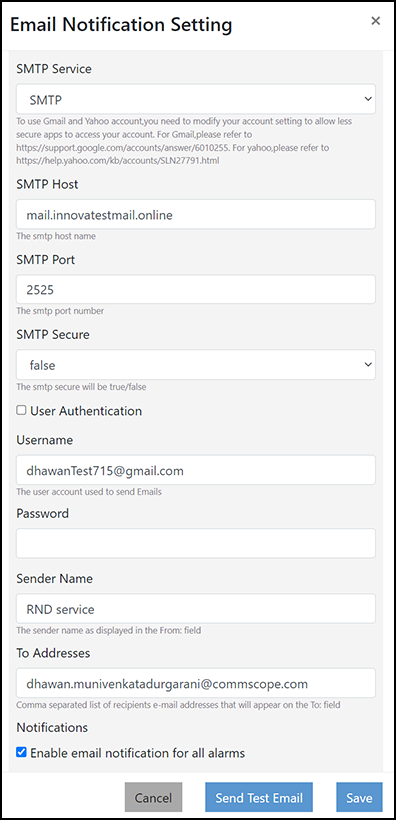
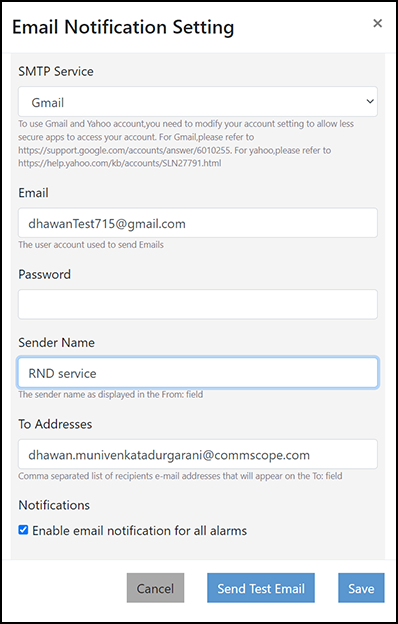
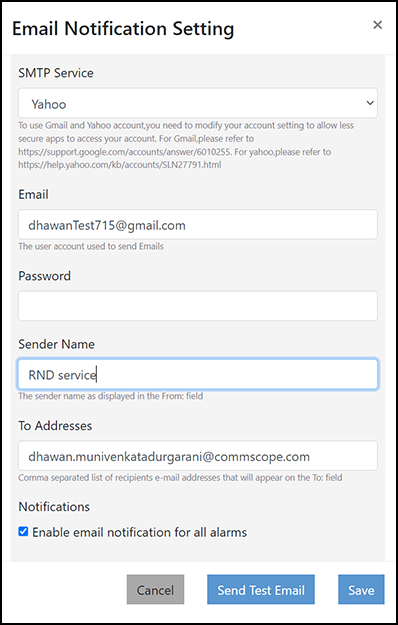
- Click Setup Mail Server. The Email Notification Setting dialog box is displayed.
- Complete the following fields to set the
alarm email notification:
- SMTP Service: Select the email service from the list. Gmail, Yahoo, and SMTP email services are supported.
- Email: Enter the email ID from which you want to send the alarm notification.
- Password:
Enter the password associated with the email account. For Gmail or Yahoo
SMPT service, enter the generated App
Password.
For Gmail or Yahoo SMPT service, enable 2-Step Verification, and generate an App Password as follows:
- Gmail:
- Log in to the Gmail web UI.
- Click to display the Security window.
- Enable 2-Step Verification.
- In the Security window, complete the following steps to generate an App Password:
- Yahoo:
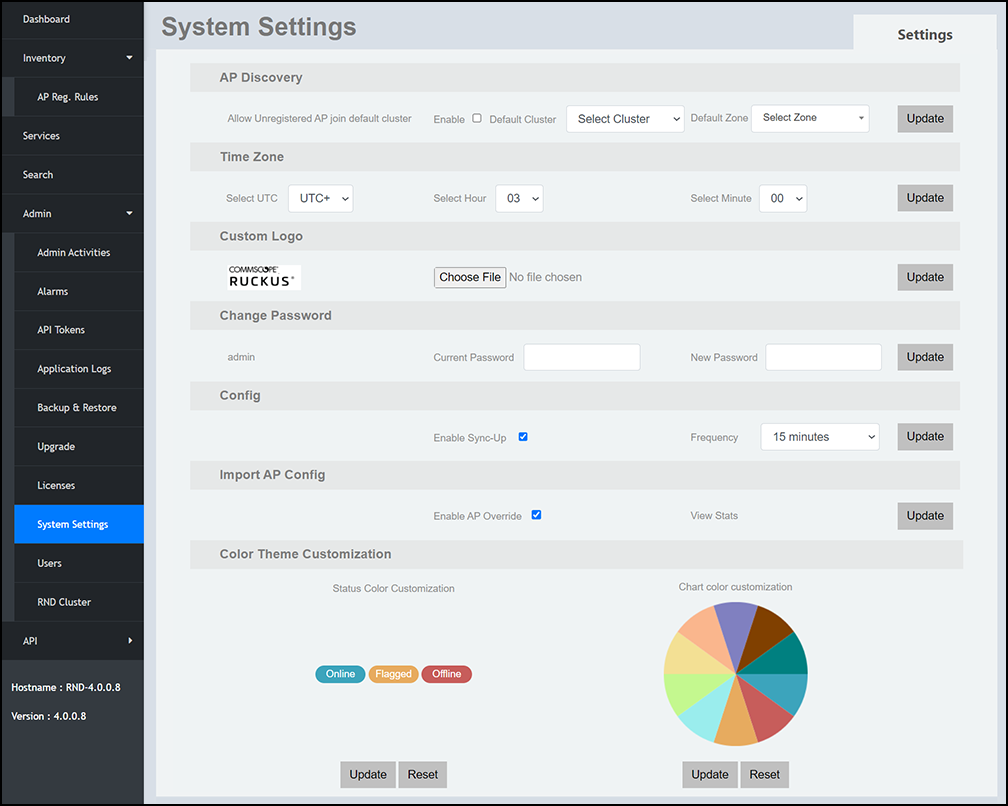
Note: Once logged in, you can change the password in the System Settings dialog box. - Gmail:
- Sender Name: Enter a name for the sender.
- To Addresses: Enter the email address of the recipients. You can add multiple recipient addresses separated with commas.
- Enable email notification for all alarms: If selected, an email notification is sent to the recipients whenever an alarm is triggered.
- If
SMTP is selected, the following additional
fields are displayed:
- SMTP Host: Enter the full name of the server provided by your ISP or mail administrator. Typically, the SMTP host name is in the format smtp.company.com.
- SMTP Port: Enter the SMTP port number provided by your ISP or mail administrator. Often, the SMTP port number is 25 or 587. The default SMTP port value is 25.
- SMTP Secure: Select SMTP secure as true or false from the list.
- User Authentication: Enable this to send the e-mail from the authenticated user.
- Username: Enter the e-mail ID from which you want to send the notification. This e-mail ID is used as an authenticated e-mail ID to send SMTP email notifications to all of the recipients listed in the To Addresses field.
- Click Send Test Email to test email delivery.
- Click Save to apply the changes.
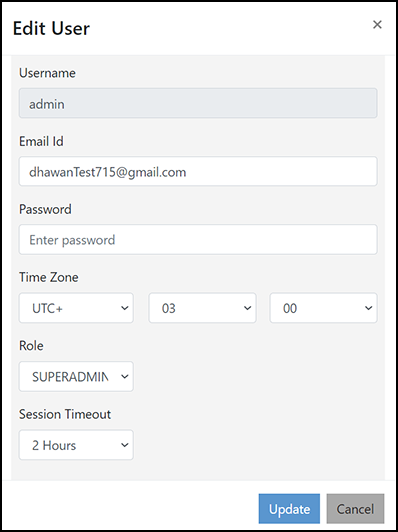
- Click Fill Recovery Email Address. The Edit User dialog box is displayed.
- Complete the following fields and click Update:
- Username: By default, the user name is admin.
- Email Id: Enter the email ID from which you want to send the notification.
- Password:
Enter the password, remember this password because it will be used on
the login page going forward.
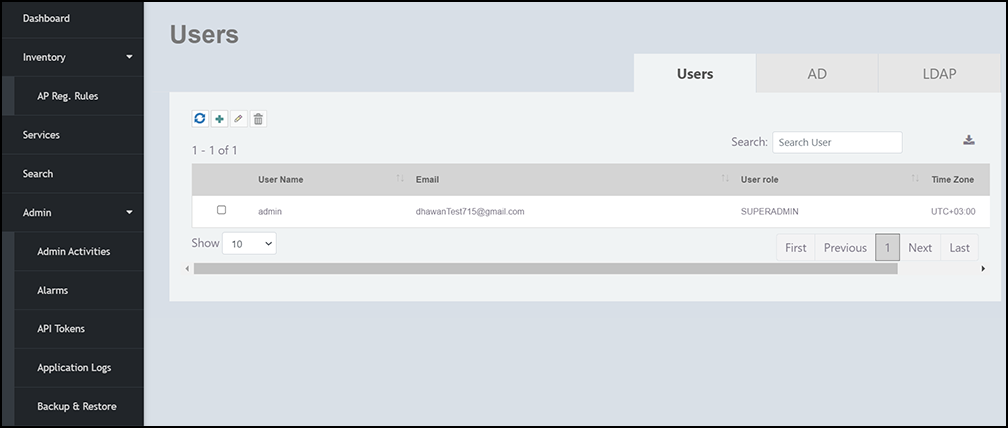
Note: Once logged in, you can change the password or add or edit a user in the Edit User dialog box.
Once logged in, you can change the password by completing the following steps:
- Time Zone: Select a time zone from the set of lists.
- Role: Select the role from the list.
- Session Timeout: Select the session timeout from the list.
- Click Back to Login Page. The login page is displayed.
- In the login fields, enter the login credentials.
- Click Login. The web interface refreshes and then displays the Dashboard, which indicates that you have logged in successfully.
 icon. The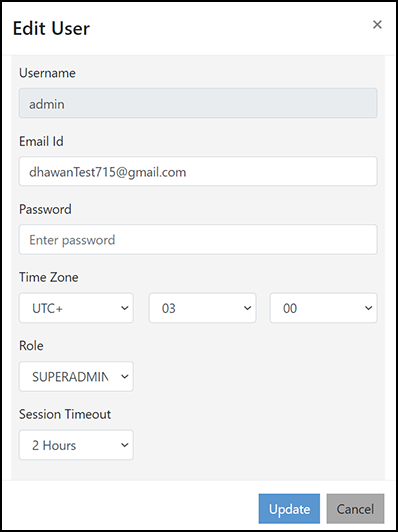
Managing the RUCKUS Network Director Application
No special management is required to manage the RUCKUS Network Director application. Standard CentOS system management monitoring is applied.