Installing RUCKUS IoT Insights
- Open a web browser on your host
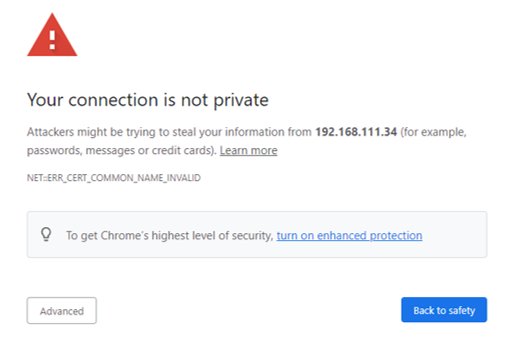
machine and enter the IP address of the VM in the address bar. A warning with "
Your connection is not Private" is displayed. In the example, the IP address is 192.168.111.34.
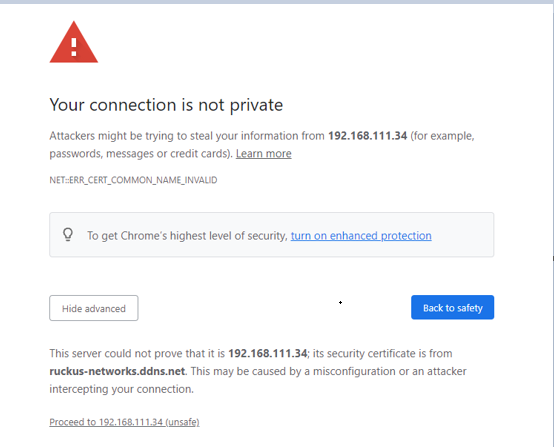
- Click Advanced.
- Click Proceed to 192.168.111.34 (unsafe) to open the IoT Insights System Installer page.
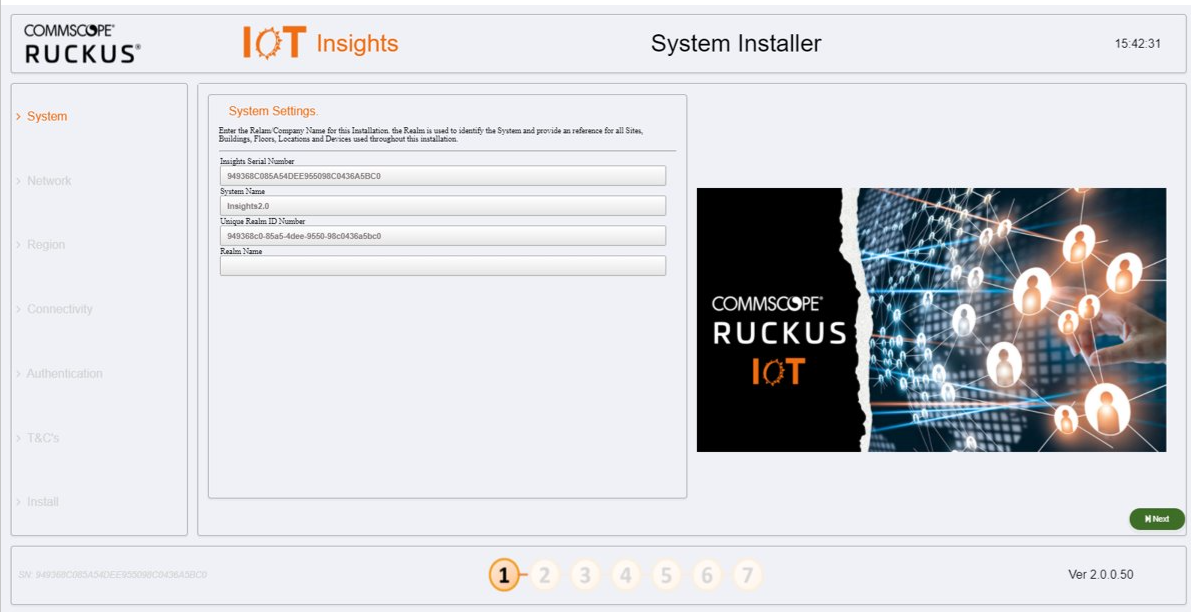
- Upon loading the system
installer, click System in the left navigation pane to display the System Settings
page. Complete the following configuration. Click Next after the
configuration is complete.
- Insights Serial Number: The unique IoT Insights serial number is autogenerated during system initialization.
- System Name: The system name is populated in this box.
- Unique Realm ID Number: The unique realm ID number is autogenerated during system initialization.
- Realm Name: Enter the realm name, which is referenced and used as part of the system identification and site association process.
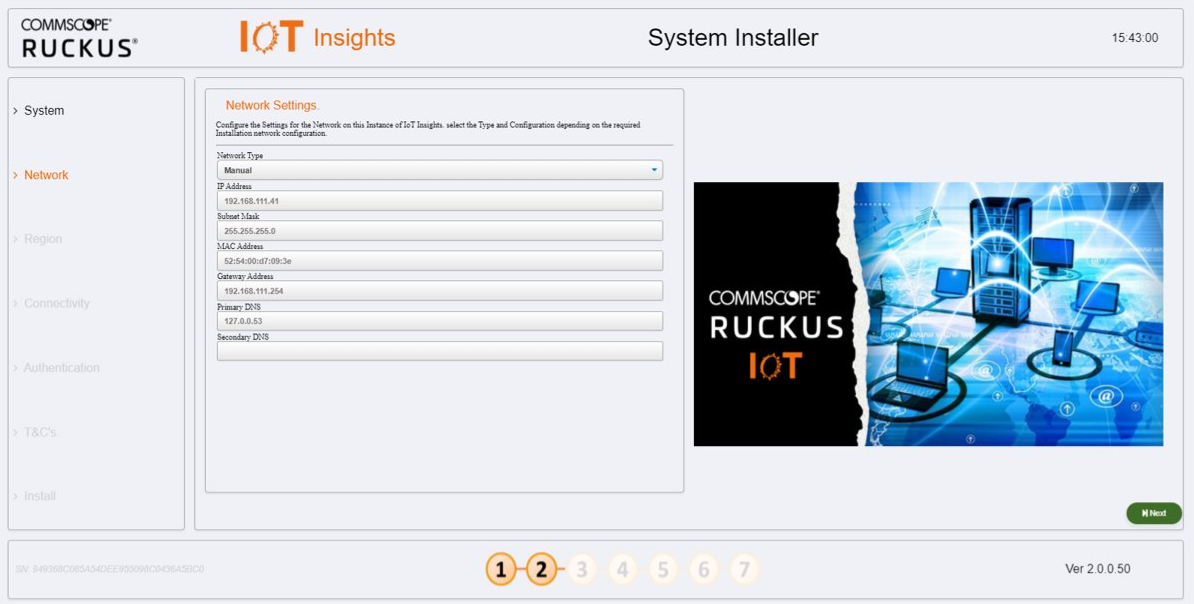
- Click Network in the
left navigation pane. The Network Settings
page is displayed. On the Network Settings
page, complete the following configuration. Click Next after the
configuration is completed.
- Network Type: Select Manual or DHCP from the list.
- IP Address: Enter the IP address of the VM.
- Subnet Mask: Enter the IP address of the subnet mask.
- MAC Address: Enter the MAC address of the VM.
- Gateway Address: Enter the IP address of the gateway.
- Primary DNS: Enter the IP address of the primary DNS server.
- Secondary DNS: Enter the IP address of the secondary DNS server.
- Click Region in the
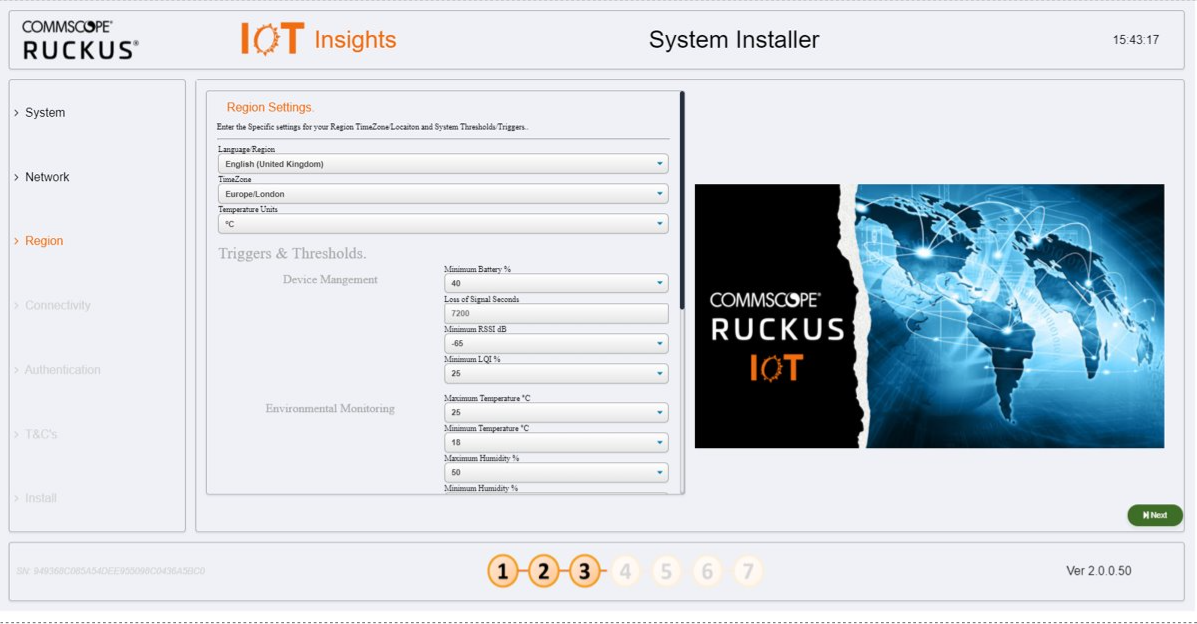
left navigation pane. The Region Settings
page is displayed, complete the following configuration. After selecting the
regional values, click Next.
- Language Region: Select the language.
- TimeZone: Select the time zone
- Temperature Units: Select the temperature unit from the list.
In addition to temperature units, you can also modify system-level triggers and alarm thresholds. The values are used to set the maximum and minimum tolerances for basic operation and alarm generation. In many cases, the default value is suitable, but you can can change the values depending upon your requirements. In addition to setting the values, the administrator can change these settings in the dashboard after installation.
- Click Connectivity in
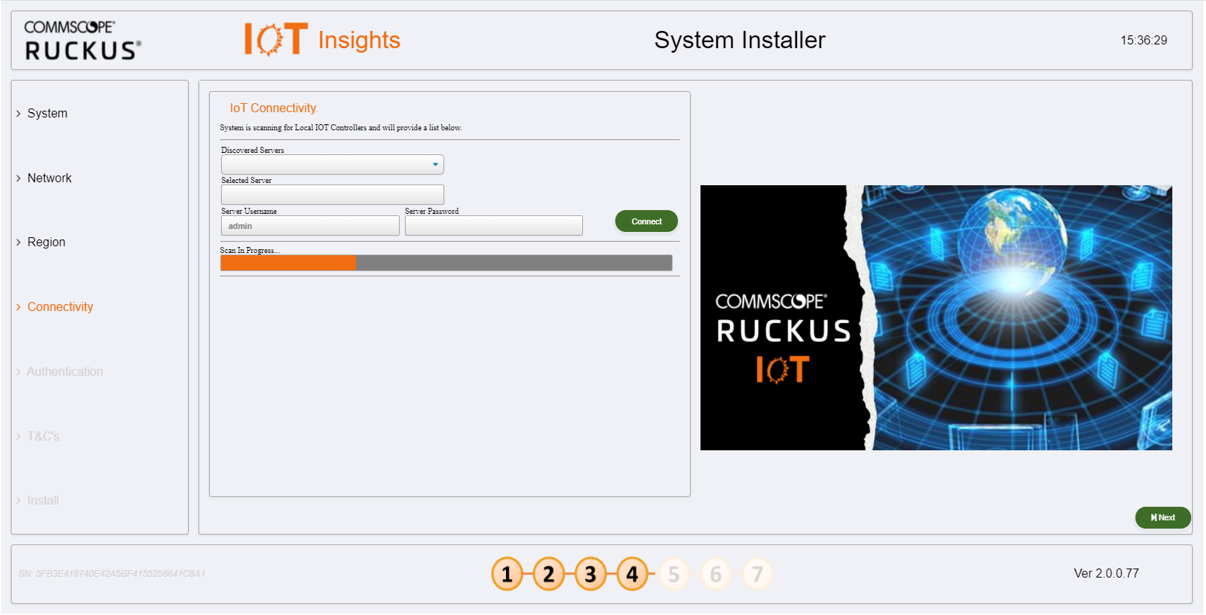
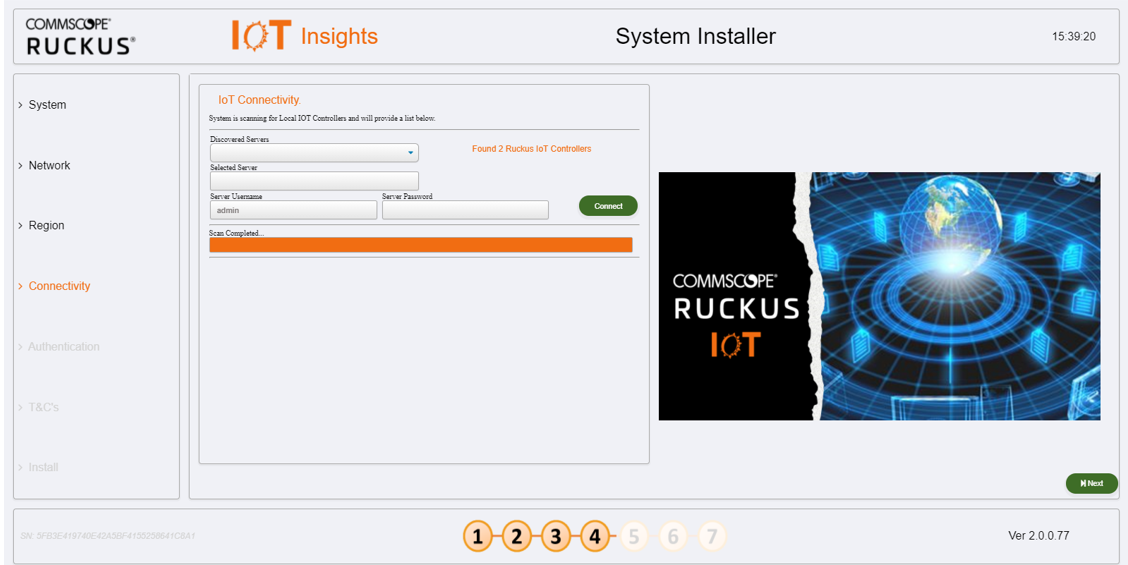
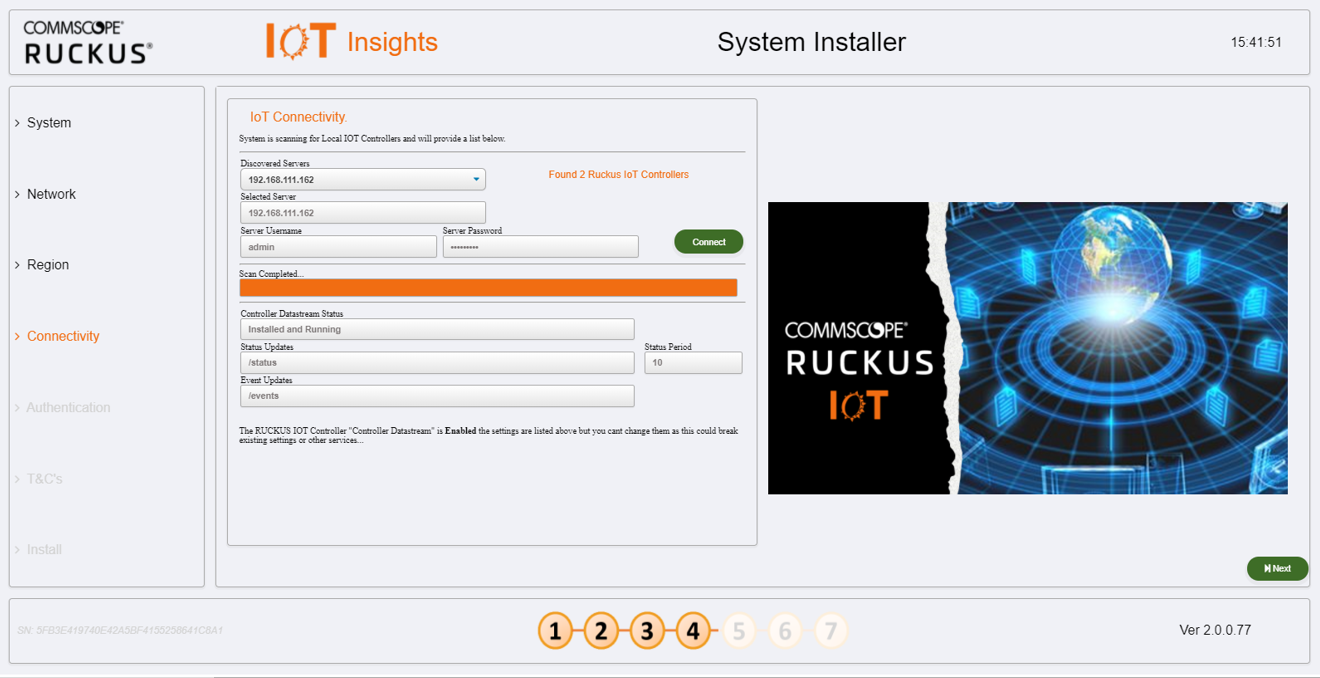
the left navigation pane. The IoT Connectivity
page is displayed, complete the following configuration, and click Next.
The IoT Insights System Installer tries to auto-discover the local IoT Controller server on the network. During the scan process, the Scan in Progress bar will increment to show the scan is underway. After the scan is complete, you can select the IoT Controller server from the Discovered Servers list.
Note: You can bypass the scan and enter the address of the IoT Controller server in the Selected Server field.If the controller datastream plugin is configured on the controller, the Controller Datastream Status, Status Updates, and Event Updates fields are displayed. If the controller datastream plugin is not configured, the system can be configured from the IoT Insights System Installer and provisioned in the IoT Controller as part of the setup process. Click Next.
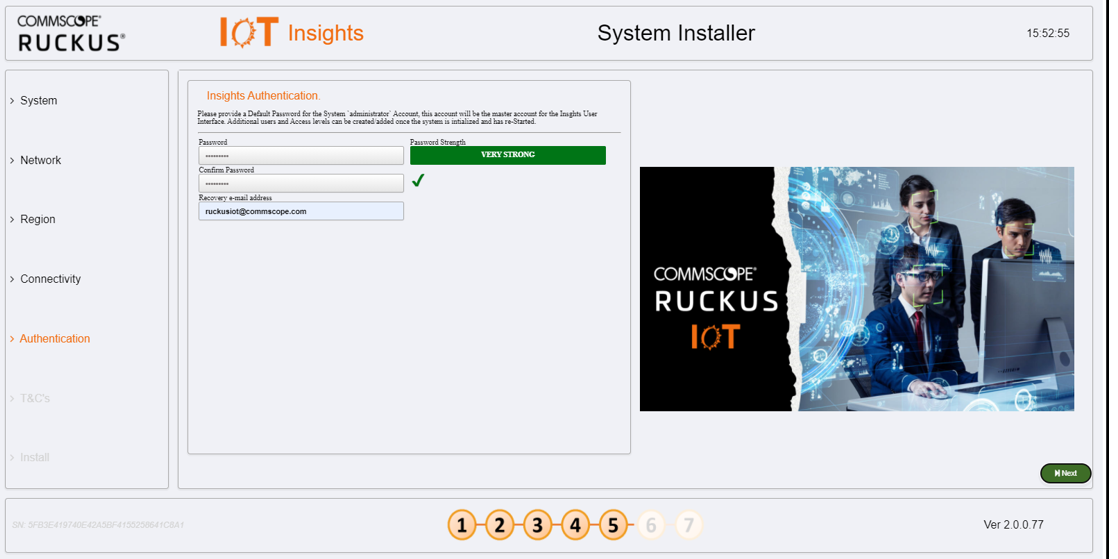
- Click Authentication in
the left navigation pane. The Insights Authentication
page is displayed.Note: The password that is created is used for the administrator account. Insights allows multiple users to install and configure their accounts. At this time, the installer is creating a master account/system user called administrator, and this account will be used to manage the system.
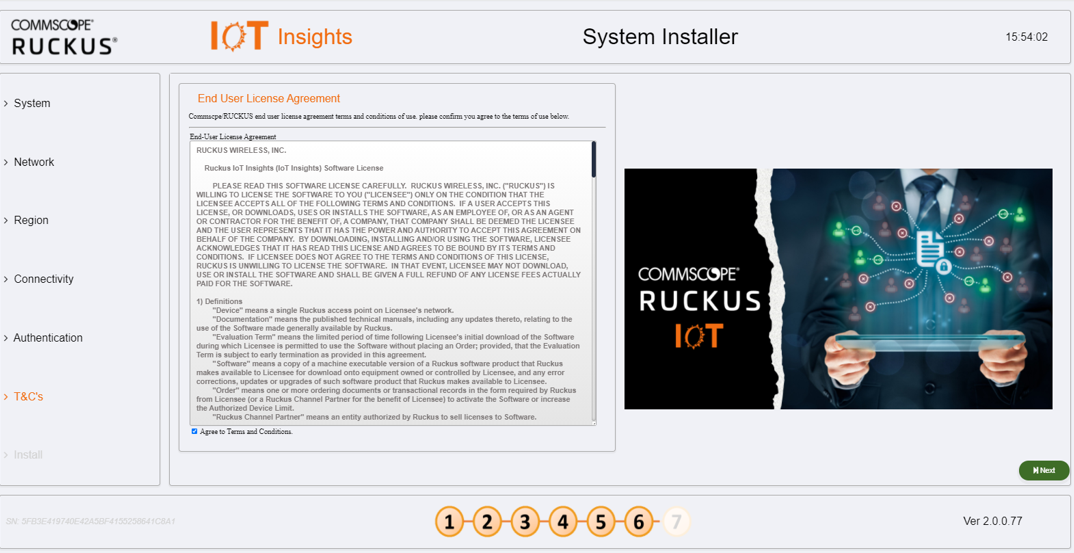
- Click T&C's in the left navigation pane to view End User License Agreement page. Click Agree to Terms and Conditions check box, and click Next.
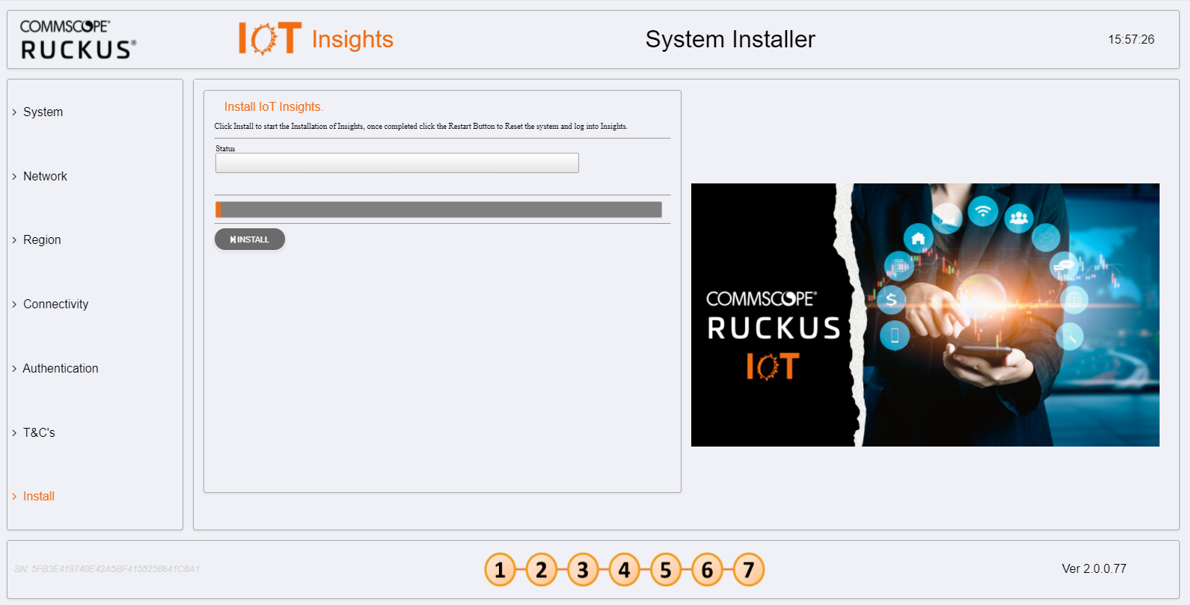
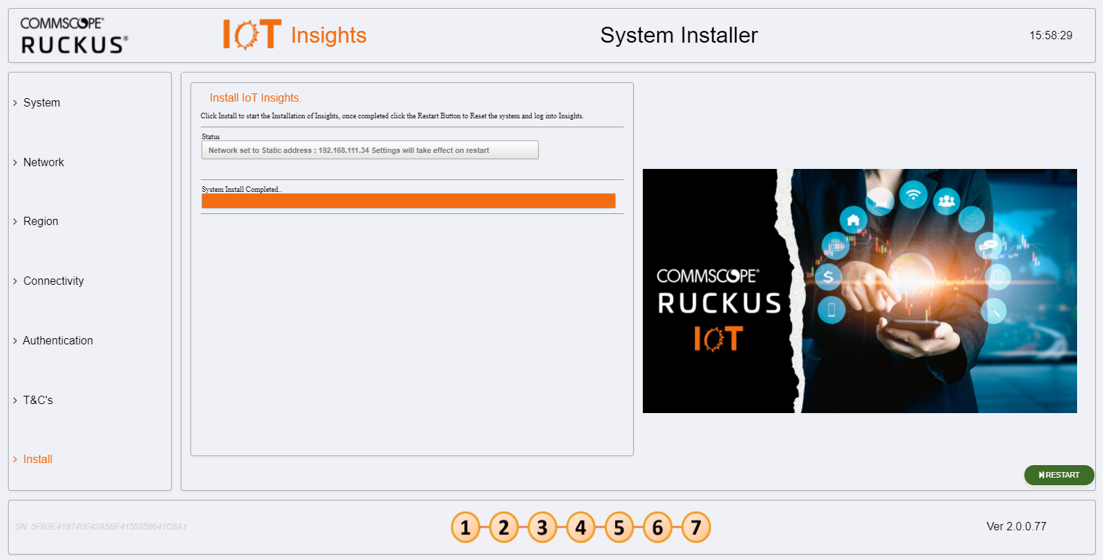
- The system is now ready to complete the Installation of Insights, click Install in the left navigation pane. The Install IoT Insights page is displayed. The system updates the IoT Insights System Installer about the current status and the Status bar shows the progress of the installation.
- After the restart is completed, a login screen is displyed, the system administrator must enter the credentials. In the Username field type administrator, and type the password configured in step 8. Cick Login.