How to Add Onboard Sponsors
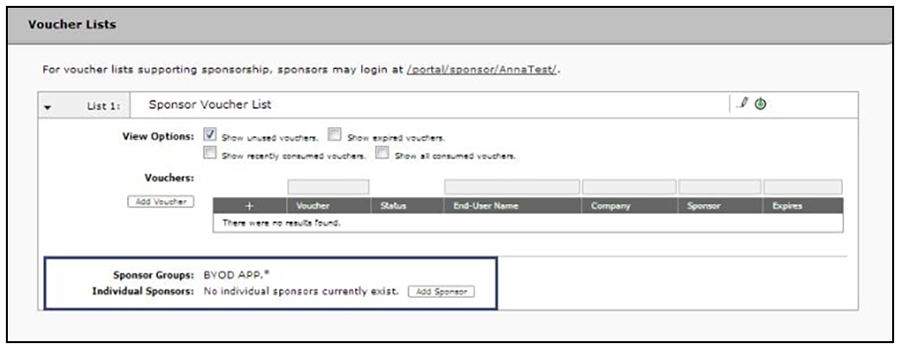
- From the ES Admin UI, go to Managed Access > Sponsored Access > Vouchers tab to view the voucher list to be used for sponsors. (Alternatively, you access the Voucher List page by double-clicking the voucher list link in the enrollment workflow.)
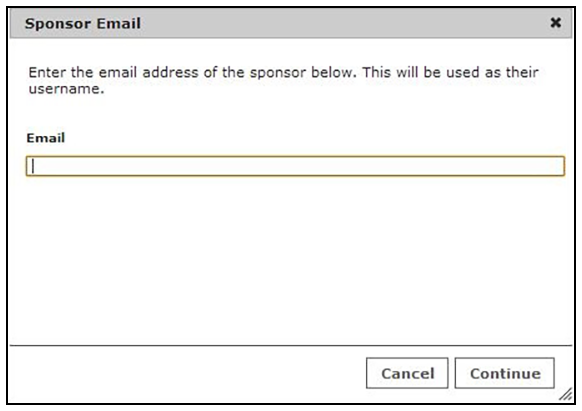
- In the Sponsor Group section, click Add Sponsors. The Sponsor Email pop-up appears.
- Enter the email address of the sponsor for this voucher list and click Continue. The email address becomes their Name.
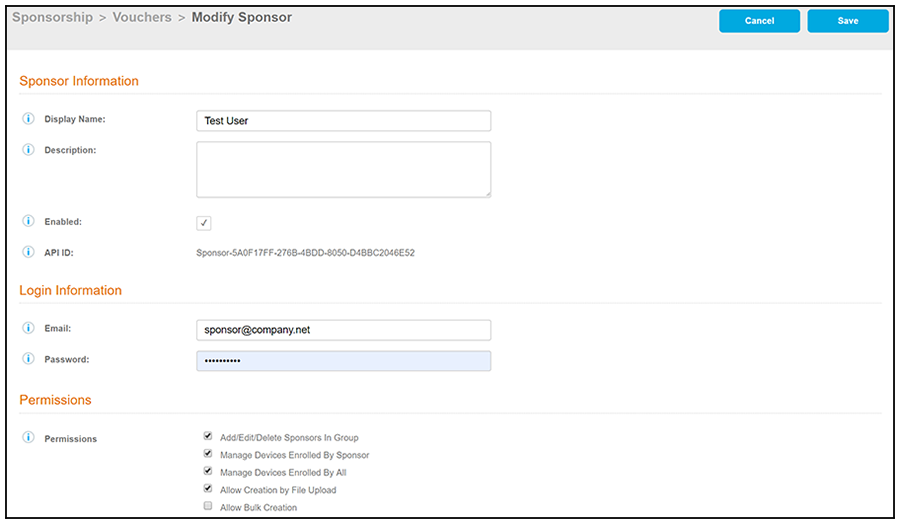
- On the Modify Sponsor page, enter the sponsor Name, Description, and Enable the sponsor.
- In the
Login Information section, enter the sponsor’s
Email address and
Password.
Note: The sponsor is prompted to change their password during the first login.
- In the
Permissions section, check the box for the appropriate sponsor permissions.
- Add/Edit/Delete Sponsors In Group - If checked, the sponsor can add, edit, and delete other sponsors within the group.
- Manage Devices Enrolled By Sponsor - If checked, the sponsor can review and revoke devices enrolled via vouchers issued by that sponsor.
- Manage Devices Enrolled By All - If checked, the sponsor can review and revoke devices enrolled via vouchers issued by any sponsor (within the Voucher List).
- Allow Creation by File Upload - If checked, the sponsor can create multiple vouchers at the same time through a file upload.
- Allow Bulk Creation - If checked, the sponsor can create vouchers in bulk by importing a spreadsheet of vouchers. A default template is provided.
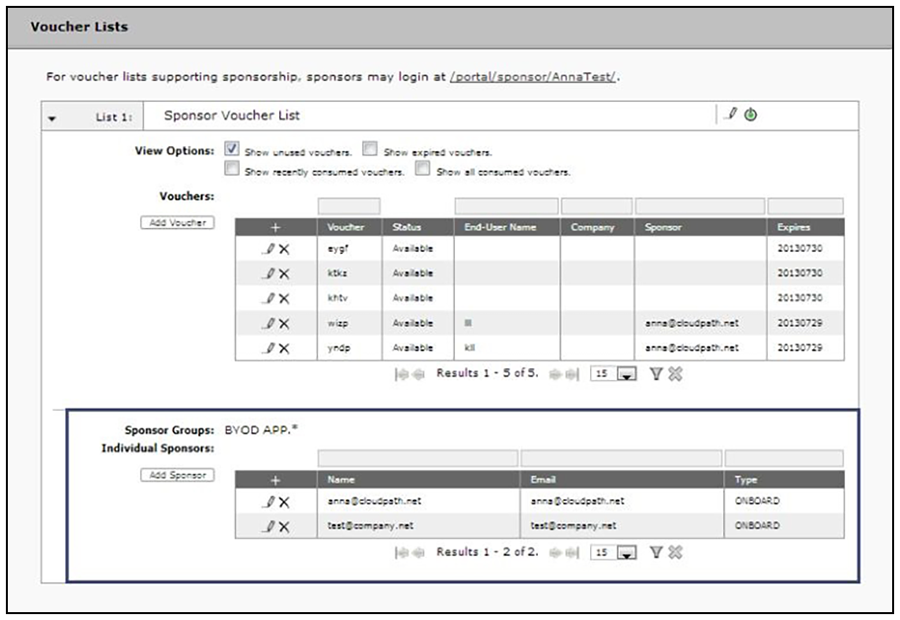
- Save the sponsor information. The sponsor information is displayed in the lower part of the voucher list.