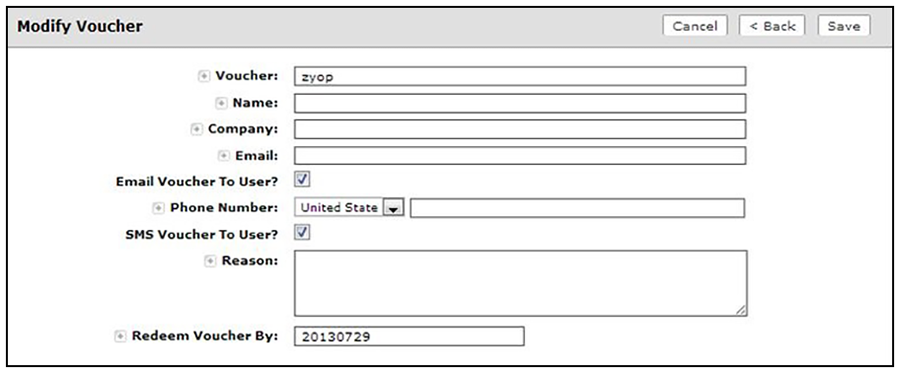
How to Add a Single Voucher to a Voucher List
- On the Create Vouchers page, select Create a single voucher.
- On the
Modify Voucher page, enter the guest user information in the fields, as described below, and
Save.
Only the Voucher field is required.
- Voucher - This field is pre-populated, but can be changed.
- Name - Guest user name.
- Company - Guest user company.
- Email - Guest user email address.
- Email Voucher to User? - Checked by default. If checked and email is entered, voucher is sent to guest user by email.
- Phone Number - Select country and enter guest user phone number.
- SMS Voucher to User? - Checked by default. If this is checked and Phone Number is entered, voucher is sent to guest user by SMS.
- Reason - The reason the guest user is provided access.
- Redeem Voucher By - The date after which the voucher may longer be redeemed.
Note: Email and SMS notifications are stored on the Notifications tab on the Cloudpath Admin UI Dashboard.