Adding a Single Voucher to a Voucher List
- On the Create Vouchers page, select Create a single voucher, then click Next.
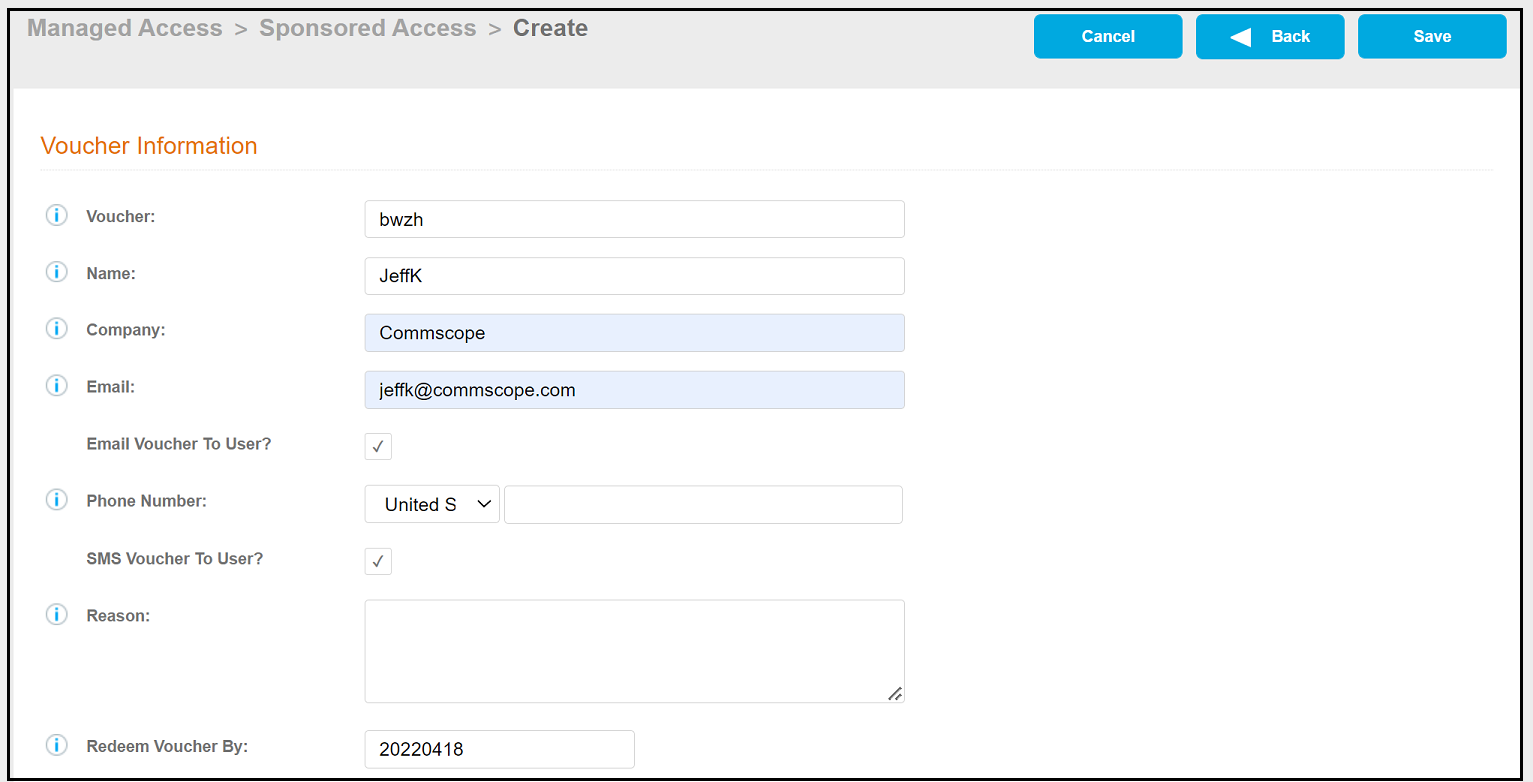
- On the Create Voucher screen, enter the guest user information in the
fields, as described below, and Save. Only the Voucher field is required.
- Voucher - This field is pre-populated, but can be changed.
- Name - Guest user name.
- Company - Guest user company.
- Email - Guest user email address.
- Email Voucher to User? - Checked by default. If checked and email is entered, voucher is sent to guest user by email.
- Phone Number - Select country and enter guest user phone number.
- SMS Voucher to User? - Checked by default. If this is checked and Phone Number is entered, voucher is sent to guest user by SMS.
- Reason - The reason the guest user is provided access.
- Redeem Voucher
By - The date after which the voucher may longer be
redeemed.
Note: Email and SMS notifications are stored on the Notifications tab on the Cloudpath Admin UI Dashboard.
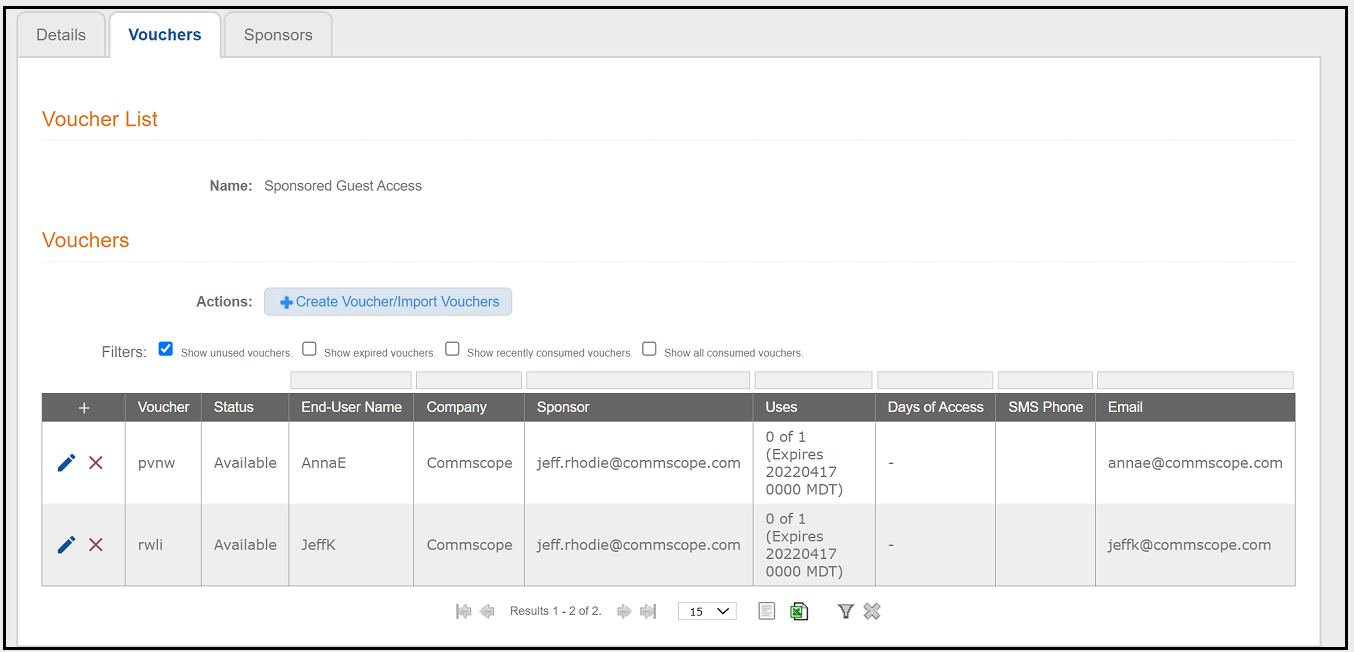
- Be sure that the vouchers you add are shown in the list of vouchers for the applicable voucher list. The following example screen shows that two vouchers have been added to the list called "Sponsored Guest Access."